
We love finding fun ways to incorporate nature into our home and decor. While it may be cold outside, now is a great time to get out into nature, collect some fun items, and get crafty! Today, Meghan Garriott, Illinois mom of three, is here with 20 nature-inspired holiday ornaments that you can make with your kids. These DIY ornaments are all made with items found in (and just outside) your home! Not only are they the perfect (non-breakable) addition to your tree, but they also make adorable gifts for friends, family, teachers, and neighbors.
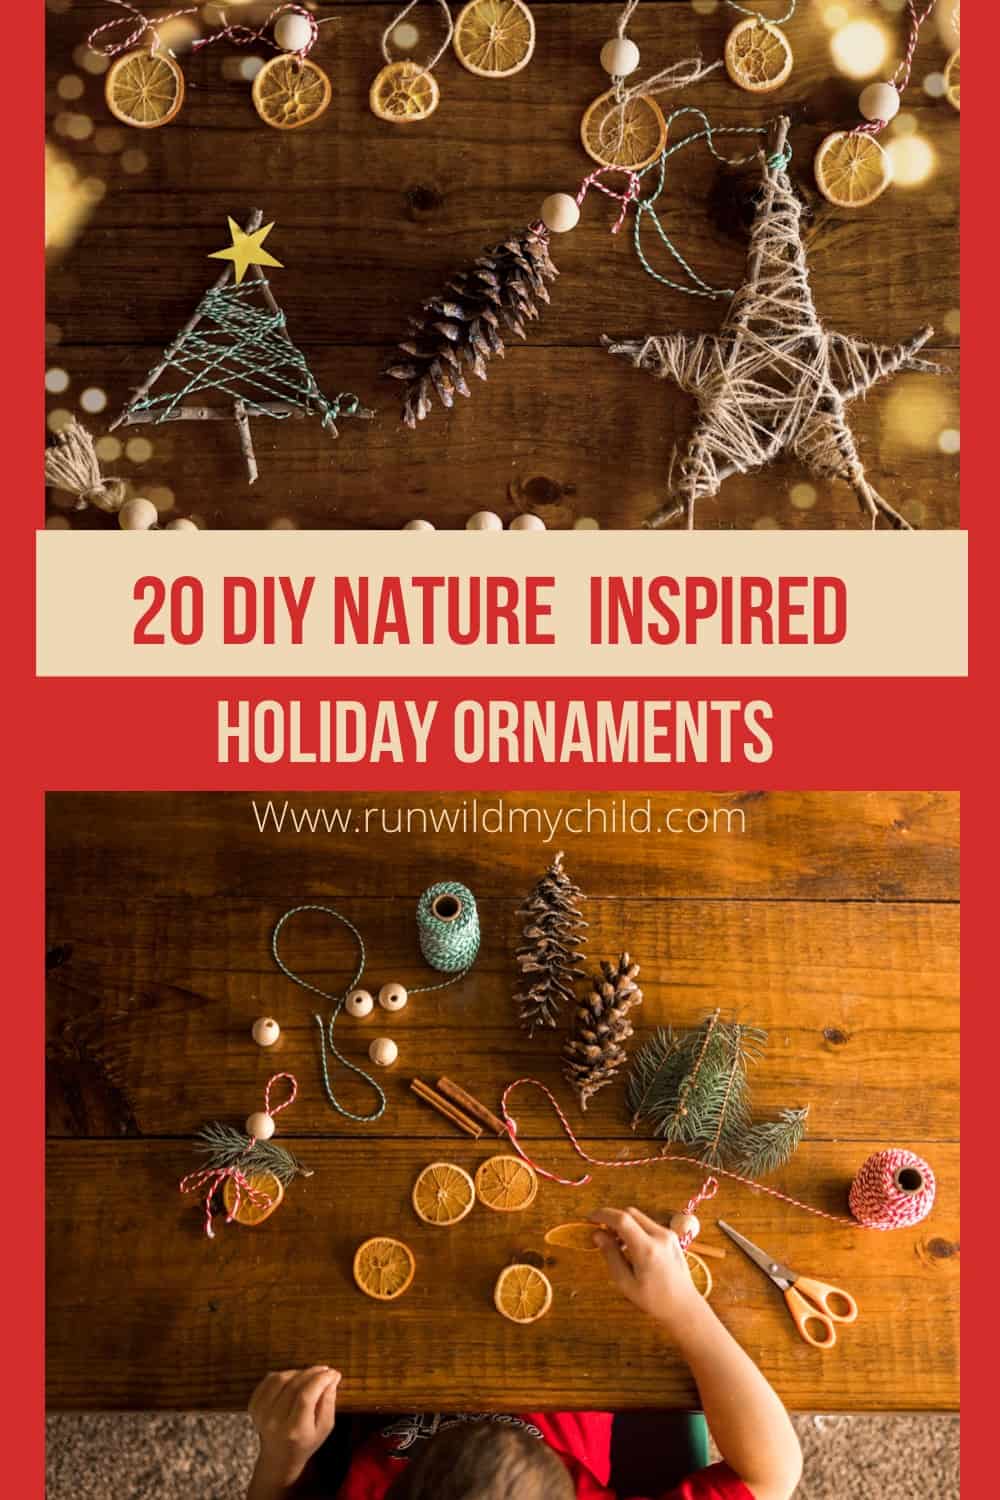

Nature-inspired holiday ornaments
Decorating for the winter holidays can be a fun family experience. Each year we like to put on music, dance and decorate. Unfortunately, with 3 little kids, it’s hard to not have a ton of broken or damaged decor by the end of decorating, and definitely by the end of the season.
This year we are doing things a little differently. I’m pardoning all my glass bulbs and heirloom ornaments. They’re staying in their boxes, safe and sound this year. Instead, we are made all of our own nature ornaments.
Not only does that mean that we got to spend some time outside in the fresh air collecting items, but we got to spend time together making the ornaments and putting them up.
Plan your crafting day
Below, I’ve included ideas for making 20 different kinds of nature-inspired ornaments. Each ornament uses both natural materials and traditional craft supplies. Making the ornaments is super fun, but so is collecting all your nature items. Since you will be using a lot of the same materials over again, I recommend making a full day out of it and do both the collecting and ornament making in the same day. Spend the morning gathering all your materials and then go home and start making your ornaments. Your nature items will be fresher, there will be less whining about when you’ll make them, ess clean up and fewer sticky/painted fingers this way!

Gather your craft supplies
For our day of ornament making, we used only the craft supplies that we had at home. No additional trip to the store for supplies – we made do with all the scraps, ends, and bits we found in our craft closet and boxes. Every ornament we walk you through below is very easy to customize based on what you have at home and I’ll include fun variations for a lot of them.
Our non-nature material included:
- string
- twine
- glue
- construction paper
- Mod Podge
- wood beads
- oranges
- salt dough (water, salt, flour)
- paint
Some additional fun things to consider using would be:
- leftover ribbon
- leftover wrapping paper
- spare buttons
- popsicles sticks
- glitter
- sequins
- stickers
Collect your nature materials
The next thing to do is get outside and find natural materials. You likely won’t have to venture too far from home to collect most of your nature materials. In our own yard, we collected sticks and pine cones. We went to the park to collect some pieces of arborvitae/red cedar tree clippings and some pine clippings. We had some pressed flowers from over the summer that we used as well. Acorns were on our list of things to find but unfortunately, the squirrels beat us to most of them. I’ve included how we planned it used them.
My kids had a great time finding the perfect sticks and pine cones to use. To make the most of your hunting day check out this Fall Scavenger Hunt how-to.

20 DIY nature-inspired ornaments (and how to make them)
Ok, let’s get to the good part. Are you ready for 20 easy DIY tutorials on how to make the cutest nature-inspired holiday ornaments with your kids? Here we go!
Salt dough ornaments
There are so many different fun types of ornaments you can make with salt dough. Have you ever made salt dough? It’s super easy and guaranteed to be fun for the kids. I’ve included the recipe and instructions below, as well as three different types of nature-inspired ornaments you can make with salt dough.
Salt dough recipe
- 1 cup of flour
- 1/2 cup of salt
- 1/2 cup of water (may add more as needed)
Knead the dough till smooth then use a rolling pin till thin. Use cookie cutters to cut desired shapes. Using a reusable metal straw poke holes for string to go through. Bake at 200 degrees Fahrenheit for 20min then flip over and cook for 10 more minutes.
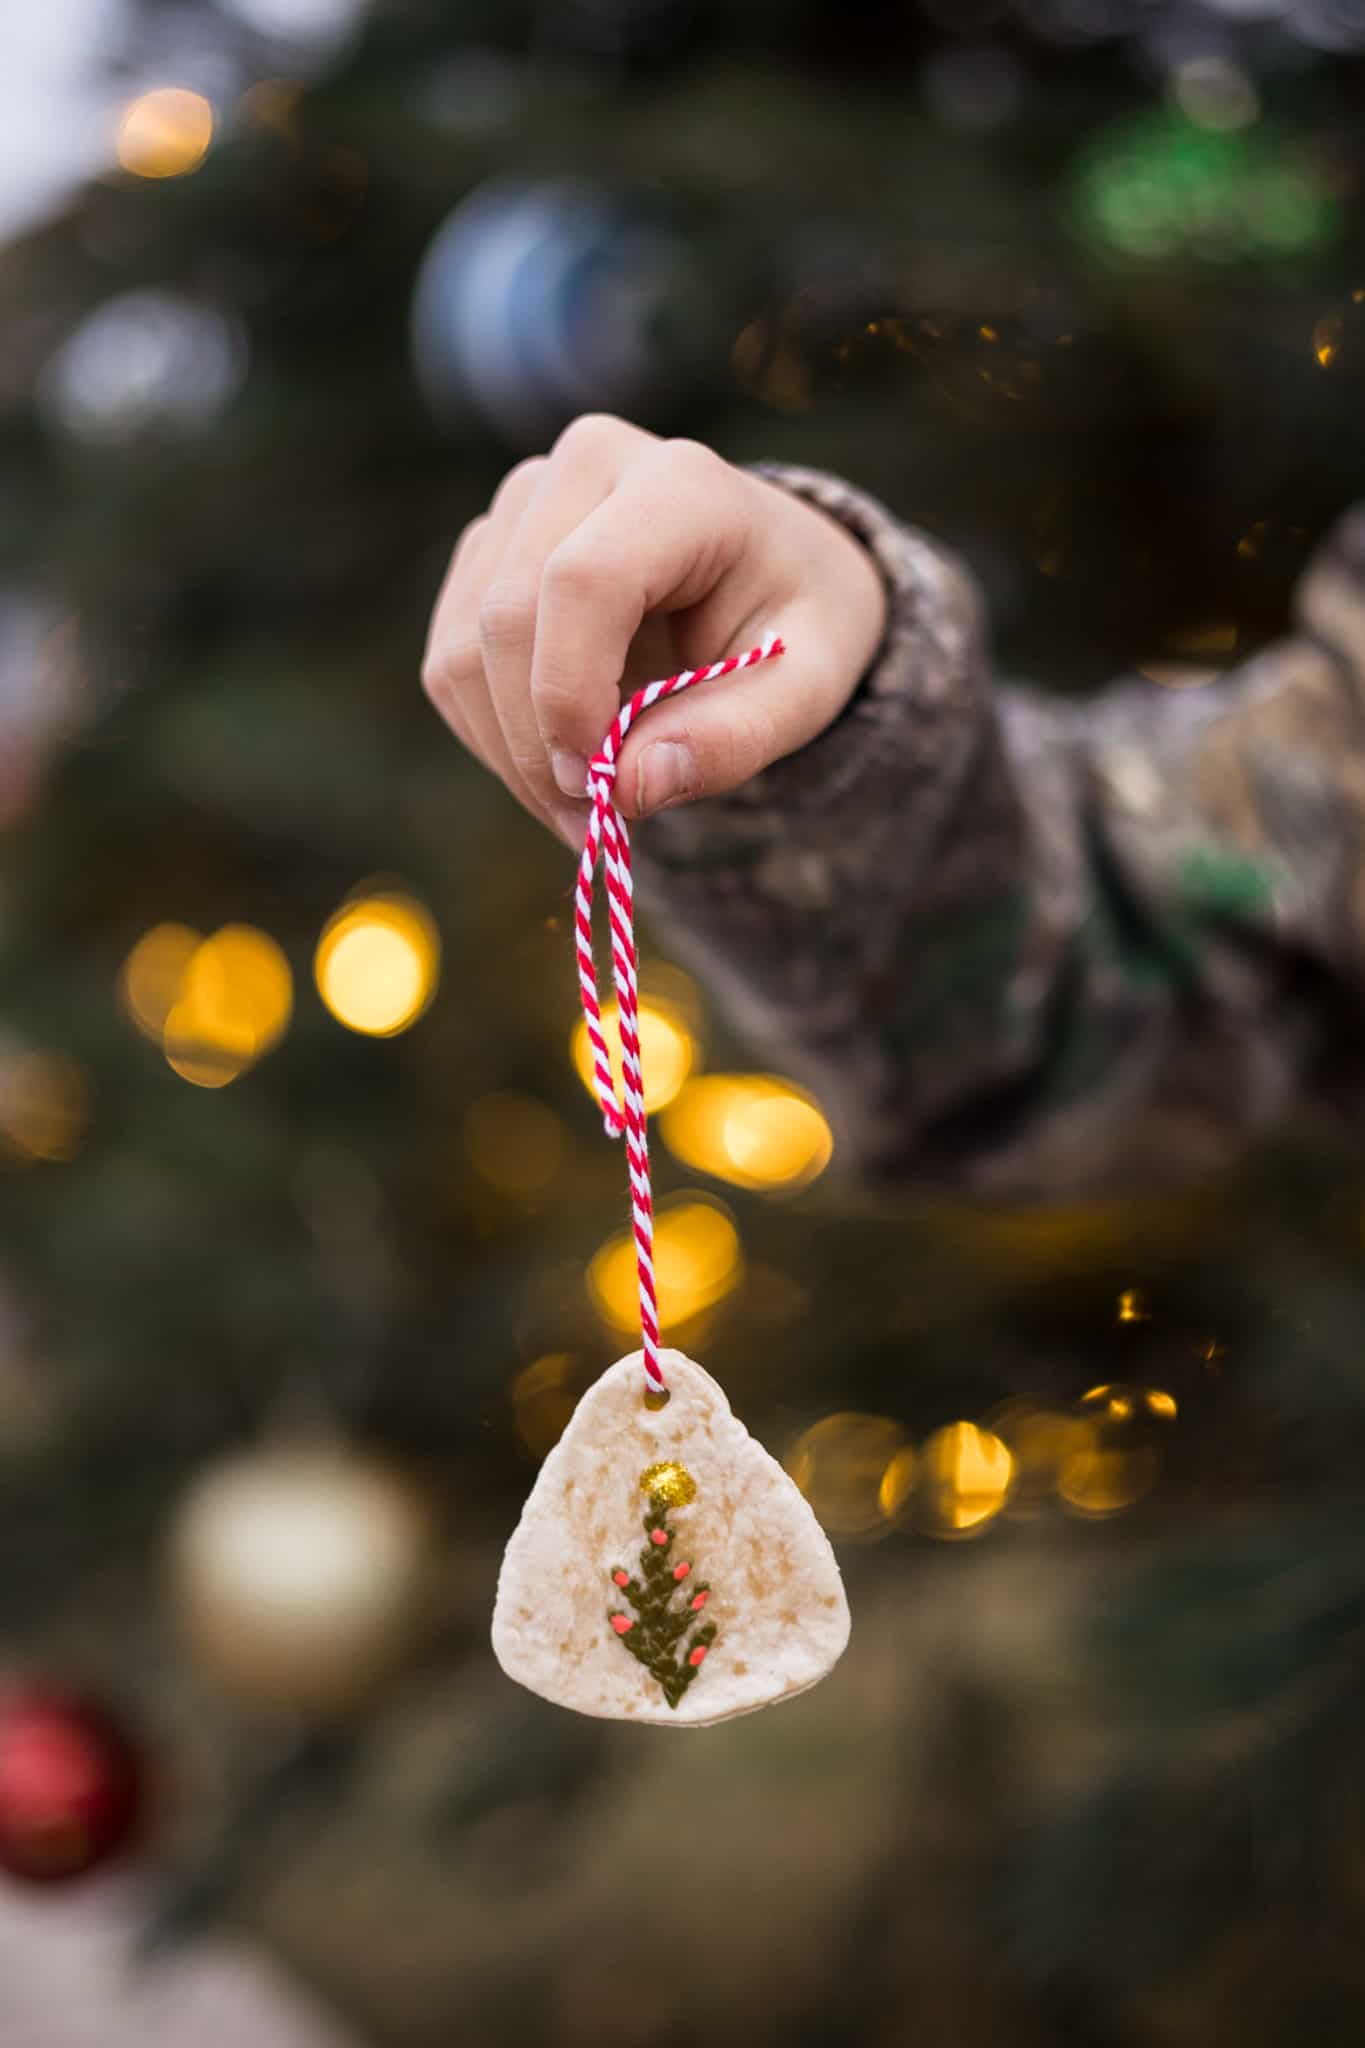
1. Salt dough Christmas tree ornaments
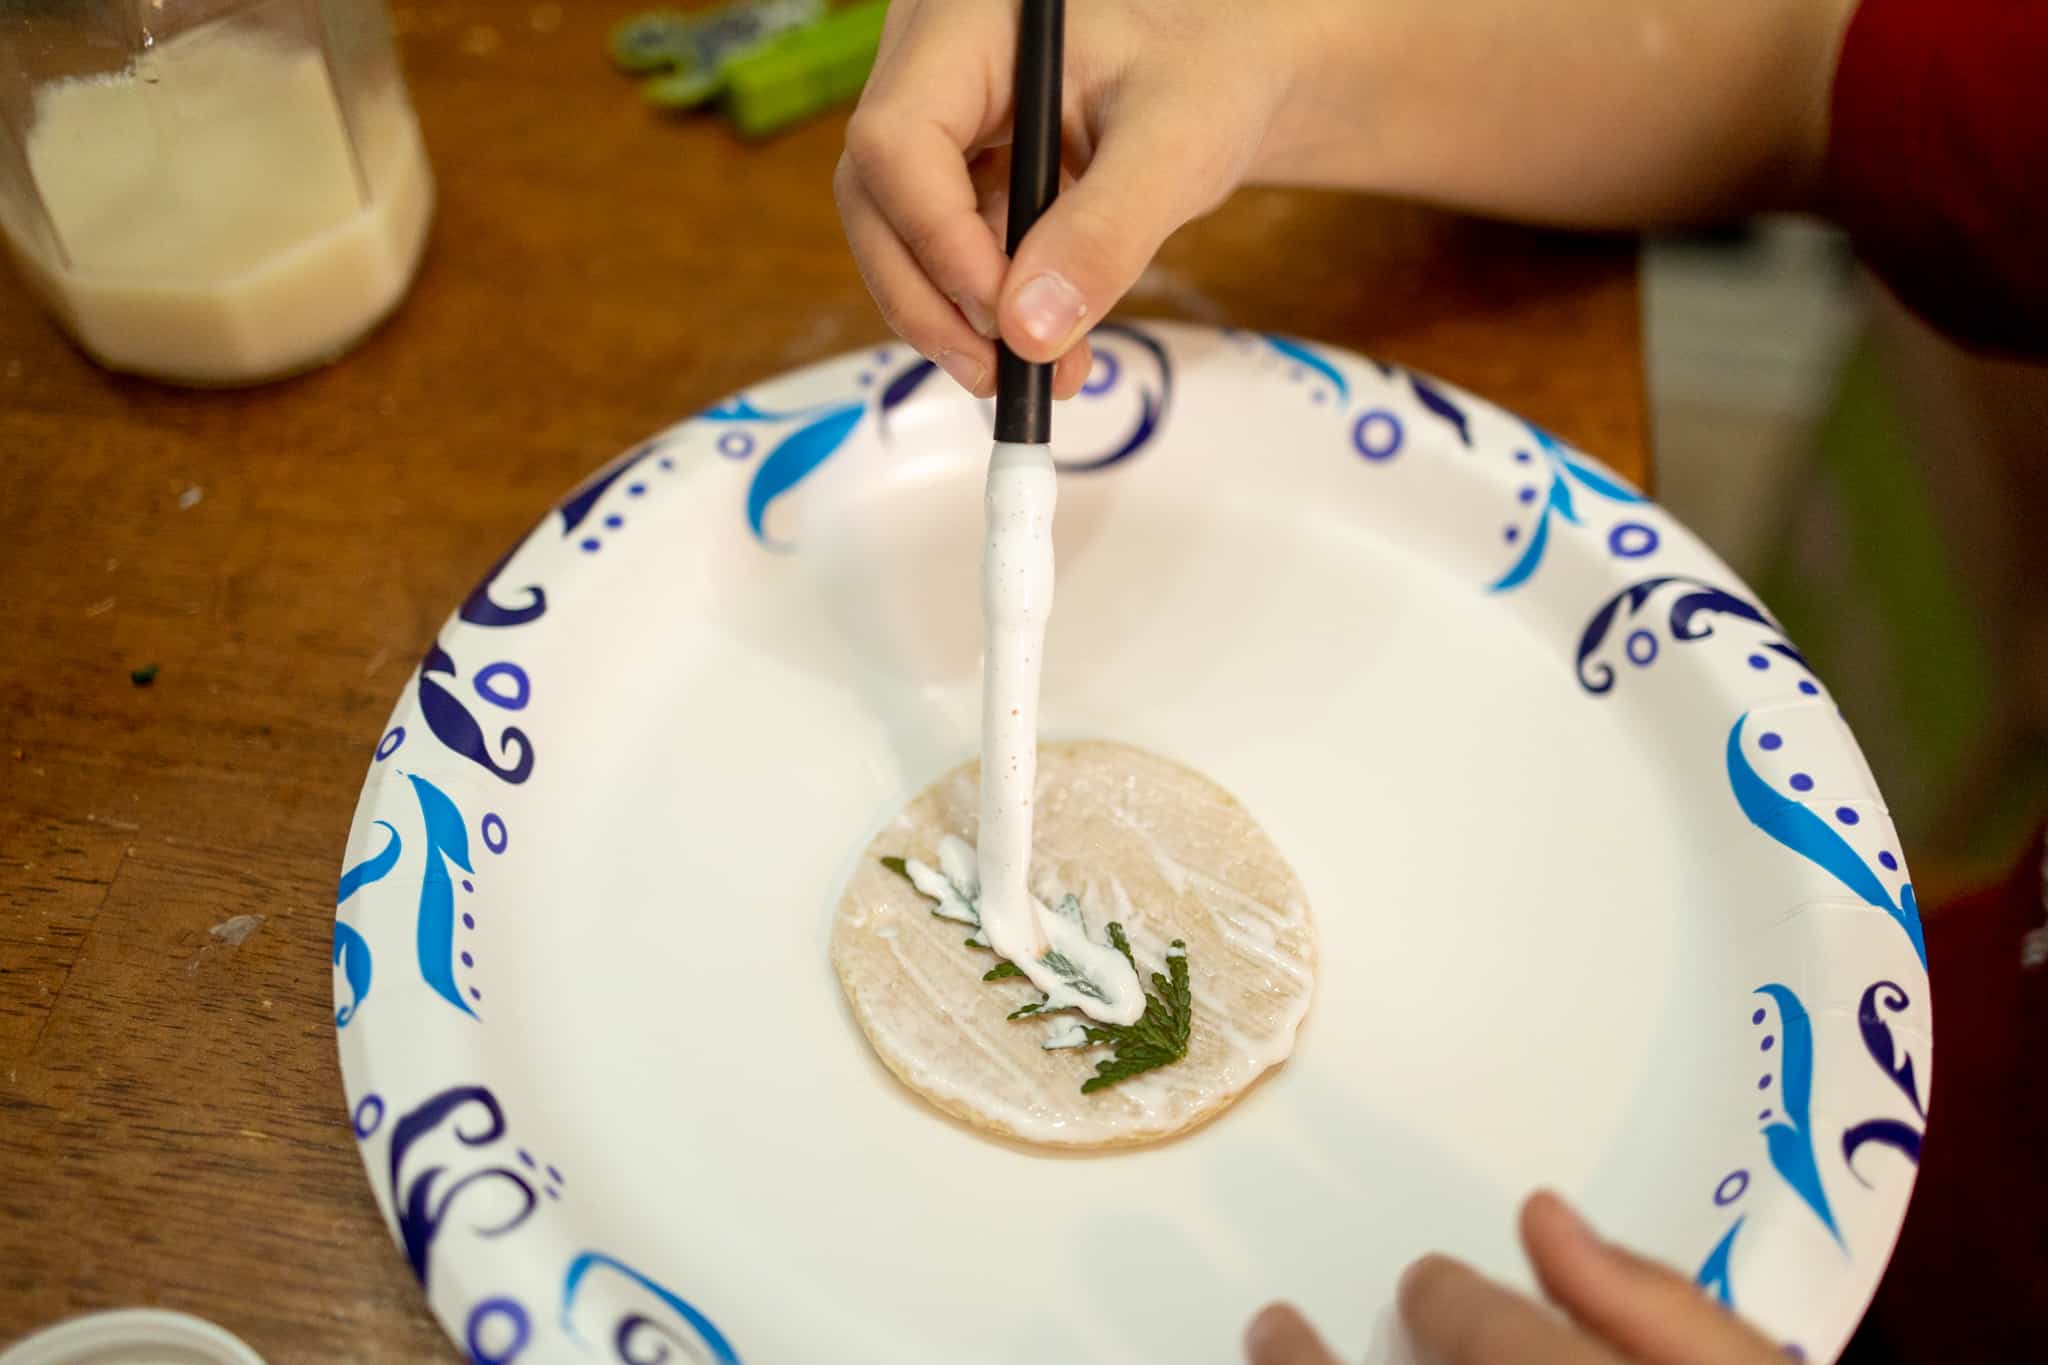
Gather small Arborvitae/red cedar clippings. Choose the pieces that look the most like a Christmas tree. Cut them to fit your salt dough shape. Place clipping on salt dough and paint with thick layer of Mod Podge. It will likely take a few coats with about 20 min dry time between each coat.
Once the Arborvitae is securely on your dough you can paint ornaments or a star on your tree, or leave it as is. (As an added bonus, these clippings smell really lovely)
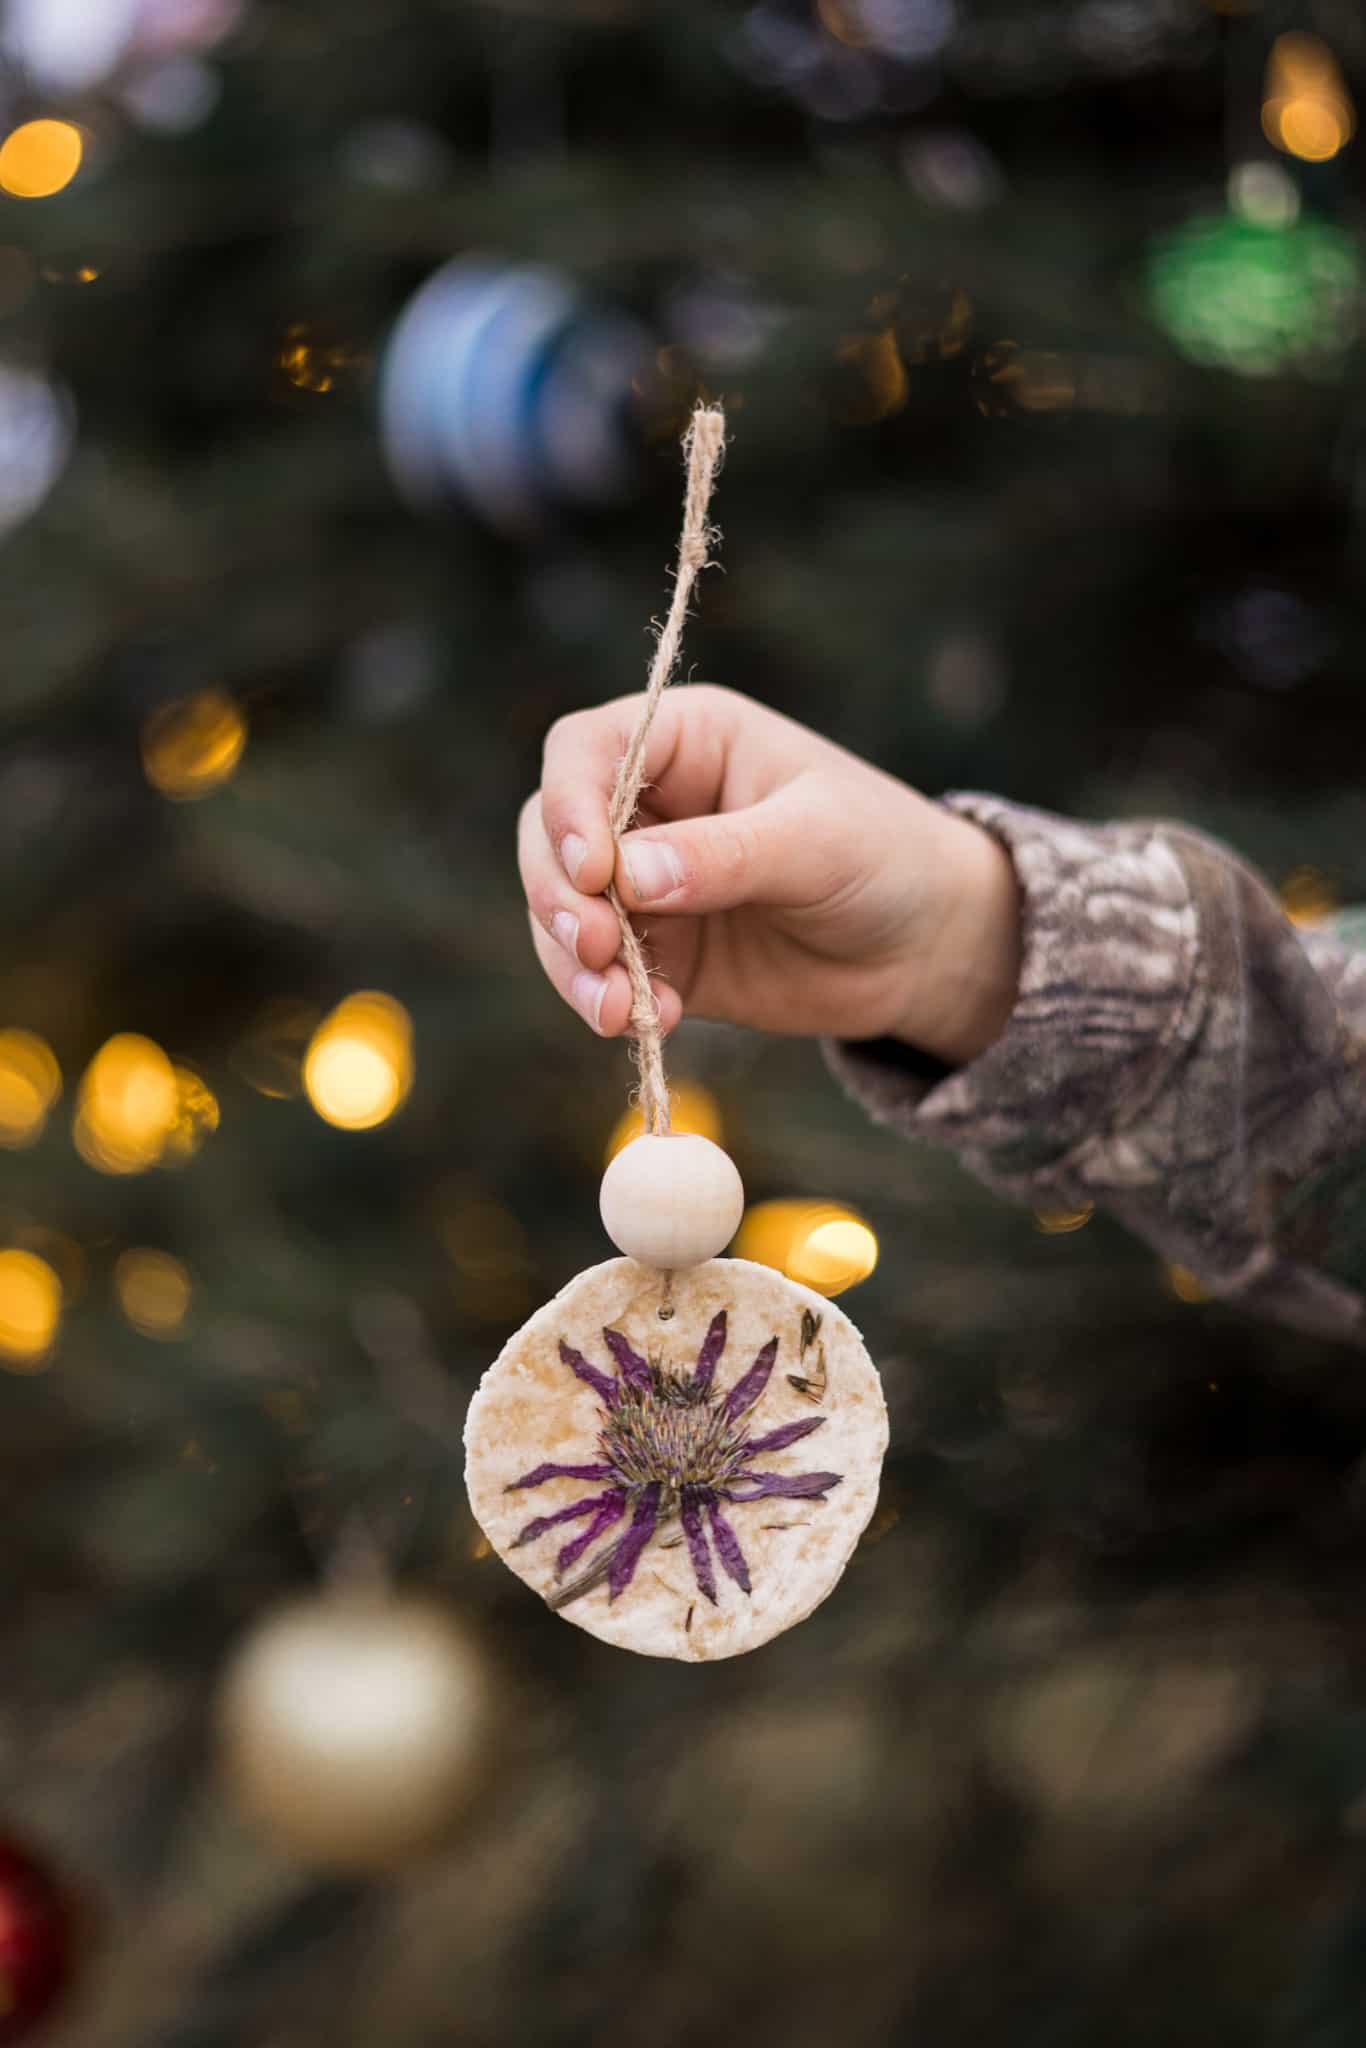
As above you organize then pressed flowers on your cut and baked dough. Carefully handle the pressed flowers. They may be delicate. Once arranged how you like paint with. Thick layer of Mod Podge. It will take a few coats.
If you don’t have any pressed flowers this year, keep this idea in mind come spring and summer! Collect them and press them in a book until you’re ready to use them next December. Add some ribbon or twine to hang and some accent beads if you have them.
3. Salt dough pine needle ornament
For this ornament you will coat the whole ornament with Mod Podge before placing the needles. While the Mod Podge is still wet use the pine needles to make designs on your ornament. Let dry then coat with one more layer of Mod Podge.

Acorn ornaments
4. Acorn silver bells ornament
Paint acorns in metallic silver. Add a black cross-hatch on the bottom of the acorn to look like the bottom of a bell. Tie a red ribbon or string around the acorn stem to hang
5. Acorn bulb lights
Paint the bottom part of multiple acorns in bright colors. Hang separately or along one long string like a strand of lights.
Ornaments made from sticks and twigs
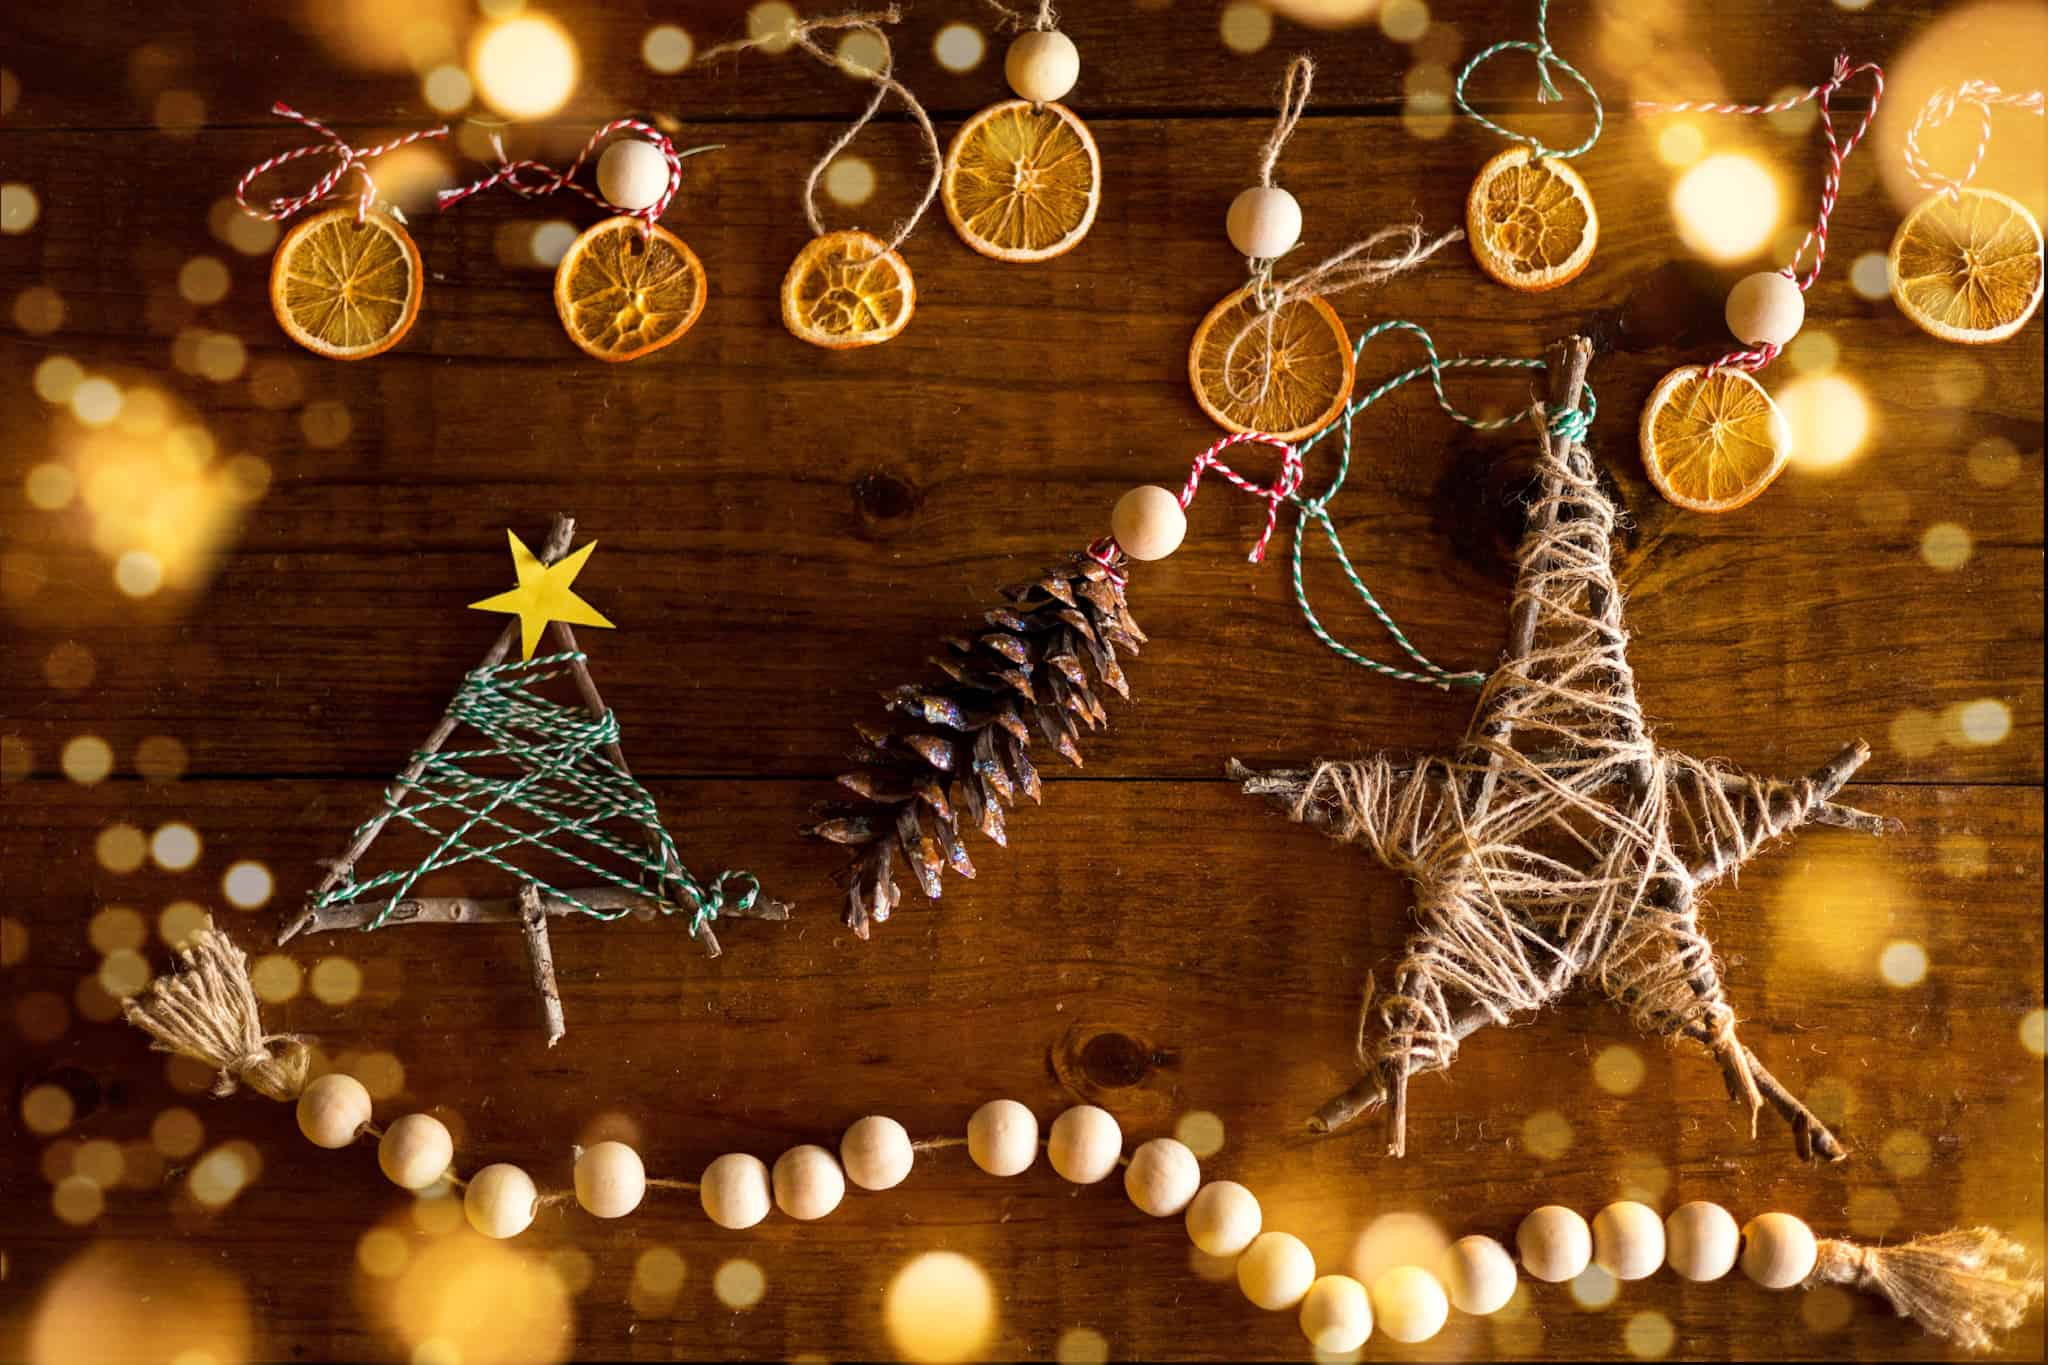
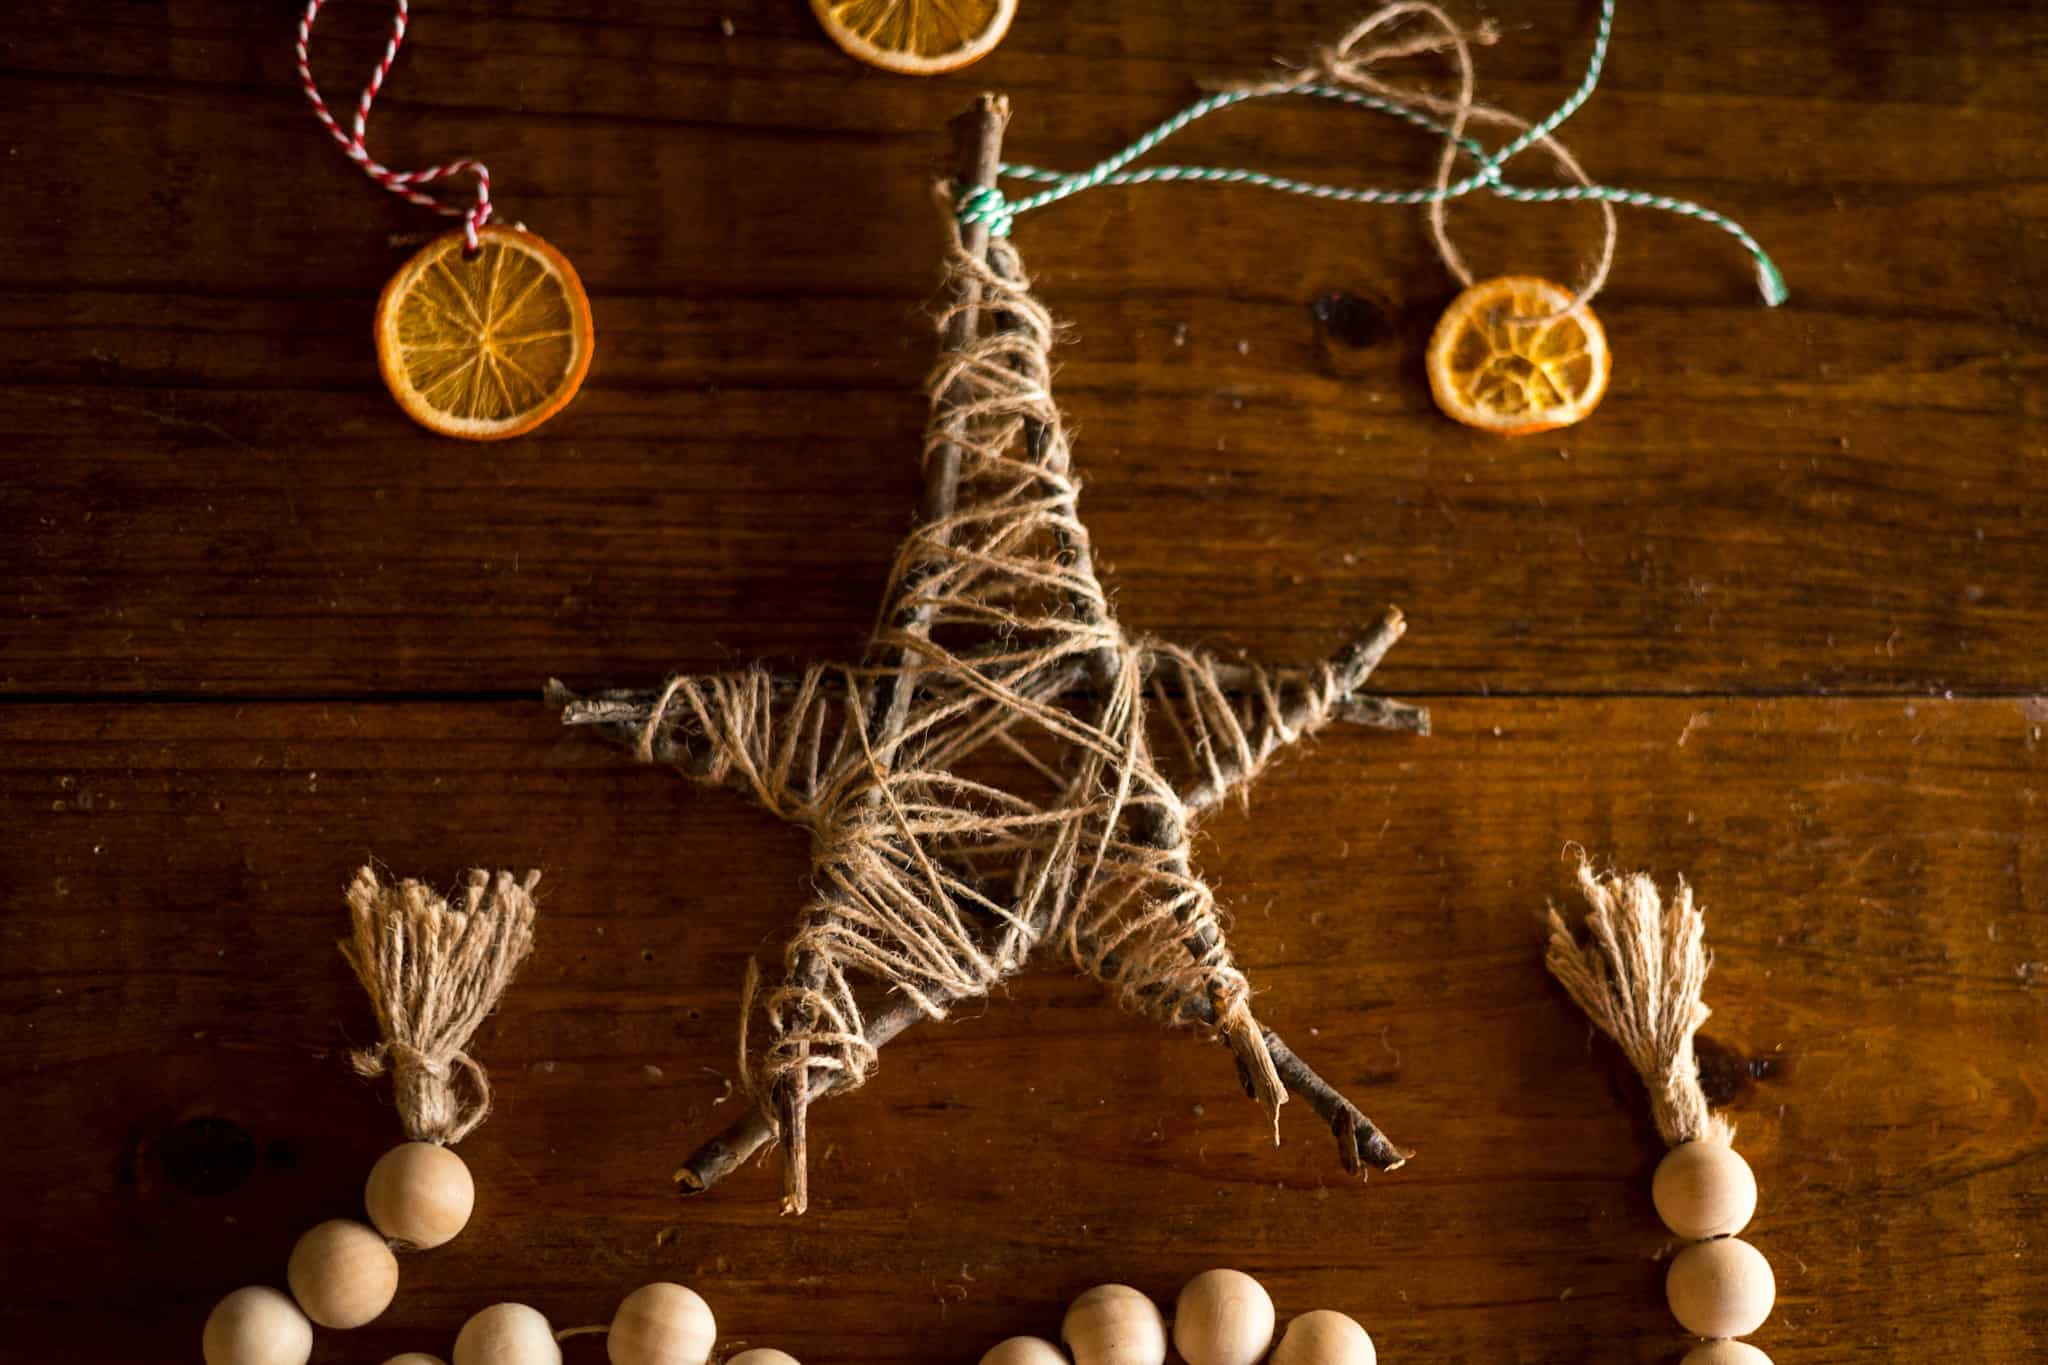
6. Stick star ornaments
Use 5 fairly equal in length sticks. Fashion them in the shape of a star and glue edges together. Regular glue works ok, but has a longer dry time. Hot glue works best. Once dry wrap string, twine, or ribbon around the star. Wrap just the points of the star, wrap the individual twigs or wrap the whole thing like we did. There is no wrong way to decorate your star.
A fun variation would be to make tassels and attach them to the end of the points. If you don’t have string or ribbon just paint that star or cover it in glitter ( if you’re brave). You could also paint the sticks/twine or add sequins to make them more colorful.
7. Stick letter ornaments
Use sticks to make the first letter of all the names in your family. This was a good activity for my 3 year old who is learning how to spell his name. Wrap letters in ribbon, yarn or twine. Decorate with buttons, paint, or glitter.
8. Stick reindeer ornaments
Make a triangle with sticks with one point of the triangle pointing at you. This will be the reindeer’s nose. Bring the furthest side from towards you a few inches, the extra length on the sides will be the antlers. Use construction paper to make a red Rudolph nose and put some eyes on each side a few inches above the nose.
9. Stick snowflake ornaments
Using 6 sticks of equal length, glue them all together at one point to create a circle. At the end of each stick glue 2 small stick pieces to each side of each stick to form the full snowflake. Paint it white, cover it with glitter or just leave it as is.
Tree ornaments made of sticks
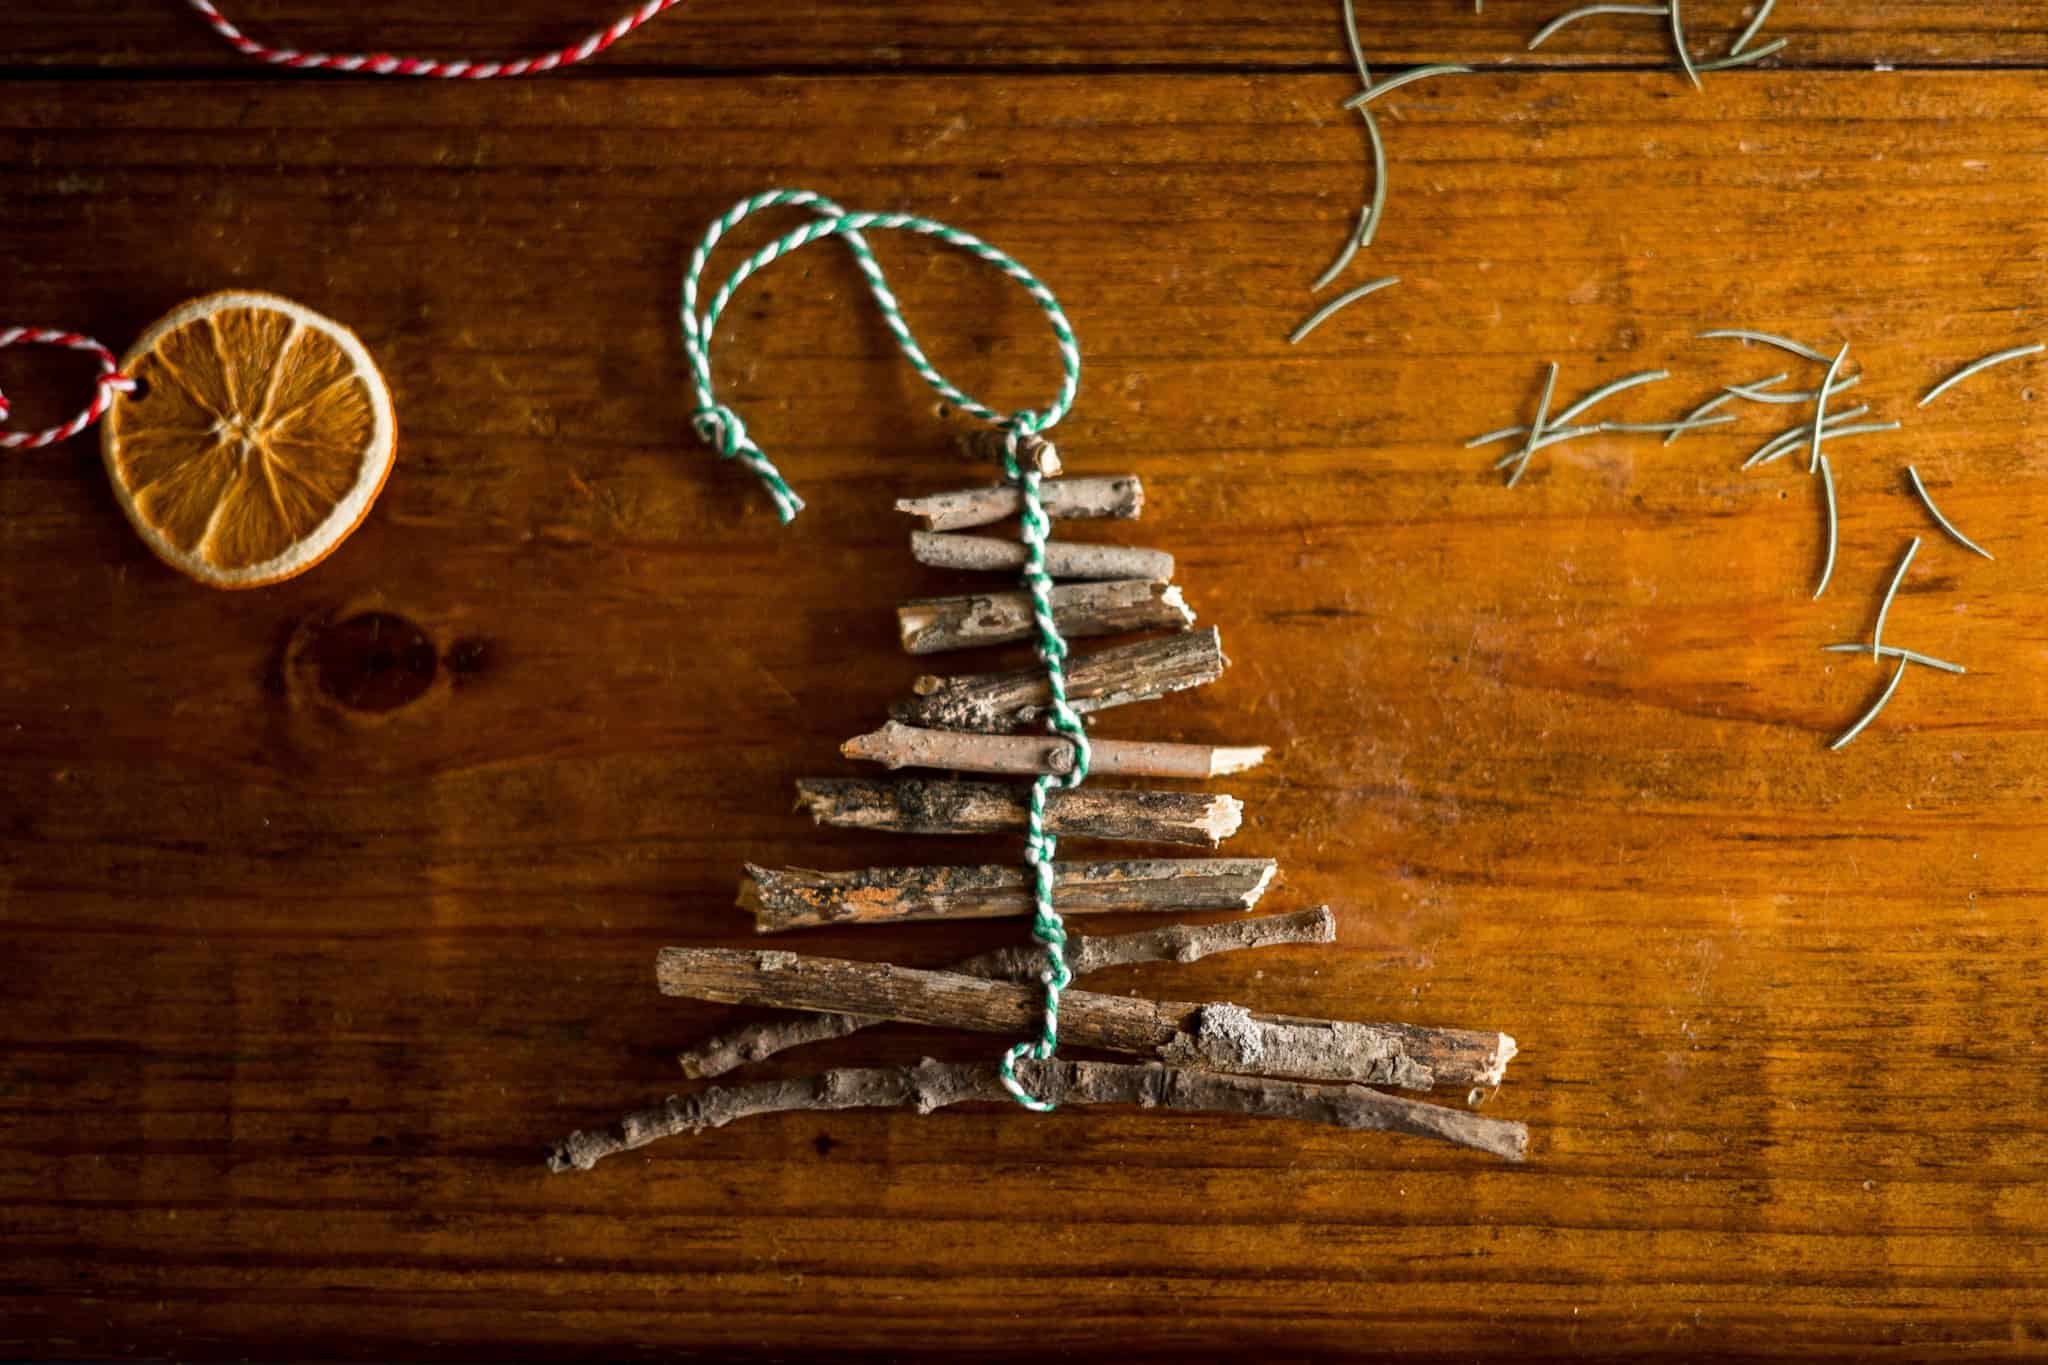
10. Stacked stick tree ornaments
Start with a stick about 6 inches long, place gradually shorter sticks above to form a Christmas tree. To keep the stack together you can glue to a. Popsicle stick base or tie them together with knots between each stick as seen below.
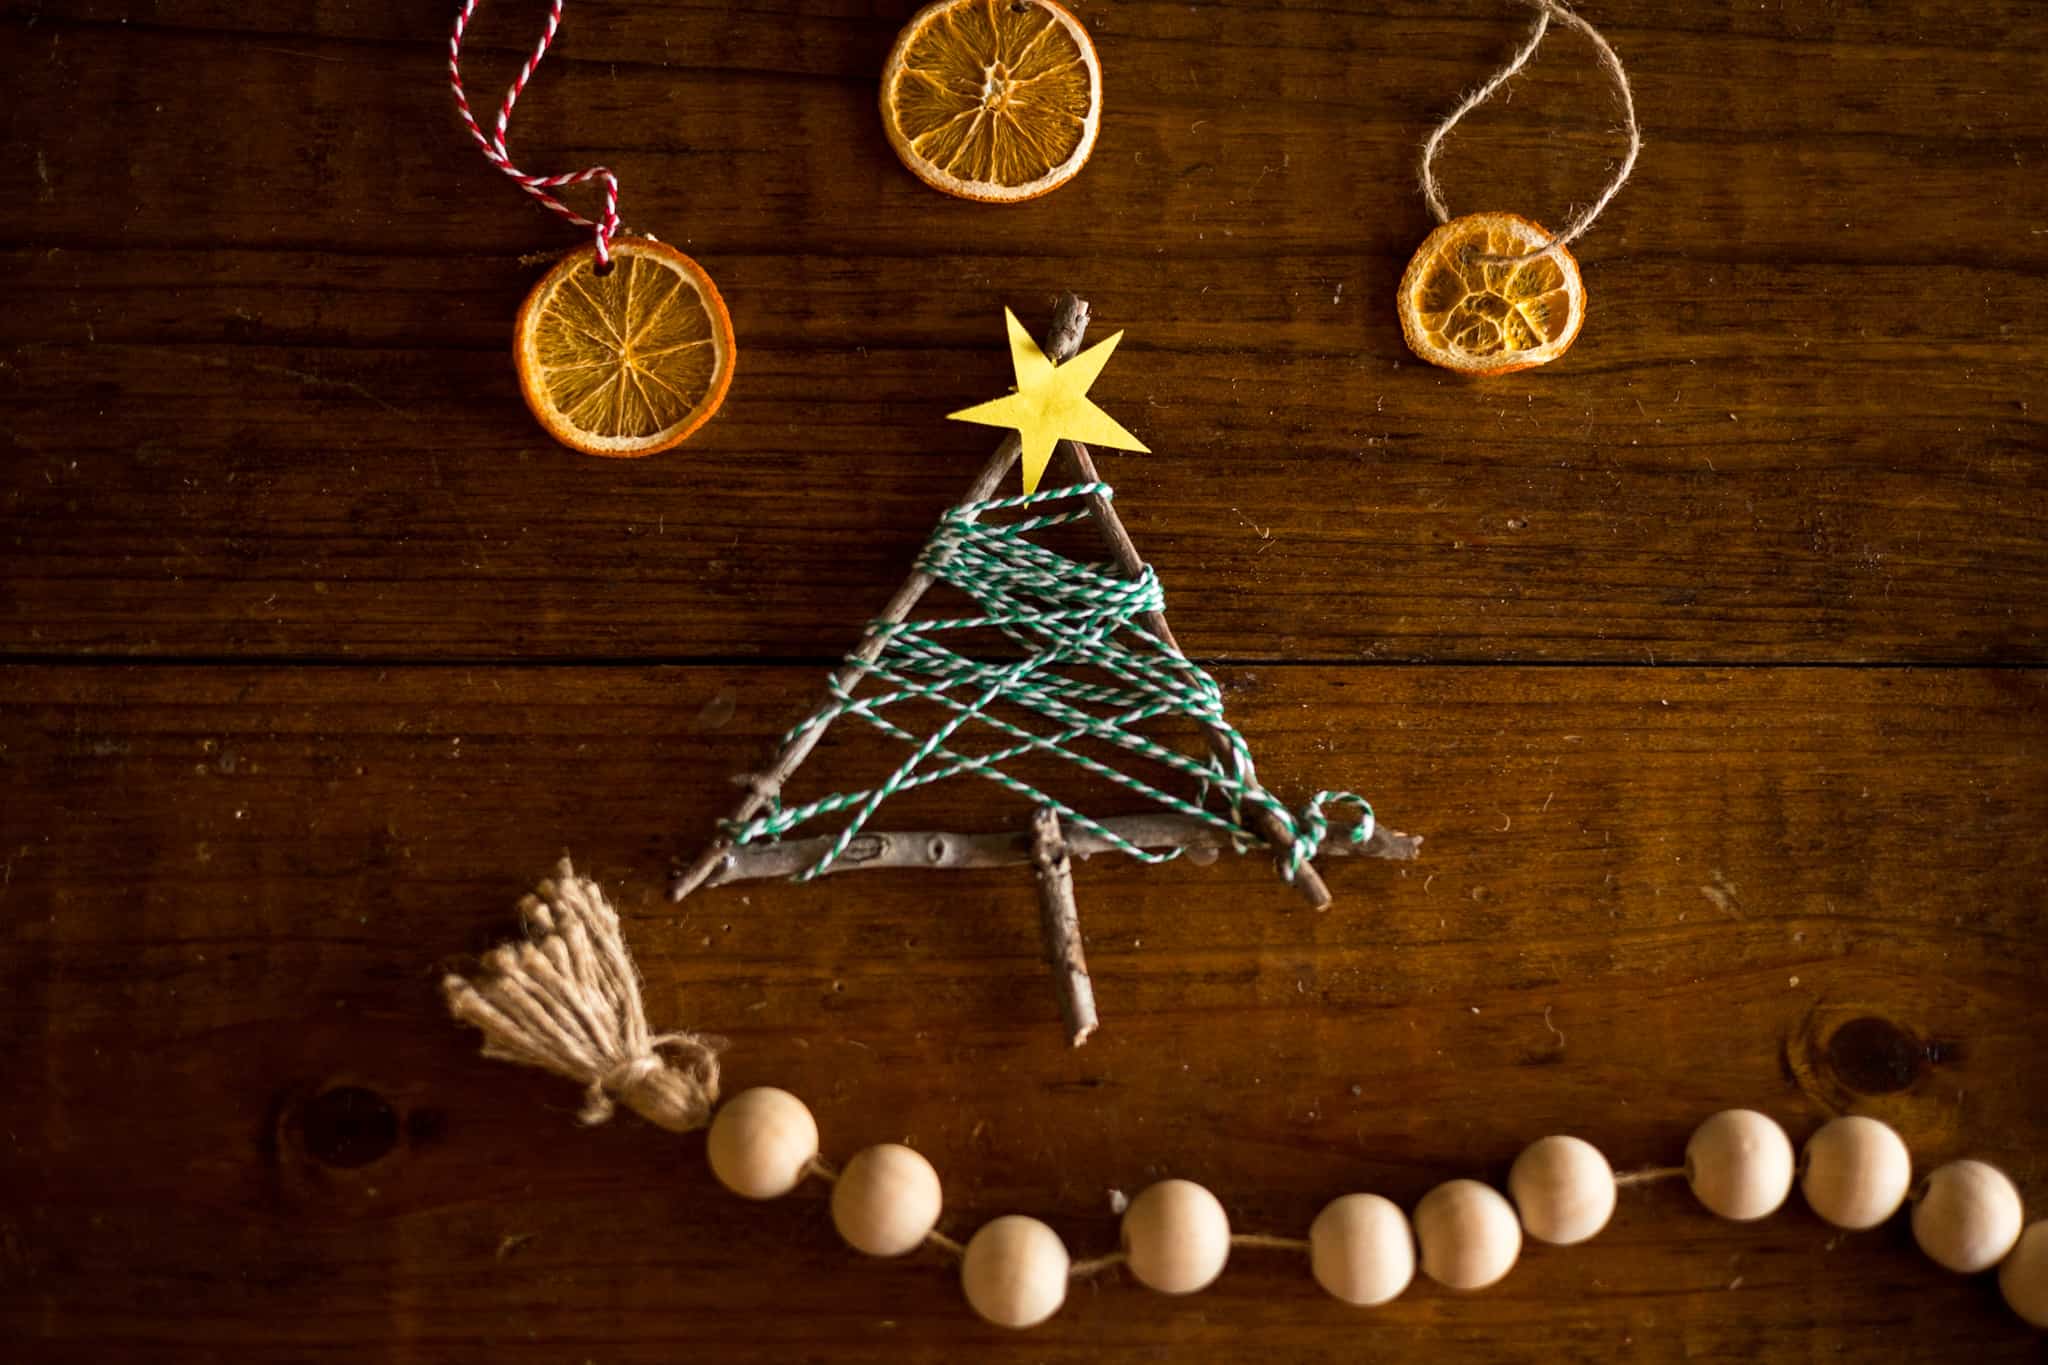
11. Wrapped twig tree ornament
For this tree we used a stick that naturally branched off into a V then glued another stick across the bottom to complete the triangle. We then use a small piece for the trunk of the tree. Wrap twine, yarn or string around the triangle to fill in the tree. Add a star at the top.
Pinecone ornaments
12. Pinecone Christmas tree ornament
Paint the scales if the pine cone green. Feeling artsy? Try using two or three different colors of green on the same cone. Add a star at the top and maybe some homemade ornaments to finish it off. You can use sequins or little pom-poms for the ornaments. Or even nature confetti (use a hole punch on some vibrant colored leaves).
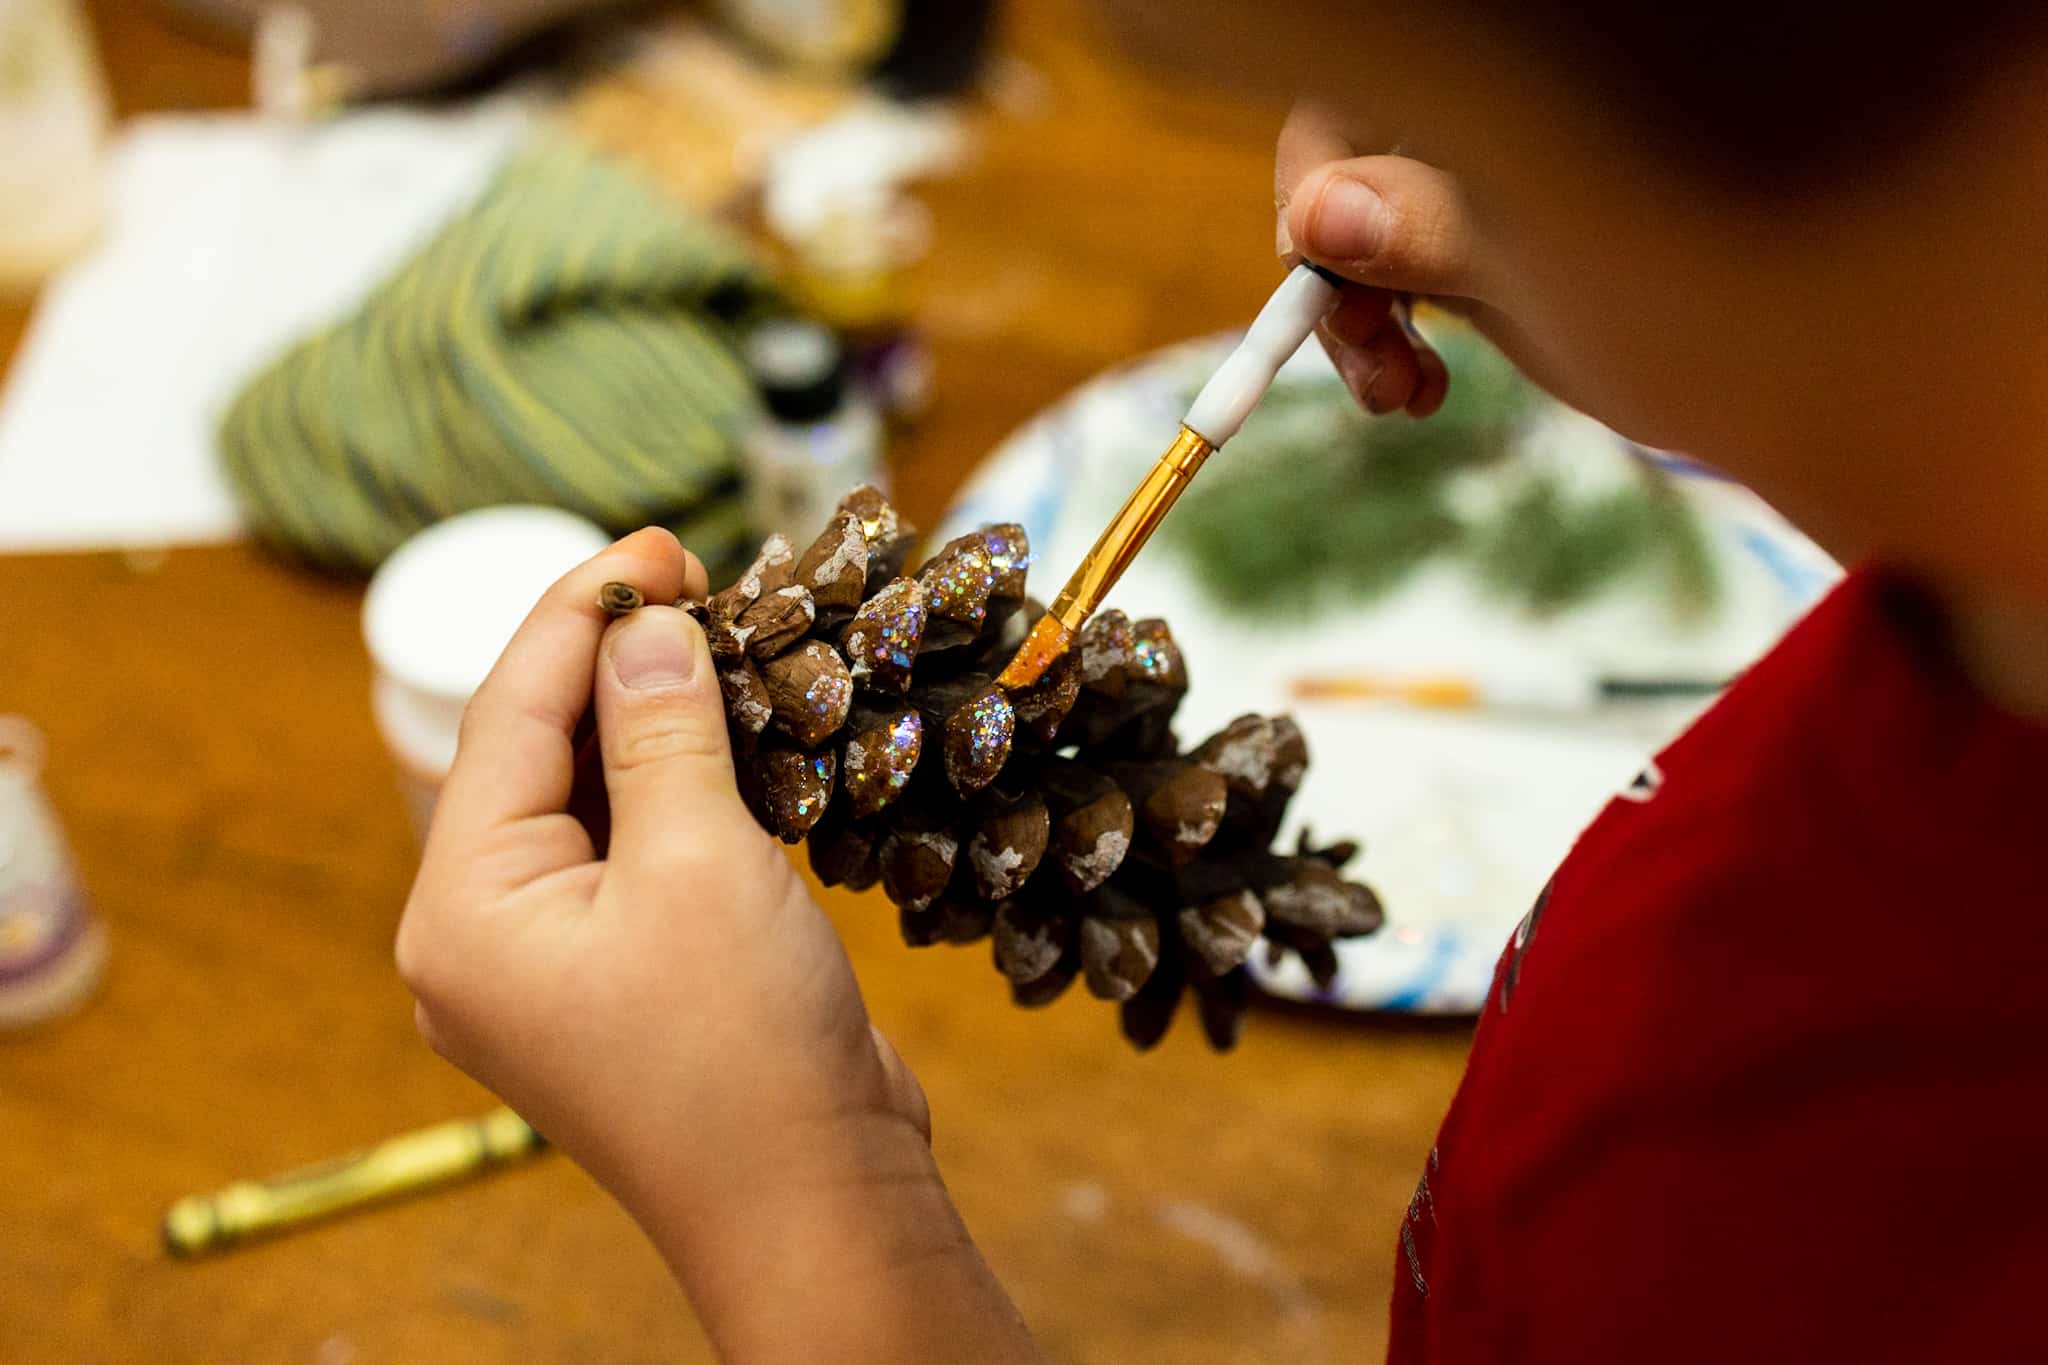
13. Snow covered pinecone ornaments
Paint the edge of each scale white. For glistening snow add iridescent flake paint on top of the white or sprinkle with white, silver, or gold glitter.
14. Beaded pinecone ornaments
Use smaller pine cones for this one. Tie string to the top of the pine cone, add colored or plain wood beads to the string on top of the pine cone. If you have small beads, glue then to the pinecone scales like ornaments on a tree.
15. Disco ball pinecone
There are a few ways to completely glitter your pinecone in order to turn it into a sparkly disco ball. You can spray the whole pine cone with spray adhesive then put pinecone and glitter in ziplock bag and shake till completely covered. Another way to cover it in glitter is to paint each scale with glittered acrylic paint. Either way you do it these are a great addition to the holiday decor because they are so sparkly and reflect the lights beautifully.
Pro tip: When temperatures are low pinecones tend to close up. To open them back up just put them in the oven at 200 for about 15 minutes.
Globe ornaments
16. Filled globe nature ornaments
Start with some clear plastic globe ornaments (like these). Then, fill them up with your favorite nature finds. You can make beachy ornaments (filled with sand or shells from your favorite beach), pine forest ornaments (filled with pine needle clippings) or even wildflower ornaments (filled with dried flowers). The possibilities are endless!
Pro tip: This is also a great way to remember a particular trip or vacation. While you’re there (wherever you are), remember to collect a bunch of small items that can be placed in a globe ornament. When you get home, put all the things in the ornament and write the destination and date of the trip on the globe.
17. Pressed flower globe ornaments
Instead of putting dried flowers inside a clear ornament, you can decorate the outside of your ornament with them! Paint the entire outside of the globe ornament with Mod Podge. Gently spread pressed flowers onto wet Mod Podge and allow the first layer with the flowers to dry. Next, add a second layer on top of the flowers to seal. The Christmas tree lights shining through the flower petals is so pretty.
Dried fruit ornaments
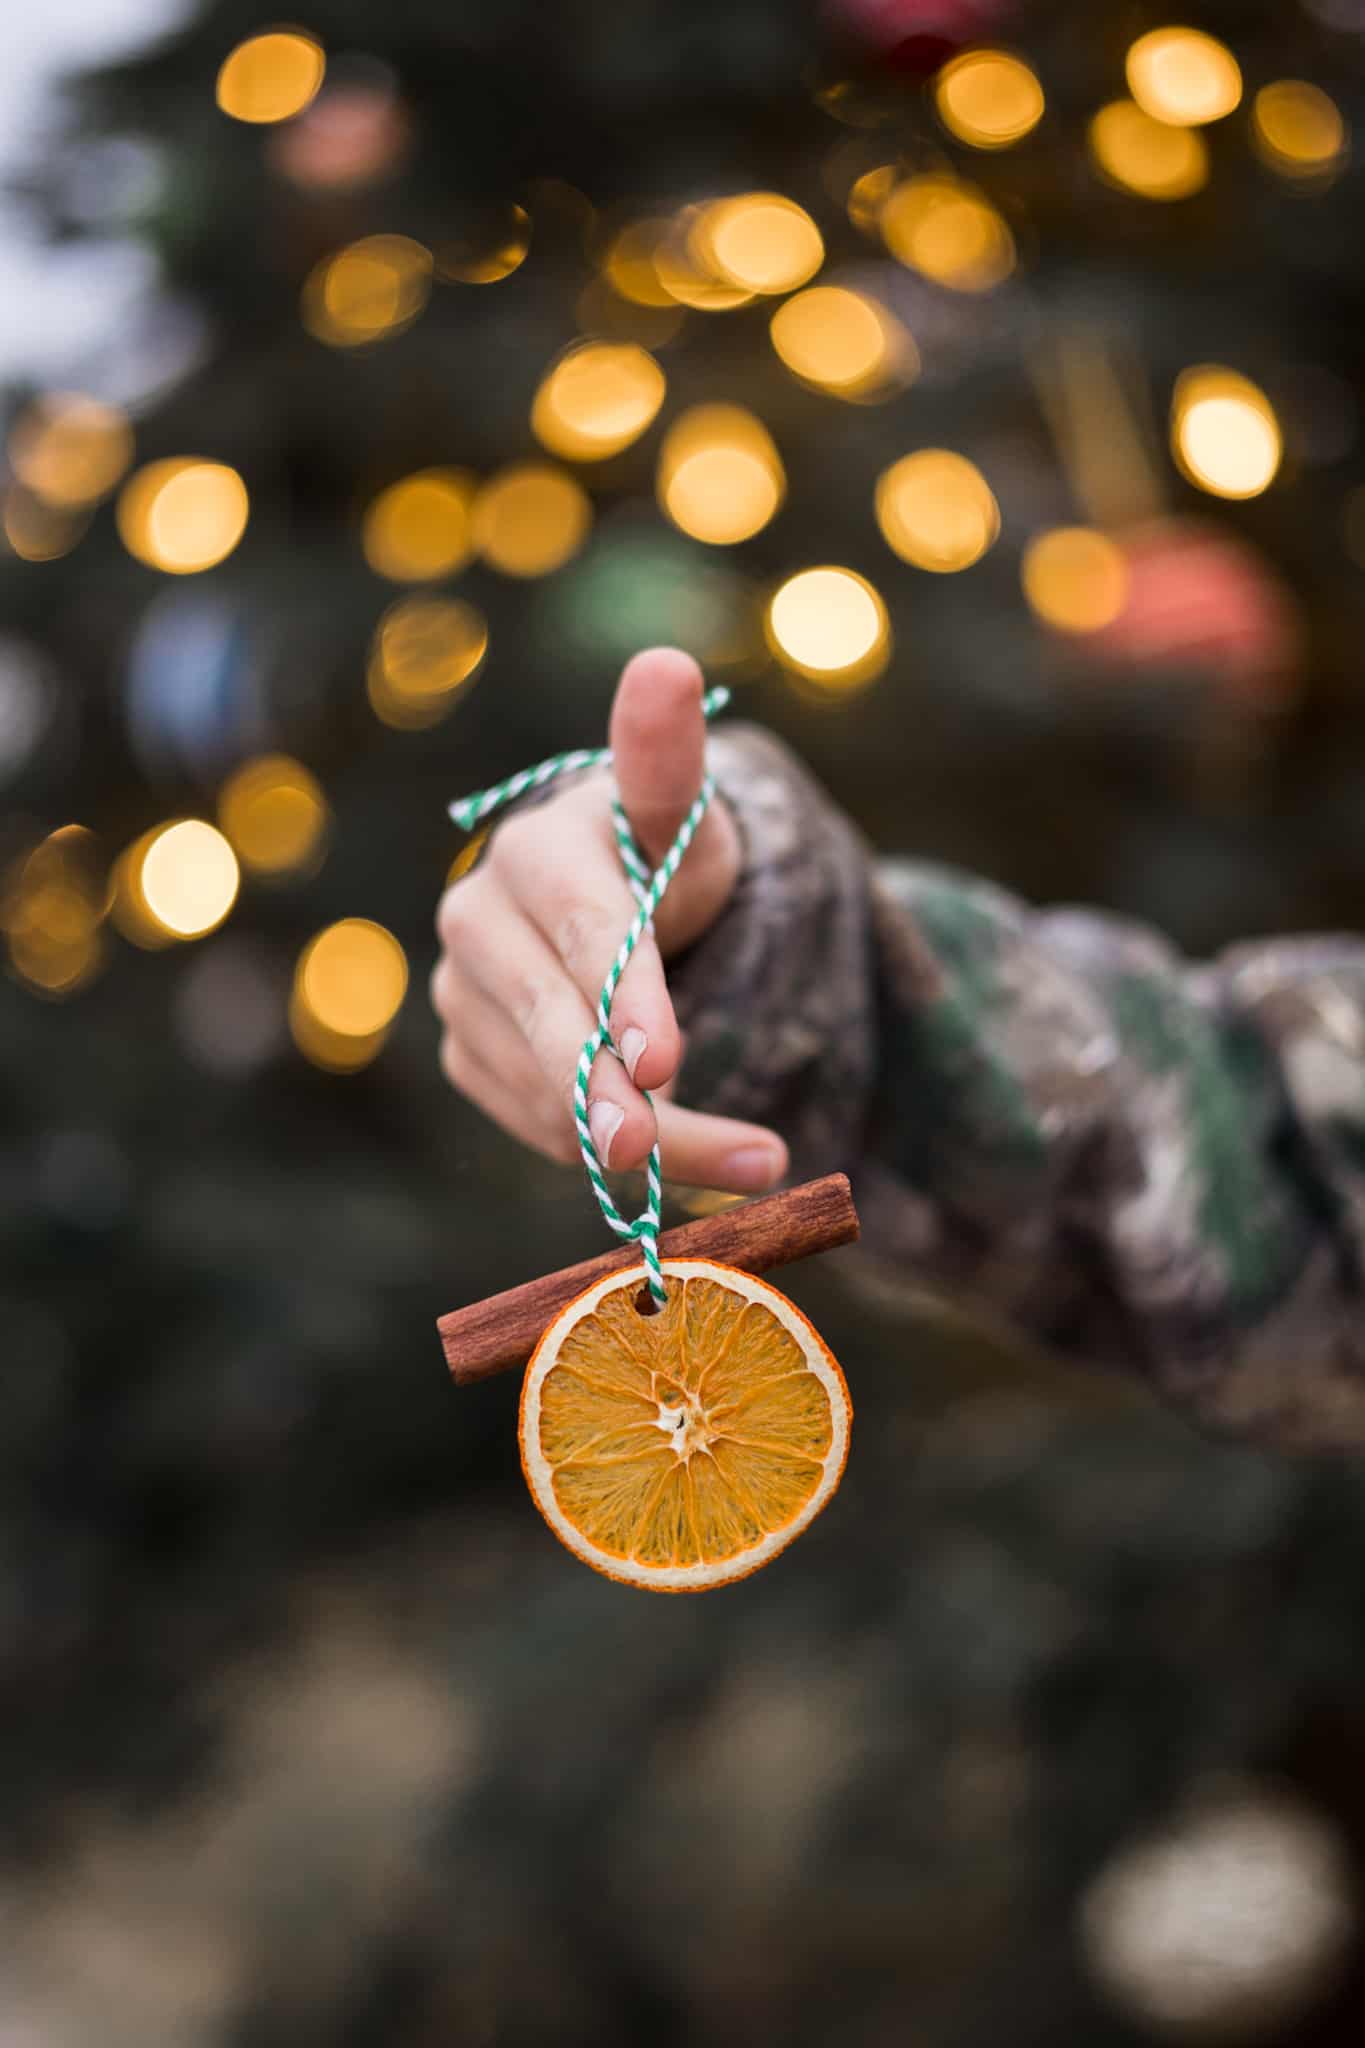
Decorating with dried fruit is so simple and festive! To dry oranges or grapefruit, slice the fruit into thin even slices. We used a potato slicer/mandolin to make sure all slices were the same thickness. Place slices on parchment paper on a cookie sheet. Before baking punch holes for hanging. We used a reusable metal straw to punch these holes. Bake for 2-3 hours or until dry.
18. Dried orange ornaments
While the dried oranges are beautiful hung just by themselves, we also made a few with pine clippings, cinnamon sticks and beads on the string above the orange. Another variation and to add some color, use grapefruit or blood oranges.
19. Dried fruit garland
Instead of one single ornament, string oranges or grapefruit slices together using twine or string. Add beads, cranberries, acorns or popcorn between each orange for fun variations.
Suncatcher nature ornament
20. Suncatcher nature ornament
Using clear contact paper, place colorful leaves, pressed flowers, ferns, nature confetti, or pine needles in a fun arrangement. Place another layer of contact paper over the top to seal in arrangement. Cut out into shapes and poke a hole in the top to hang on tree. Check out this fun flower suncatcher for more ideas.
Get creative with your nature ornaments
Nature-inspired ornaments are so much fun to make with your kids. The good news is that there is no wrong or right way to make any of these ornaments. You or you children will likely come up with many variations as you are working on them. The beauty of working with natural materials is the are already perfectly imperfect and leave a lot of room for creativity. Thankfully, if any of these get knocked off the tree by tiny excited gift retrievers, you don’t have to worry about glass or ruining an heirloom. You can go outside and gather your supplies to make another.
How will you be using nature ornaments to decorate for the holidays this year?


About the author
Meghan is a country living, mom of 2 boys in rural central Illinois (with a baby girl on the way). She is a Physical Therapist Assistant by trade but spends most of her time outside with her family. At home, she has large flower, herb, and vegetable gardens to tend to and 3 large dogs to play with. As a family, they enjoy hiking, camping, boating, fishing, and helping her in-laws show and raise livestock. Photography became a hobby while in isolation after her oldest son’s bone marrow transplant. It has since become a passion to capture her family’s daily life. Throughout her family’s journey with rare disease and transplant, the outdoors have been a safe space for the whole family to grow, learn, and thrive.
You can find more from Meghan online in the following locations:
Instagram: @meghangarriott
RWMC posts: Meghan Garriott