Your cart is currently empty!

DIY Pressed Flower Butterfly Wings for Kids
If your kids are anything like mine, they probably love playing dress-up and pretend. Kids have the most amazing imaginations! We love finding ways to make fun costumes, accessories, and dress-up items from things we already have at home or can find in nature. Today, Megan Rigdon, Maryland photographer and mom of three is here to show us exactly how to make beautiful DIY pressed-flower butterfly wings for kids.
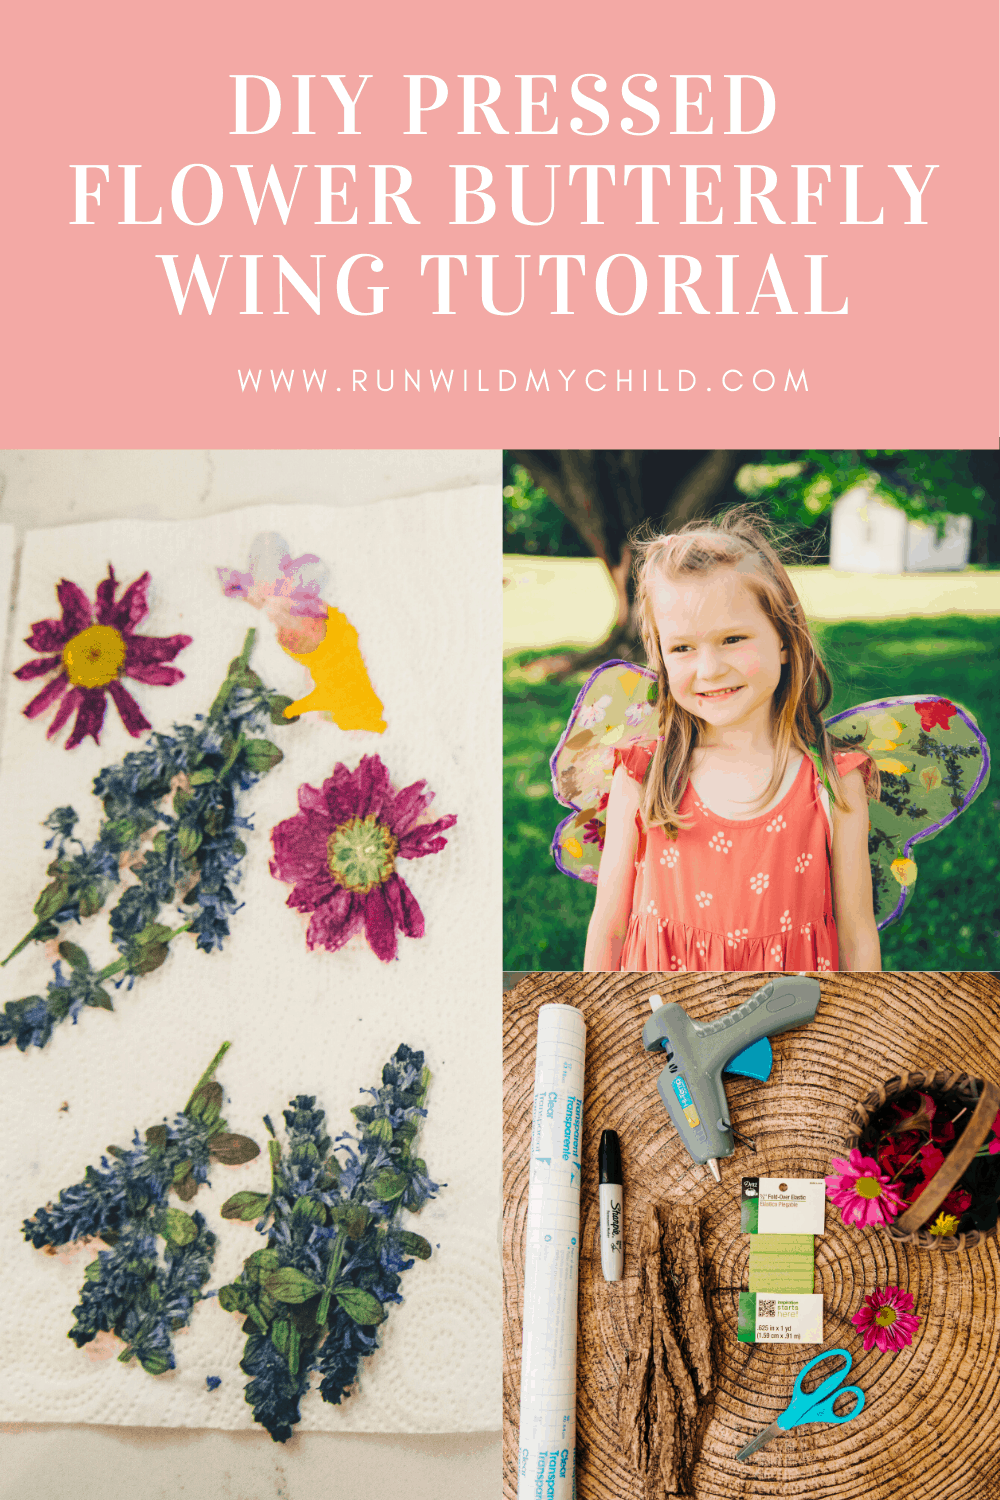
DIY butterfly wings
These DIY butterfly wings are not only beautiful and colorful, but they’re really easy to make, with just a few things. They combine two of my favorite things: spending time outside with my kids and making nature crafts together. Here’s what you’ll need to make your own DIY pressed-flower butterfly wings with your kids.
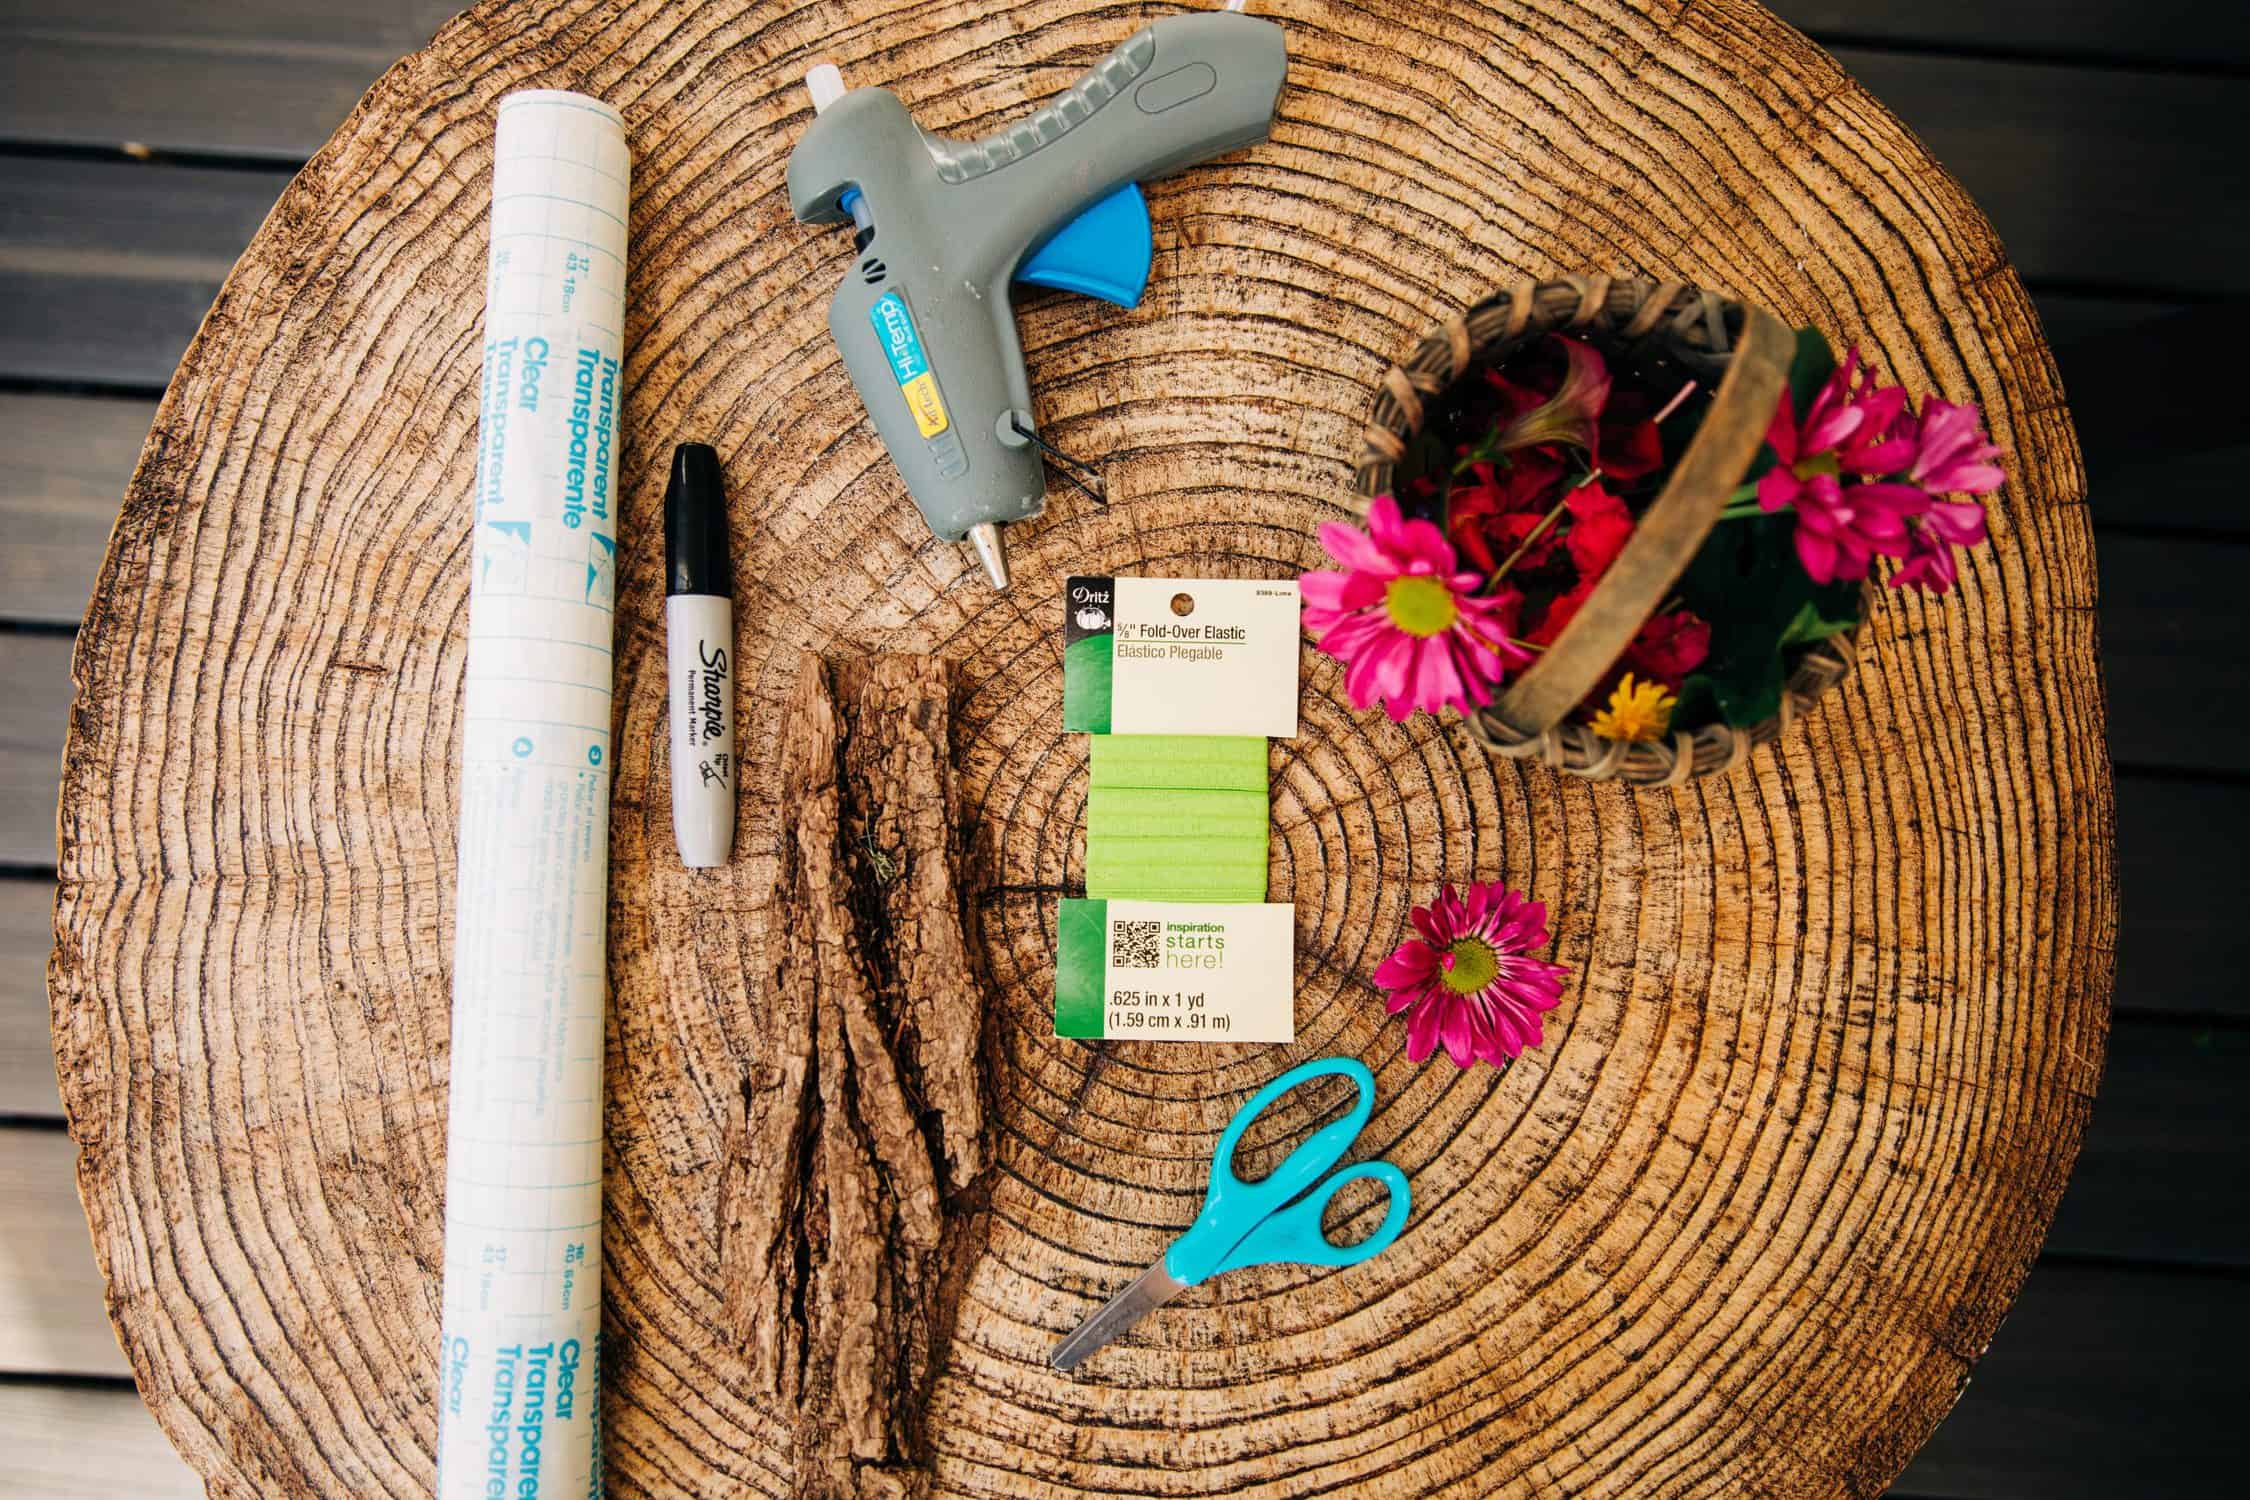
Butterfly wing supplies:
- Flowers
- Microwave
- Contact paper
- Scissors
- Tree bark (or driftwood)
- Hot glue
- Pipe cleaners
- Elastic
How to make DIY butterfly wings for kids
Butterfly wing instructions:
- Gather your flowers. Because we’re all about getting kids outside, we highly recommend you send the kids outside and pick your own flowers. However, we know that might not always be possible. The great thing about these butterfly wings is that they can be made with any flowers, whether that’s wildflowers picked from a meadow or a bouquet of colorful flowers from the grocery store.
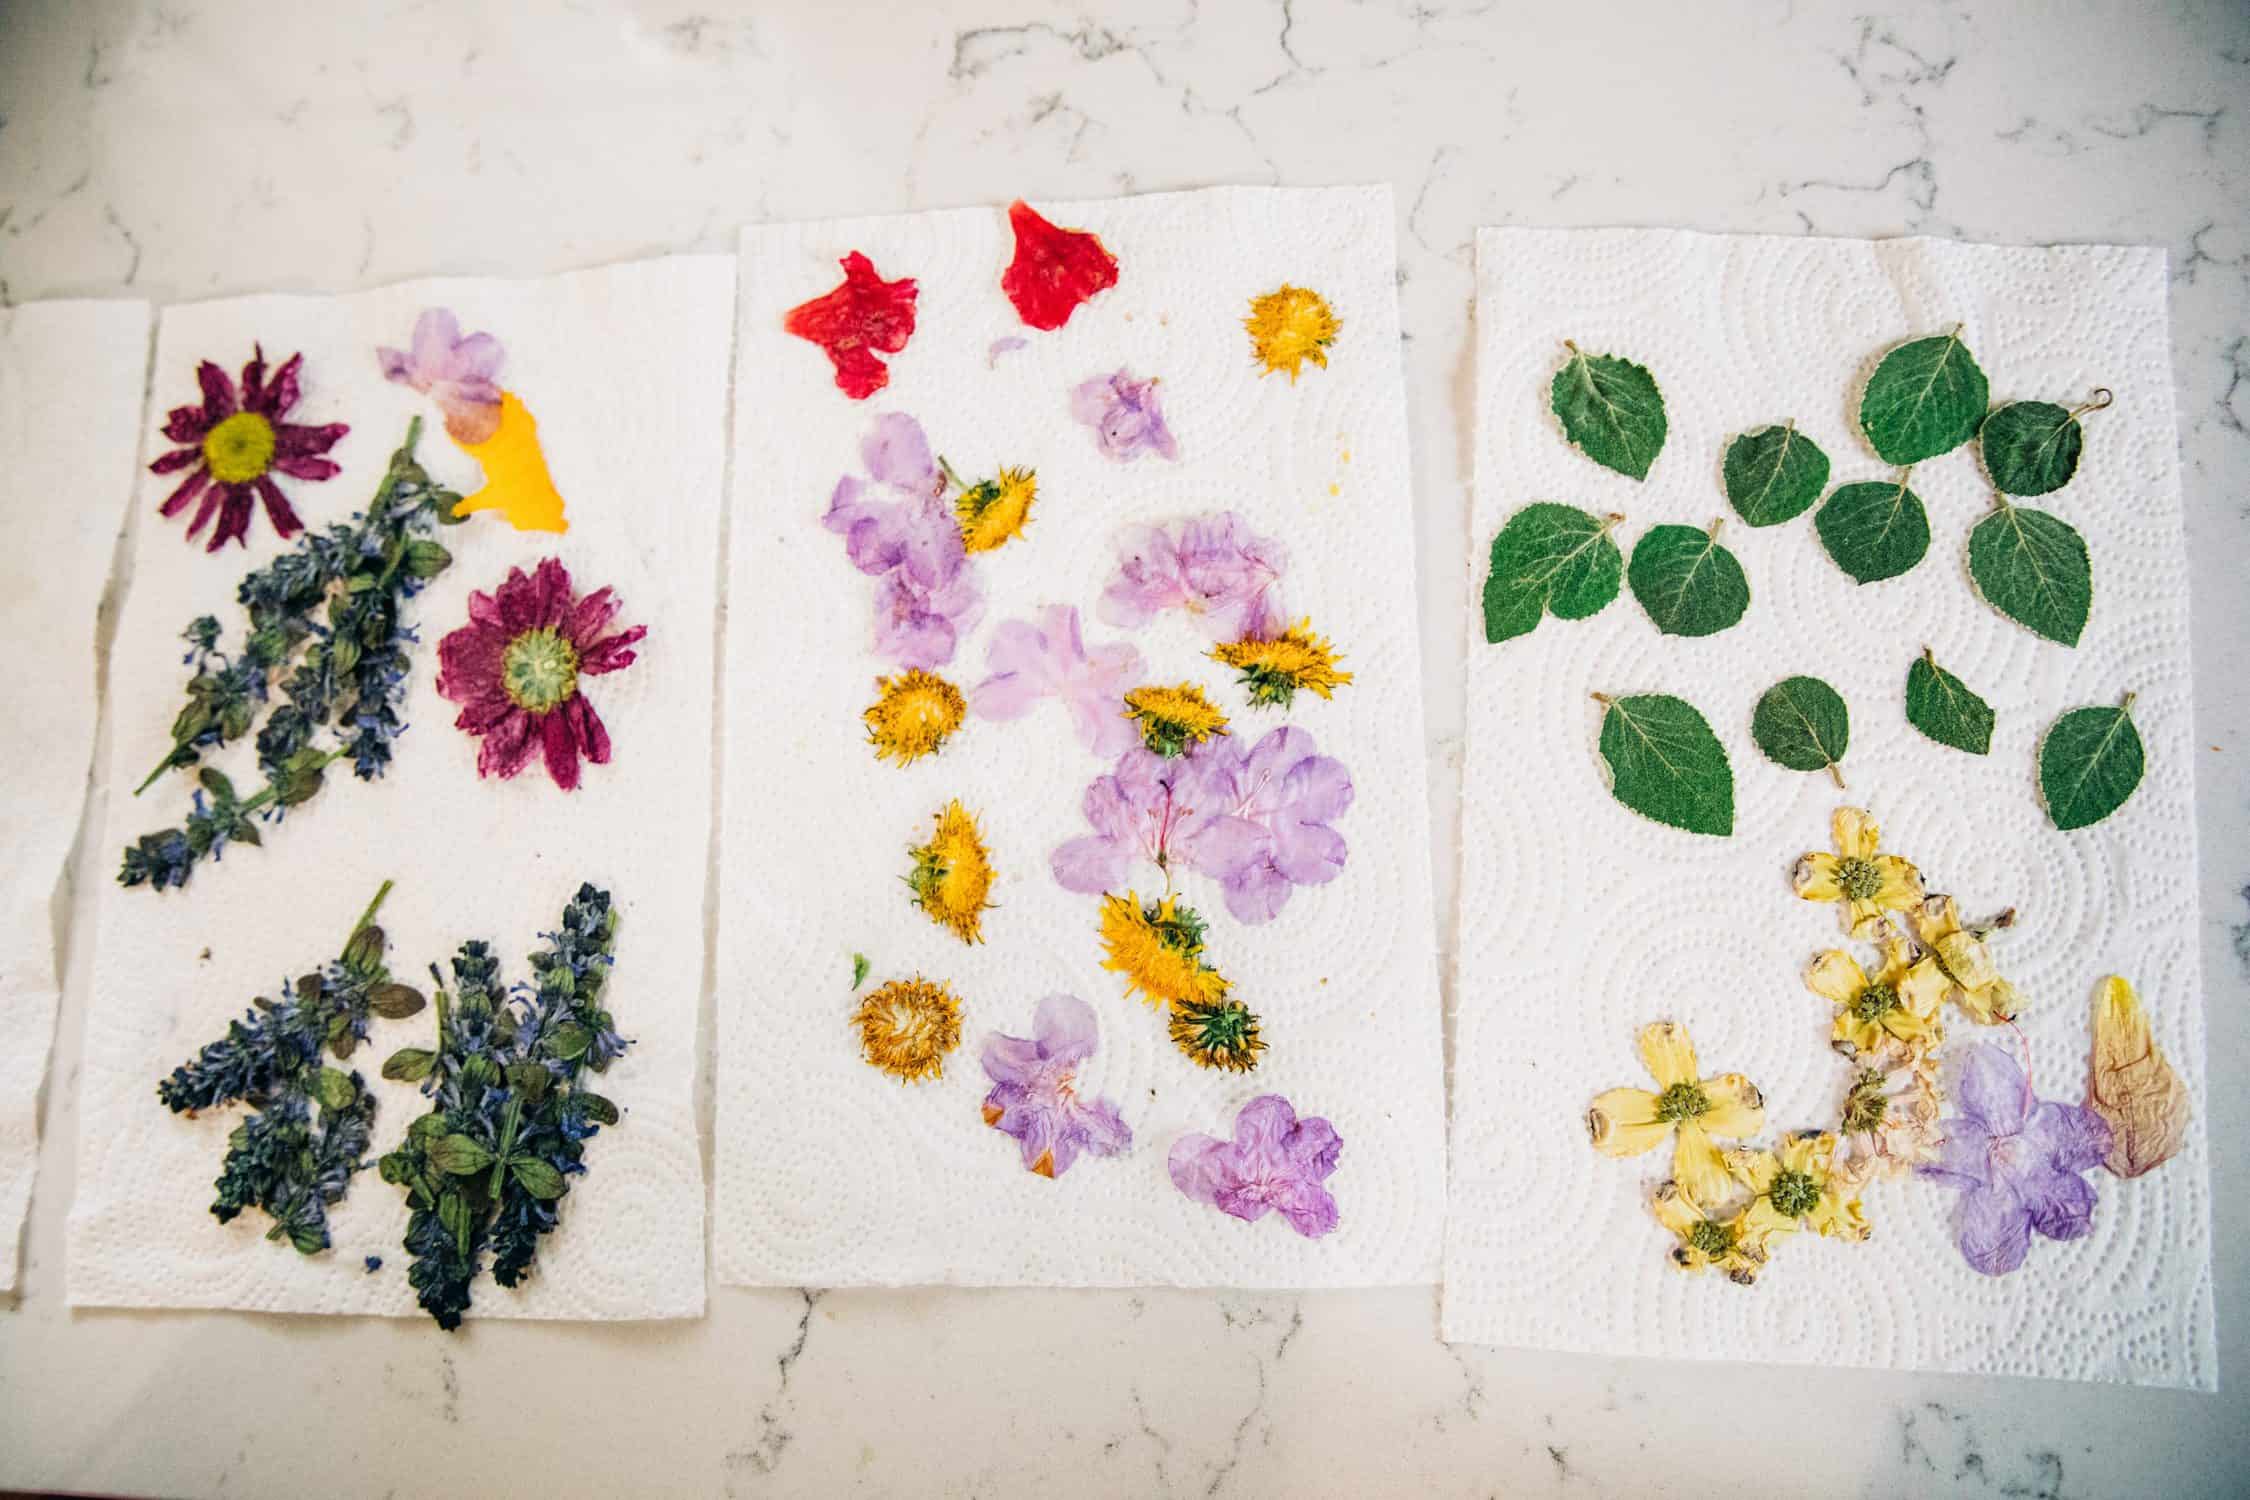
- Place your fresh flowers between two paper towels with something heavy (and microwave safe on top) as a weight. Microwave the flowers for 1-3 minutes. This helps remove all the moisture from the flowers, but keeps their bright vibrant color. If you don’t have a microwave, you can press the flowers between the pages of a heavy book.
- Draw/outline butterfly wings on the contact paper. Cut out 2 sets of wings.
- Remove the backing from one sheet of the contact paper and arrange the dried flowers on the sticky side of the paper.
- Remove the backing from the second sheet of contact paper and place it sticky side down directly on top of the first paper/set of butterfly wings. The paper will be stuck together with the flowers in the middle.
- Use your hot glue gun to glue tree bark (or a piece of driftwood) to the middle of the wings to serve as an anchor.
- Hot glue elastic bands (for arm bands) onto the other side of the butterfly wings/wood center.
- Optional: Add pipe cleaners around edges for extra stability.
- Wear your gorgeous DIY butterfly wings and enjoy!
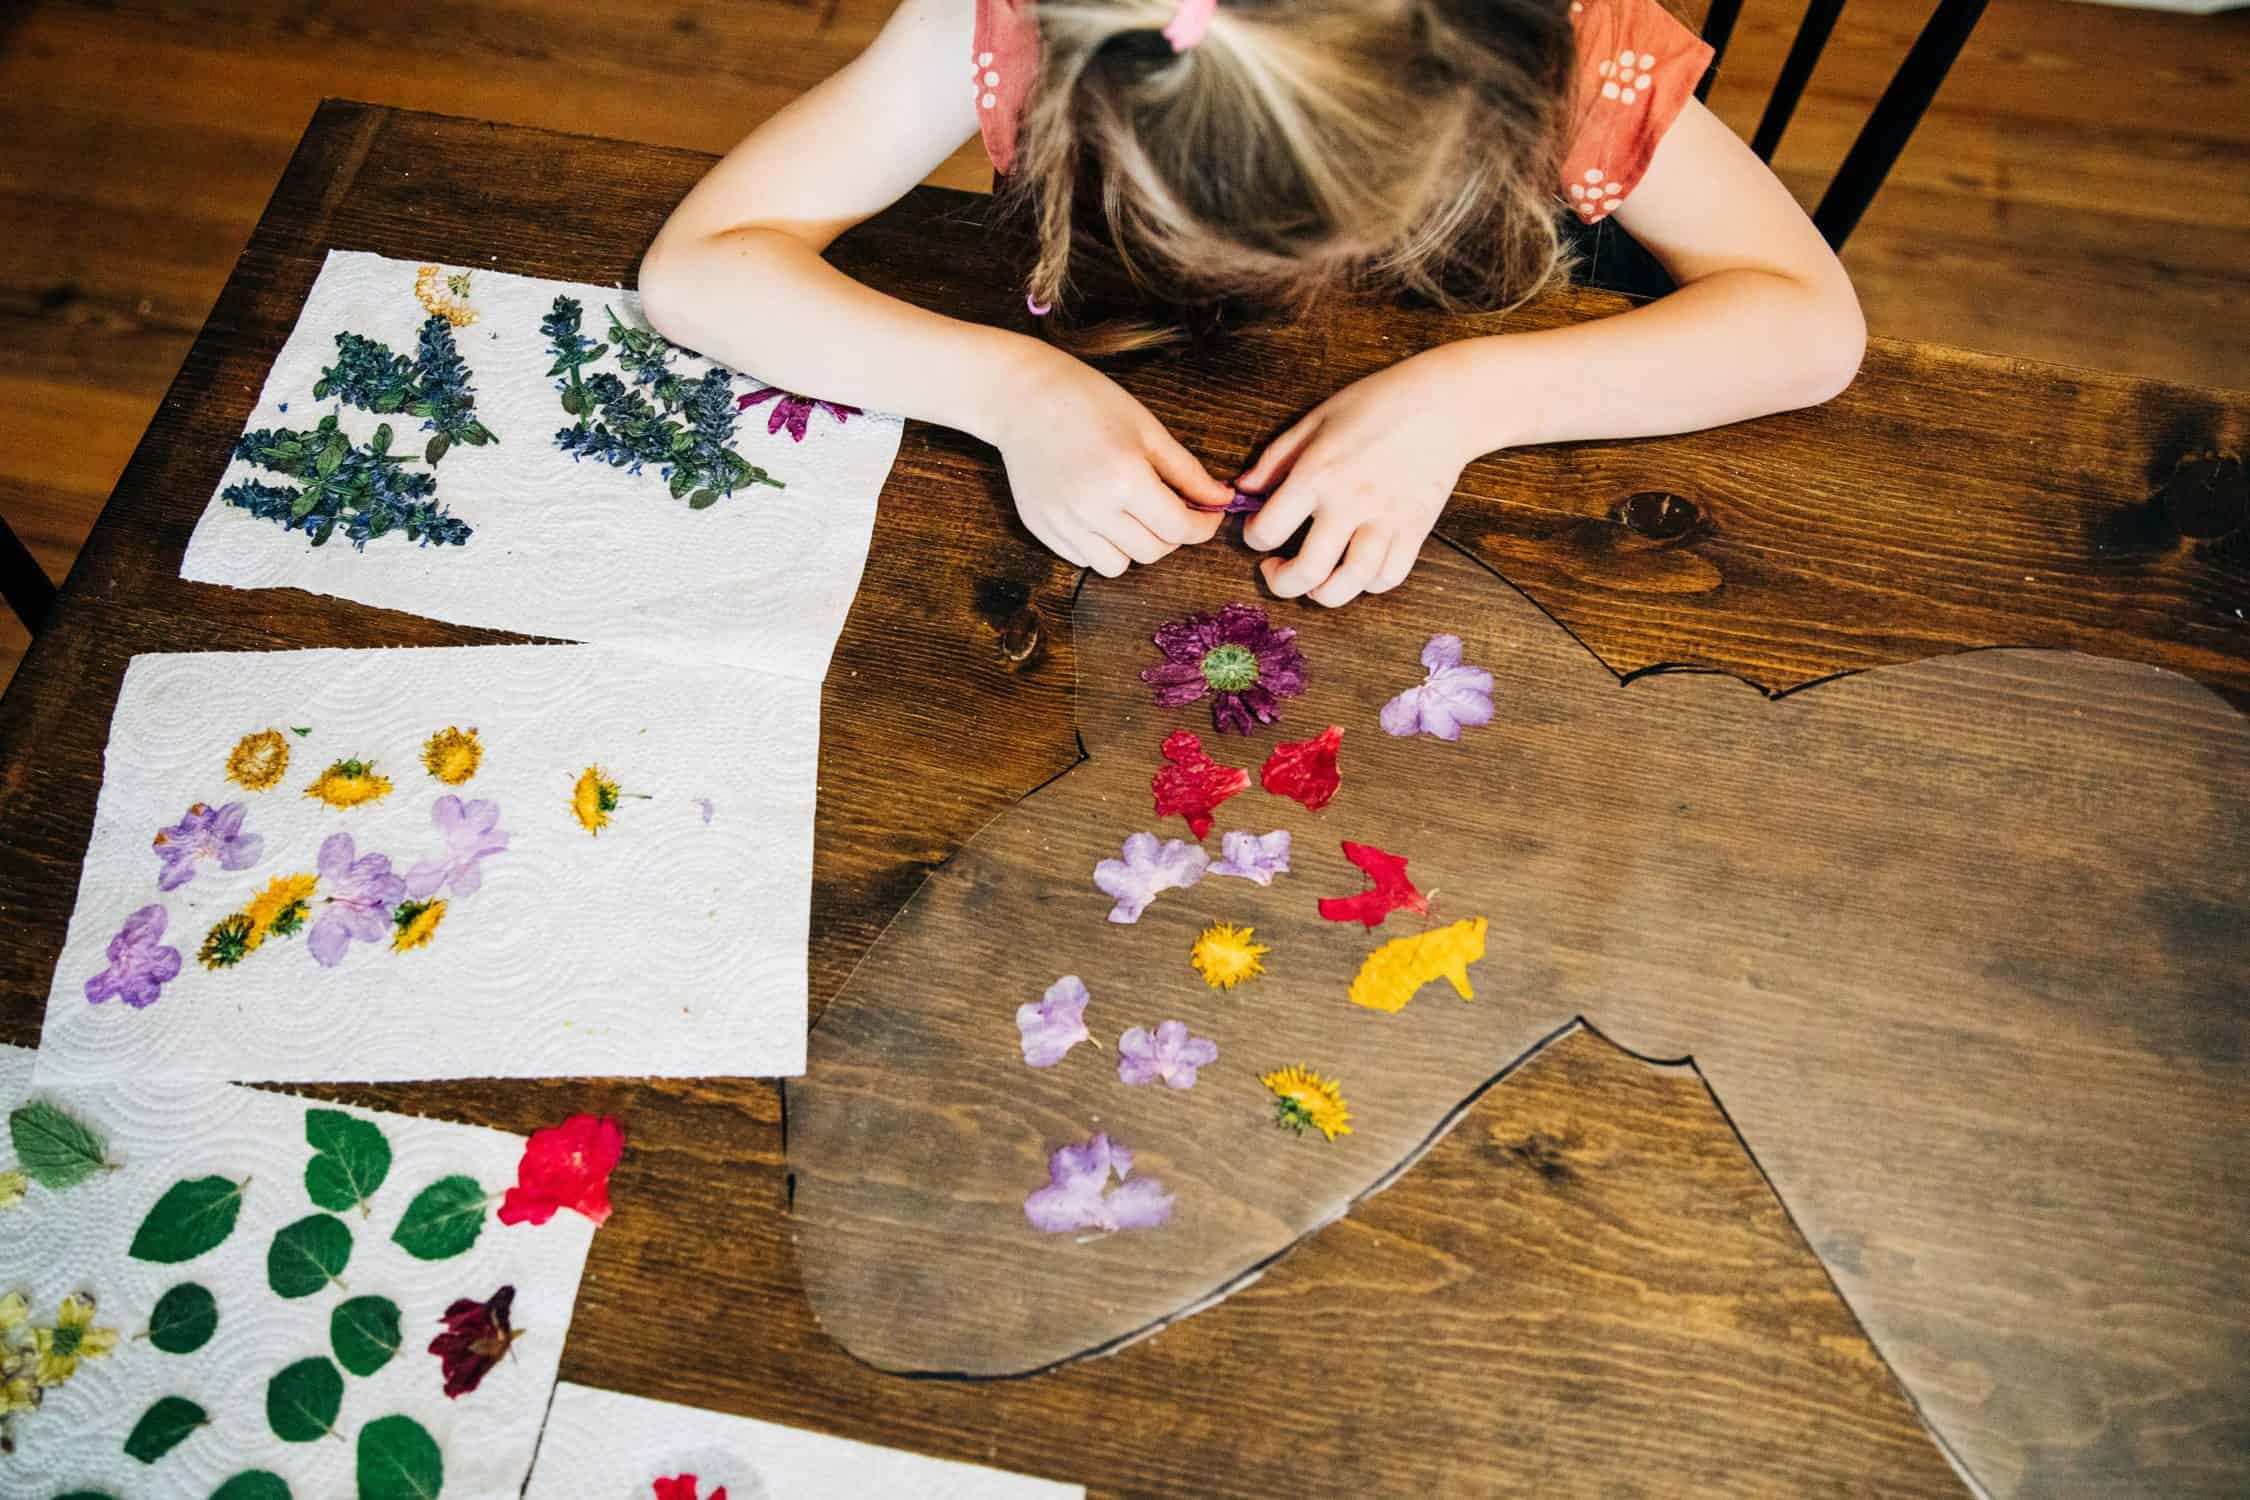

DIY pressed flower butterfly wings tutorial
About the author
Megan Rigdon is a mother to three energetic children and lives on their family farm in Harford County Maryland. She is a lifestyle family photographer and a lover of joyful and colorful images. Megan has a degree in Early Childhood Education and taught kindergarten prior to having her own family. They spend as much time as possible exploring the farm and going on adventures together! Raising chickens, fishing, gardening, and crafting are just a few of her favorite things that she enjoys doing with her family.
You can find more from Megan in the following locations:
Instagram: @meganrigdonphotography
Website: www.meganrigdonphotography.com
RWMC Posts: Blueberry Picking with Kids, Winter Photo Scavenger Hunt, Pumpkin Fairy Garden
Comments
5 responses to “DIY Pressed Flower Butterfly Wings for Kids”
Wow this is a easy and beautiful use for pressed flowers 🌺
Wow this is a easy and beautiful use for pressed flowers 🌺
[…] DIY butterfly wings made from dried flowers and contact paper are stunning and simple to make! All you need are some […]
[…] prince! If you really want to take your child’s imaginative play to the next level, add some butterfly wings (moth wings) or a wizard robe to their ensemble, and let your child’s imagination run […]
[…] Live flower arrangements are not the only way you can enjoy your flowers. Drying and pressing flowers are a great way to enjoy and preserve your flowers. Flowers like daisies and pansies lend themselves to be easily pressed. Plants like strawflower, lavender, and Celosia can make beautiful dried arrangements that can be enjoyed all year long! You can even use pressed flowers to make a fun Halloween costume, like pressed flower butterfly wings. […]

Leave a Reply