STEAM activities

  • Using Chromatography to Find Fall Leaf Colors

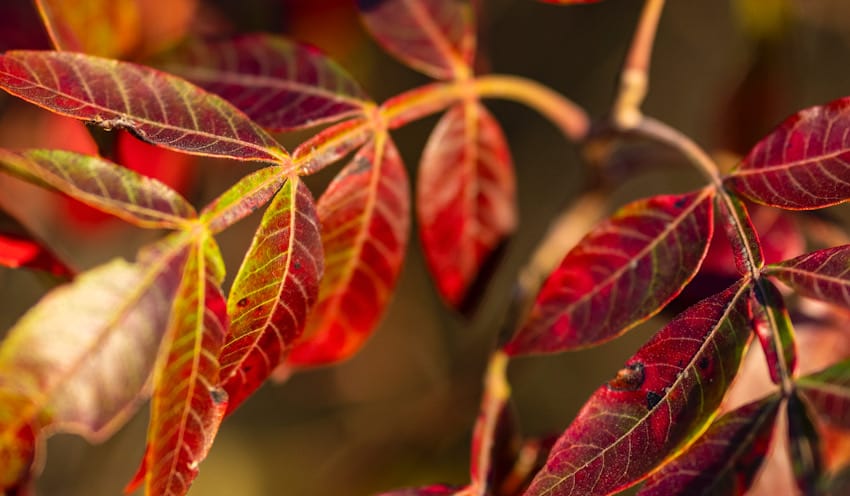
    Autumn is best known for its gorgeous color palette. Deciduous trees in more temperate climates respond to autumn’s cooler temperatures and shorter daylight hours by changing their leaf colors and dropping their leaves to the ground. In fact, the word deciduous is from Latin and literally means “fall down.” A rainbow of purples, reds, yellows, oranges, and browns take over where shades of green once dominated. But, what causes this transformation? Today, Laura Stroup, founder of Firefly Nature School and School of the Wild, explains how to reveal the assorted color pigments found within the fluttering leaves of fall trees. 

    Exploring the beauty of the season

    As the crisp breeze of autumn transforms the landscape, it brings a spectacular display of vibrant hues adorning the trees. For curious young minds, fall leaves hold more than just seasonal beauty. They conceal a secret world of hidden colors waiting to be discovered.

    Today, we invite young scientists (and their parents) to embark on an exciting journey of exploration through the captivating realm of chromatography, unlocking the mysteries of nature’s palette right from the comfort of home. Join us as we delve into the fascinating world of chromatography and guide young enthusiasts through a simple and engaging experiment. Unleash your inner scientist, and let the colors of fall leaves tell their unique tales of nature’s artistry!

    What is chromatography?

    Chromatography is a technique used to separate and identify components within a mixture. In the context of fall leaves and their vivid hues, chromatography acts as a scientific detective, revealing the hidden pigments responsible for the kaleidoscope of colors in fall leaves.

    This process capitalizes on the principle that different substances in a mixture travel at different rates through a medium, such as paper or a chromatography strip. As a solvent moves through the paper, it carries the pigments along, causing them to separate based on their unique chemical properties. By examining the distinct patterns left behind, scientists can unravel the composition of complex mixtures, offering a valuable tool not only for understanding the science of colors in nature but also for applications ranging from forensics to pharmaceuticals.

    By understanding the science behind chromatography, kids can do hands-on experiments (like the one we’re sharing below!) that not only reveal the hidden pigments in leaves but also fosters a deeper appreciation for the wonders of the natural world. Are you ready?

    How do trees prepare for winter?

    Like the people and animals around them, deciduous trees prepare themselves for winter. Each fall, deciduous trees undergo a fascinating transformation to prepare for the challenges of the colder months. As part of nature’s strategic planning, deciduous trees meticulously withdraw energy from their leaves, the very organs that had been the source of their lush greenery throughout spring and summer.

    As the days grow shorter, leaves lose more chlorophyll. You probably know chlorophyll as the green pigment that helps leaves absorb the sunlight they need for photosynthesis. As the remaining chlorophyll breaks down inside the leaves, other hidden colors are revealed. Cold weather early in autumn and/or dry conditions over the summer months may make for less than spectacular shows of color and early leaf drop.

    This withdrawal is facilitated by the formation of an abscission layer, a specialized zone that develops at the base of each leaf’s stem. As daylight wanes and temperatures drop, the tree recognizes these cues and triggers the production of a hormone called abscisic acid. This hormone signals the cells in the abscission layer to expand, effectively sealing off the connection between the leaf and the tree. The once-nurturing relationship comes to an end, and the leaf is left to gracefully fall to the ground.

    red sumac in autumn

    What colors are in the leaves?

    Leaves are green from chlorophyll, but they also contain lesser-known pigments like brown tannins, yellow xanthophylls, and gold and orange carotenoids. What makes the ravishing red and purple shades like those of the red maple, pin oak, and sweetgum? 

    Anthocyanins, in combination with what remains of the chlorophyll, are responsible for those beauties. The anthocyanins are created as the leaves make sugars during fall’s warm sunny days. As night falls and the temperatures cool, the sugars are changed to red and purple pigments. 

    Conduct your own chromatography experiment

    You can solve a chem-mystery to figure out what colors a particular tree is hiding in its leaves. For this activity, we will focus on gathering a variety of leaves from different tree species and using the chemistry of chromatography to reveal the hues normally covered by chlorophyll for most of the year. 

    Begin by taking a nature walk, noticing the colors, and collecting leaves from different trees. We like to do this experiment with green leaves, but you can use leaves of other colors. It’s best to pick leaves from trees that are on your own property or leaves that you have permission to pick.

    supplies for leaf chromatography

    Chromatography supplies

    Paper chromatography is how you will separate the different colors in the leaves you gather by using a solvent (in this case, isopropyl alcohol) and a paper strip. Remember, most leaves have a few different colors hiding in them, even if you see only one color.

    For this activity, you will need:

    1. A variety of leaves – keep track of the species
    2. Isopropyl alcohol 
    3. Glass jars (the number of jars depends on how many leaf species you collect)
    4. Pencils
    5. Tape
    6. Scissors
    7. Coffee filter or absorbent paper towel

    Breaking down the leaves

    You will need to make a mixture with the leaves. Choose one species of leaf, and select your method of breaking your leaves into small pieces. You can use your hands to tear them, a mortar and pestle to grind them, scissors to cut them, or a blender or food processor to mulch them into tiny pieces (the latter being my kids’ favorite option). 

    The goal is to have enough leaf pieces to cover the bottom of your jar. 

    Put your leaf pieces into the bottom of a glass jar. Pour enough isopropyl alcohol into the jar to cover the leaves. Slowly swish the jar around to mix up the solution. The leaves will break down a bit, so their color molecules will mix in with the alcohol. Making sure the pieces are tiny helps this process along. 

    Revealing the colors

    Let the jar with leaf bits and alcohol rest while you make your filter strips. Cut a one-inch wide strip through the length of a coffee filter or the width of a rectangle of paper towel. Roll the end of the strip around a pencil, and rest the pencil across the top of the jar. The dangling end of the strip should be just barely dipped into the leaf/alcohol mixture. 

    Once you have your setup complete, leave the jars for several hours. The different color pigments in the solution that you made will take different amounts of time to “crawl” up the filter paper due to the different molecules found in each. This results in the colors separating out into visible stripes in different locations along the length of the paper.

    chromatography color strips on paper towel

    Reading your results and extending the lesson

    As young scientists dip these leaves into a solvent during the chromatography experiment, they witness the mesmerizing separation of pigments on the chromatography paper. The resulting patterns are akin to a colorful fingerprint, revealing the distinct chemical makeup of each leaf.

    Check your filter strips to see what color pigments are in your leaves. Did you find anything that surprised you? You may have found several shades of greens, oranges, browns, or yellows.

    To translate this scientific exploration into a prediction for fall colors, kids can carefully observe and record the patterns obtained from the chromatography experiment. By noting the number, intensity, and positions of the separated pigments, they create a chromatographic profile for each type of leaf.

    If you do this experiment in the summer or early fall BEFORE the leaves change colors, kids can make connections between these profiles and the forthcoming fall foliage. As fall approaches and the leaves begin to change color, children can revisit their chromatographic findings and correlate the presence of specific pigments with the colors they observe in the leaves outside.

    For instance, if a particular pigment in the chromatography experiment corresponds to a rich red hue, spotting that pigment in the chromatographic profile could indicate a likelihood of red leaves appearing on the trees during autumn. This analytical approach transforms the chromatography experiment into a predictive tool, empowering kids to anticipate and appreciate the kaleidoscope of fall colors based on the unique chemical signatures unveiled in their chromatographic investigations.

    Get outside and enjoy the season

    Be sure to get outside and take an autumn nature walk to enjoy nature’s colors. Take photos of trees that catch your eye, or draw them in your nature journal. You can even save the leaves themselves and press them to dry them out. This allows you to store the leaves without them crumbling to pieces.

    Here are a few additional fun fall posts you might be interested in:

    Which fall colors are the most prevalent in your region?
    Which shades are your favorites?

    About the author

    Laura is an ecology writer and the founder of Firefly Nature School, a nature study curriculum designed for homeschooling families, co-ops, and classrooms. Laura has a Bachelor of Science degree in Animal Ecology from Iowa State University with an emphasis in natural resource education. A former wildlife conservation educator and upper school science teacher, she now directs School of the Wild, a local nature school serving her community. In her free time, she enjoys traveling with her family, hiking, running, writing, reading, and cooking. Laura lives with her husband and their three children in the beautiful Ozarks countryside.

    Find more from Laura in the following locations:
    Website: Firefly Nature School
    Instagram: @fireflynatureschool
    Facebook: Firefly Nature School
    RWMC posts: Laura Stroup

  • Kite Flying with Kids

    Springtime means warm breezes and sunny days – perfect weather for flying a kite. Children absolutely love flying kites and it’s easier to do than you think. Flying a kite is one of those activities that people often talk about, but never get around to doing. Today, we want to change that and challenging you to take your kids out for a kite flight! We’ll walk you through the steps of how to choose a kite for kids, how to launch, fly and land a kite, plus explain all the benefits of kite flying. Here are some great tips for flying a kite and ways to make your kite flying extra fun! 

    {This post contains affiliate links.}

    How to Fly a Kite with Kids - Kite Flying

    Let’s go fly a kite… up to the highest height.” Mary Poppins

    Benefits of flying a kite

    There are so many great reasons to go fly a kit with kids and a lot of physical, educational, and social benefits. Kiting is a healthy and active outdoor activity for kids that is usually very low-cost and budget-friendly. Spending time outside means that kids get a healthy dose of Vitamin D from sunlight. Flying a kite also provides exercise for your child’s body as they chase. It’s wonderful for hand-eye coordination, kinesthetic awareness, and gross motor skills. Kite flying also helps strengthen the eyes, as they focus far and near observing and controlling the kite’s flight. 

    Fling a kite also provides social benefits. When kids are outside flying kites, they have the opportunity to interact and spend quality time with parents, family, and friends. Kite flying is a great bonding activity and requires coordination and communication skills with others. 

    Feature image credit: @susan.grimes

    Feature image credit: @jenniferdonlevy

    Kite flying is fun and educational

    There are so many great lessons to be learned while flying a kite. Kids can learn about science, physics, aerodynamics, weather, and ecology. Kite flying also helps develop hand-eye coordination, kinesthetic awareness, and gross motor skills.

    Once you have a kite, kids love the challenge and the thrill of launching the kite. Once they figure out how to get it flying they can begin to master the challenge of keeping the kite in the air, and maybe even learn a trick or two. The final challenge is how to get the kite down when you’re ready to head home.

    Feature image credit: @ashleytheislander

    Feature image credit: @fokys_pokys

    How to choose the right kite

    The first thing you need to do to get started with kite flying is to get a kite! There are more styles, colors, and sizes of kites than ever before – not to mention, kites are now easier to put together, get into the air, and fly. You can purchase a basic-shaped kite (diamond, triangle, prism) for not much money (under $20) that’s easy to assemble and easy for little kids to handle. Elaborate 3-D box kites or dragon kites may look cool, but the standard shapes are the easiest to fly for beginners. Once you’ve mastered the basics of kite flying, you can move up to the more creative designs and shapes.

    Here are a few highly recommended budget-friendly kites for kids:

    Make your own kite for a STEAM activity

    If you have older kids and are up for a challenge, you can choose to make your own kite and turn this into a STEAM activity. Kids can learn a lot from designing, building, and decorating their own kites. 

    Feature image credit: @kristcx

    The perfect kite-flying wind

    The next step is to assess the wind. You will need to pick a kite-flying day with good wind, but not too much wind. Days with consistent light to medium winds are good kite flying days. Flags on masts should be extended straight out (good wind), but not rippling or snapping (too much wind). Too much wind could result in your kite looping and diving. It could be very difficult to control or keep a hold of. Too little wind and your kite may not be able to stay in the air. Make sure to check the weather and never fly a kite in a thunderstorm.

    Feature image credit: @larissahollowayphoto

    Feature image credit: @rachelkrausmannphoto

    Look for a wide-open space

    Next, you’ll need to pick the perfect location for kite flying. A beach or wide-open field is the ideal spot. Check out your local parks, ball fields, farms. The more room you have, the more fun you will have kite flying with kids. Avoid hills, because the wind will make kite flying difficult. Take note of your surroundings and avoid power lines and nearby trees.

    Feature image credit: @desireemacke

    How to launch a kite

    The hardest part of kite flying is initially getting the kite into the air. Young children love to run to launch a kite. While this is fun for kids, it is actually not the best way to launch a kite. You can certainly let them try, though! If you would like to launch this way make sure your child is running into the wind with only a little bit of line. Once the wind catches it they’ll need to stop and let out more line.

    The best way to get your kite in the air is to stand with your back to the wind, hold the line in one hand, hold the kite up in the other (with the nose pointing straight up). Let the wind catch the kite then let go. Don’t throw it into the air, just gently release it into the wind and let line out as the wind lifts the kite. If the wind lulls, pull the line in tight to make your kite gain altitude.

    You could also let your child hold the kite about fifty feet away. Pull the line tight and signal to them to release it. Take a few steps backwards and the kite should shoot up into the sky, just like if you were running.

    Feature image credit: @sixdegreesofchaos

    Tips for keeping your kite in the air

    Each different style of kite (design, size, shape, and material) will need different amounts of wind for successful flying. If your kite is new, try checking the package for wind recommendations. If that’s not an option, the best way to figure it out is through trial and error! You might have to try a few different times or locations to find the best wind for successful flying.

    However, once the kite is flying high and smoothly, keep the string at a comfortable tightness and it will not be hard to keep it flying. If the string is too slack, reel some in. If the kite pulls hard, let some additional line out.

    Feature image credit: @wildlyraised

    How to bring your kite down

    When you’re finished flying the kite, simply wind the kite string around the spool or handle while walking towards it to bring it in. Remind your child to wind up the string slowly and carefully so it does not get tangled or knotted. Easy peasy!

    Feature image credit: @sara_mccarty

    Kite flying tips & tricks

    • The perfect length – Don’t let out too much line. It’s hard for people to see and enjoy if a kite gets too high. If your flying line becomes slack, bring in a little. If the kite begins to pull too hard or act unstable, let some line out.
    • Teaching about turbulence – Turbulence is an irregular motion of the air resulting from eddies and vertical currents. Sometimes, as the wind goes around objects (trees, buildings, hills), it causes turbulence. Other times, turbulence might be in the form of updrafts over pavement or barren places and downdrafts over vegetation and water. As you’re kiting, you might feel your kite get bumpy. If you find this phenomenon, it’s a fantastic learning opportunity for children. 
    • Come up with challenges – If your child likes a good challenge, there are definitely ways to make kite flying more interesting. Challenge your kid to see how quickly he can get the kite in the air or if he can get the kite to dive and soar. When it’s time to leave, challenge your kid to bring the kite in without letting it touch the ground. He’ll have to pull it in quickly to keep it airborne.

    Feature image credit: @eliza.flaska.mi

    Have you flown a kite with your kids?
    What kite flying tips do you have?