get outside cape cod

  • Fall Hiking with Kids: Tips, Tricks, Activities & Snacks

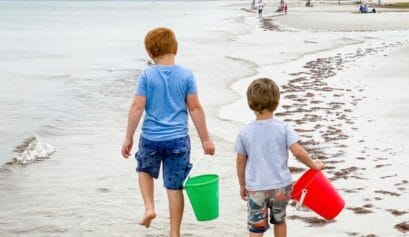
    Fall is such a magical time to get outside and hit the trail! As the crisp autumn air sweeps through the colorful leaves, there’s no better time to embark on an outdoor adventure with your little ones. Fall hiking with kids gets your kids outside, active, having fun, and creating lasting memories that will be cherished for years to come. In this post, Lissy Perna, Cape Cod mom of two, explores the wonders of fall hiking. She’s got some valuable tips on how to keep your young explorers motivated, engaged, and excited on the trail with hiking activities, tips, and the best fall hiking snacks! 

    Fall hiking with kids

    Hiking is our favorite family outdoor activity year-round, but our favorite time of year to go on nature hikes is definitely the Fall. We live in New England, so the natural changes of the season are so pronounced, and it’s a cooler and quieter time to get outside. The changing colors of the leaves make our hike feel like we’re walking through a postcard. The cool, crisp air is refreshing after a hot summer. 

    Would you like to experience fall hiking with your kids? Well, keep reading because I have a few tricks to make your adventures safe and fun for all!

    Picking a trail for your fall nature hike

    Are you in a rut, hiking with your kids on the same nature trail every time you explore? Are you ready to make hiking feel exciting again for your kids? While re-hiking the same route has benefits, sometimes it’s nice to explore a new-to-you location! Hiking in a new location opens all kinds of possibilities and exciting finds for kids. Not knowing exactly what to expect can be part fo the fun (especially for older kids).

    I have a few methods for finding new hiking trails near us: (1) using the All Trails app (they have a free version!), (2) checking out local Land Trust websites, and (3) visiting the nearby town’s natural resource department web pages. These resources will usually have a list of any local trails they own and maintain. Sometimes, these pages will have trail maps, lengths, and even a description of what to expect in the area.

    Another idea is to check out your local library or bookstore for hiking guides. Where we live on Cape Cod, there are so many! None of them were necessarily geared toward families, so I ended up writing my own. It’s called “50 Cape Cod Hiking Trails” and is available at local shops and on Amazon, too!

    Trail sign.

    What to pack for fall hiking with kids

    It’s always best to be prepared when hiking with kids, no matter the season. We bring a hiking bag filled with what we’ll need every time we go out on a trail. Usually, our little nature walks are under three miles, so we don’t need much, but it’s better to be safe than sorry. Sometimes, my kids bring their own backpacks or fanny packs, but generally, they want me to be the pack horse, and I’m okay with that, too!

    Here’s a list of the essentials we keep in our bag:

    • First aid kit – you can find these at most grocery stores, pharmacies, or sporting goods stores. I also recommend keeping one in the car at all times as well.
    • Bug spray– we almost always spray our shoes and clothes before heading out on a trail, but I bring it along in case we need a refresh.
    • Baby wipes – we use these before we eat a snack, if someone has an emergency bathroom break, or for sticky encounters such as slugs, sap, or mud puddles!
    • Tecnu wipes – these are wipes used if you come into contact with poison ivy. I highly recommend them if this noxious plant affects you or your kids.
    • SNACKS! – a must-have with doing absolutely anything with kids. More on this essential below. 
    • Wet bagthese reusable, washable bags are a lifesaver. I use them for any trash we accumulate or soiled or wet clothes. The snap loops on the packs are great for attaching to your backpack.
    • Water– our backpack has water bottle holders on each side. I like to bring our reusable water bottles along on any trail we walk.

    For more info on what to pack when hiking with kids, see our full post on the 10 Essentials for Hiking with Kids

    Me with my hiking backpack

    What to wear when fall hiking with kids

    With the change in season comes cooler temperatures, so it’s best to dress appropriately. Layering is the key to comfortable dressing in the fall! You can always shed or add layers to adjust as temperature changes or you warm up (or cool down) on your hikes.

    On warmer days, we still wear a single-layer shirt, but bring a sweatshirt or light jacket. On colder days, wear an additional coat over a sweater or sweatshirt. When choosing hiking shoes, I always opt for closed-toe waterproof shoes or boots if it has been raining lately or if the trail we are walking has a pond or beach nearby. Wool socks are always my go-to, as they keep the feet warm and dry.

    We also keep a set of clothes and shoes in the car at all times in case we need to change after our hike, as oftentimes, we’re hiking near water and it’s inevitable that the kids will get wet and/or muddy. 

    Check out our full post on the best hiking shoes for kids

    Bundle up for fall hiking.

    Tick prevention while hiking in the fall with kids

    While you may encounter fewer mosquitoes and gnats while hiking in the fall, ticks can still be active during this season. If you live in an area where ticks are prevalent, it’s a smart idea to wear bug spray or take other precautions. All-natural bug sprays exist, but we chose this brand as it works great. If you aren’t into using bug sprays, you can take other precautions like wearing light colors, long sleeves and pants, hats, and tucking your pants into your socks. As always, make sure to do thorough tick checks after every hike.

    Fall hiking with kids.

    Activities for your fall nature walks with kids

    While simply walking through the woods in the fall with your kids, breathing in that fresh air, and getting some exercise can be fun enough for most people, sometimes our kids need a little more motivation to keep their feet moving down that trail. With an arsenal of activities at the ready, your kids will be excited to go on your next Fall hiking adventure. Here are some ideas for what works for my family. Hopefully, these fun hiking activities will work for your family, too!

    1. Add wheels! 

    You might think scooting or biking down a paved pathway through a park or wooded area isn’t hiking. And you may be technically right. But, it still involves moving your body, enjoying nature, and being outside, which counts as a hike in my eyes! (Plus, I’m still hiking, as scootering isn’t quite my thing.) 

    My boys love to visit our local state park, Nickerson State Park. There are miles of paved trails that wind through hilly woodlands. It’s a beautiful spot to explore, and the boys love bringing their scooters, skateboards, or bikes along for the adventure. If you have access to paved trails around you, break out some wheels and let them go at it! It’s a whole different way to explore (and burns a ton of energy!). 

    Biking on the path.

    2. Hike with friends

    What is more fun than a fall nature hike? A fall nature hike with friends!

    We have a group of friends that try to walk weekly, with children aged two to ten. We pick stroller-friendly walks so the little ones can take a ride if they need a break. The older kids have fun running ahead and playing together. It is an excellent exercise for us moms and gives us time to catch up with one another.

    If you’re interested in getting a group together for hiking or just an outdoor play date, consider creating a hiking club with friends or other families in your neighborhood! Here’s a great resource about how to get started organizing an outdoor playgroup

    Hiking with friends.

    3. Fall leaf activities for kids

    Walking in the woods during this time of year is dreamy – crisp, cool air, bright sunny days, and leaves crunching beneath your feet. The leaves are so colorful and pretty this time of year; why not use those leaves for activities once you get home?

    While out on your hike, have your kids collect leaves along the path for activities back at home.. (Who said the fun had to stop once you leave the trail.) Start with something fun and easy, like crayon rubbings. Just lay a dry leaf on a flat surface, cover it with paper, and rub the side crayon over the leaf. The result will be an artistic copy of your leaf treasure!

    Try with different species of leaves, cut them out, and create a garland. Or, keep your leaves to make a leaf crown. Preserve the leaves by dipping them in beeswax and using them for home decor. Whatever you don’t use, just toss back outside once you’re done! Who knew fall hiking with kids could be so fun?

    Check out our full post filled with fall leaf activities for kids

    Leaf piles!

    4. Fall hiking scavenger hunt

    Scavenger hunts are an excellent activity for kids of all ages, are low-cost (or even free), and can be done nearly anywhere (including the hiking trail). They keep kids motivated to continue along the trail to check their finds off the list. 

    Scavenger hunts are easy to find and/or create. We have a free downloadable Scavenger Hunt Bundle for Kids that has scavenger hunts for all the seasons and various locations and celebrations. 

    If you choose to make your scavenger hunt, you can include items that are native to where you’ll be hiking and what’s going on at this particular time of year. You can include items such as a red leaf, a giant boulder, a wooly caterpillar, a tree with no leaves, ice (if your autumn is extra chilly!), acorns, seed pods, etc. The possibilities are endless.

    You can print a paper scavenger hunt or use an iPad or phone to track your findings!

    mushroom scavenger hunts.

    5. DIY hiking sticks for your fall hike

    One of the best DIY activities I’ve done with my kids is to make our own hiking sticks! It’s a pretty simple activity, once you’ve gathered your tools and supplies. All you really need is the perfect-sized stick (this can be your kids’ mission to find when out hiking), and a few colorful accessories like ribbons, string, bells, or paint.

    Once you’ve made your hiking stick, you can keep it in the car to bring it on all your fall hikes with your kids! They will be proud of their creations, which help hike uneven terrain! Also, I love a good craft project using found items in nature, don’t you?

    Here’s the full tutorial I wrote on how to make your own hiking sticks with kids

    Hiking sticks.

    6. Make a fall mandala

    What’s a mandala? According to Wikipedia, “A mandala is a geometric configuration of symbols. In various spiritual traditions, mandalas may be employed for focusing the attention of practitioners and adepts, as a spiritual guidance tool, for establishing a sacred space, and as an aid to meditation and trance induction.” 

    In its simplest form, a mandala is a circular structure with a design that radiates out symmetrically from the center. You can find natural mandalas in flowers, tree rings, the sun, eyes, snowflakes, spider webs, sea shells, seeds, fruits, and more. There is no right or wrong way to make one which is why it is such a wonderful way to engage children to make their own mandalas using items they find in nature.

    Create your mandala by collecting items along your hike, such as leaves, acorns, twigs, shells, or rocks, and assemble your mandala. It’s best to find a smooth, flat surface to construct your nature-themed mandala. You’ll be surprised how beautiful these creations turn out. Be sure to take a photo, as you can’t bring your art home!

    Shell mandala.

    7. Bring your pet on your fall nature walk

    Do you have a four-legged friend who loves the outdoors, too? Consider bringing your pup along on your next fall hike! Not only will this keep the kids entertained, but everyone will get extra exercise and fresh air! 

    Dogs love to spend time with you and enjoy all the sights (and smells!) in the woods. Just remember to follow guidelines for dog leashing and dog waste for the trail you choose. Also, your dog might get thirsty too. We like this collapsible bowl, as it’s a space saver and convenient to keep in our hiking backpack.

    Dogs like hiking too.

    8. Let your child lead your fall hike

    A fun way to get your kids excited about hiking is to give them control! Kids rarely feel like they get to be in charge, so this is a fun way to hand over the reins on your next fall hike and let them make some decisions. Start by letting them choose which trail you’ll hike. Give them control of packing what you’ll need for the hike and which snacks to pack (with supervision, of course). Once you get to the trail, let them find the trailhead, lead the way, and decide to take a left or right, and when to stop for a snack break.

    My boys enjoy taking turns being the leader, and they thrive when they control our adventure. I think it’s great practice for them to make decisions and think about their actions. I hope this trick works for your family, too!fall hiking tips and activities for kids

    9. Take a fall hike at night

    The sun is setting earlier this time of year, and it may be cutting into your outdoor time. Let’s take advantage of the earlier darkness and take a night hike! Star-gaze, take a flashlight hike, or even go owling!

    • Star gazing: Take a walk outside on a clear night, preferably away from street lights. Check out the stars above and see if you can identify any constellations or plants. Bonus points if you catch a shooting star!
    • Lantern/flashlight hike: We like to do lantern or flashlight hikes on trails we are already familiar with, so we know what to expect regarding terrain and trail layout. Bring along a flashlight to light the way. Trust me, it is so fun! 
    • Owling: Owling is when you go out at night to look and listen for owls. If you have a nature preserve near you, check to see if they lead owling walks; it’s a great introduction to this activity. If not, go for one on your own. Just remember, avoid using flashlights, and stay quiet. Going on a non-windy night is best so the wind won’t obscure the owl’s sounds. Before you head out owling, look at photos of owls local to your area and listen to their calls.

    Check out our full post all about Owling with Kids.

    fall lantern hike with kidsPhoto credit: @raising_little_naturalists

    Best fall hiking snacks for kids

    As parents, we know that snacks are an essential part of every day for our kids. It’s no different when you’re going out on a trail! Bringing enough snacks is the key to success for any activity with kids!

    Here are some shelf-stable snack ideas for you to tote along and make your fall hiking adventure successful:

    • Trail mix
    • Granola bars
    • Dry cereal
    • Clementines
    • Apples
    • Bananas
    • Beef sticks/jerky
    • Peanut butter and crackers
    • Popcorn
    • Dried fruit
    • Apple sauce pouches

    Pro tip: You can use that wet bag in your hiking backpack to hold the waste from your snacks until you return home to dispose of it!

    For more, check out our full post on trail-tested and kid-approved hiking snacks.

    Snacking while hiking.

    Fall hiking books for kids

    I always like to recommend books that will support the information shared in my posts. The following books can be found at most bookstores and libraries; I hope you check them out!

    Kids leading the hike.

    Fall hiking with kids

    As you lace up your hiking boots and get ready to explore the trails with your little ones this fall, remember that the beauty of the season goes beyond the colorful leaves—it’s in the shared laughter, the time spent outside together, and the connection you made during your hike. Embrace the magic of the season, using the activities and ideas in this post to make your fall family hikes truly special. 

    I hope this information was helpful and got you motivated and excited to explore some hiking trails with your children this Fall. Now, get out there and explore! Happy hiking!

    About the author

    Lissy lives near the ocean on Cape Cod, Massachusetts, with her husband, 2 rambunctious boys (aged 4 & 7), and an ever-growing number of pets. She grew up walking nature trails and finding joy in the beauty of nature. She now shares that love for local adventures with her community through her blog, “Get Outside Cape Cod.” Lissy knows that everyone can benefit from spending more time outdoors and wants to inspire and support families to do just that!

    You can find more from Lissy in the following online locations:
    Instagram: @getoutsidecapecod
    Website: Get Outside Cape Cod
    Facebook: @getoutsidecapecod
    RWMC Posts: Lissy Perna

  • Exploring Tide Pools on Cape Cod

    Nestled along the picturesque shores of Cape Cod, Massachusetts, lie an abundance of tidal habitats that beckon curious explorers of all ages. From sandy beaches to rocky outcrops, these captivating tide pools serve as an open-air classroom where kids can immerse themselves in nature’s wonders while fostering a lifelong love for the environment. Today, Lissy Perna, Cape Cod mom of two and founder of Get Outside Cape Cod, is here to help you and your kids explore the beauty of the tidepools of Cape Cod. 

    Exploring tide pools on Cape Cod

    Have you ever explored a tide pool with your children? For the kids living here on Cape Cod, it is as common a pastime as going to the playground. These miniature underwater ecosystems, teeming with fascinating marine life and hidden treasures, offer an incredible opportunity for discovery, learning, and unforgettable family adventures.

    As you embark on this enchanting journey with your children, you’ll witness their eyes light up with excitement as they uncover a wealth of marine creatures, from scuttling hermit crabs and colorful sea stars to elusive octopuses and vibrant anemones. While they may start off merely observing, their natural curiosity will soon drive them to ask questions, investigate further, and engage in hands-on learning experiences that ignite their sense of wonder.

    So, if you are planning a visit to Cape Cod with your children, make sure to add tide pool exploration to your bucket list. Don’t worry; I’ll give you all the insider info about having a successful tide pool exploring excursion that you need to make your adventure a success! 

    Why should you explore tide pools with your kids?

    What is better than a day at the beach? Splashing in the salty waves, building epic sandcastles, and perfecting your boogie-boarding skills are great ways to spend time in the sun. But, if you visit the beach at low tide, you’ll be amazed by what you can find! And your kids may become obsessed with this new activity at the beach! As the ocean tide recedes, giant puddles of water appear and teem with sea life. Crabs, worms, fish, and eels can be found if you investigate. This activity is a perfect hands-on learning experience for children and adults alike! 

    Beyond the joy of discovery, exploring tide pools also offers a chance to educate your children about the delicate balance of our ecosystems and the importance of environmental stewardship. As they witness the interplay between different species and witness firsthand the effects of tides and currents, they’ll gain a deeper understanding of the interconnectedness of all living things and the need to protect and preserve these fragile habitats.

    Moreover, this outdoor escapade provides a golden opportunity for families to disconnect from the digital world and reconnect with one another. As you huddle together, searching for hidden treasures or sharing stories of your own childhood adventures, the bond between parent and child strengthens, creating memories that will be cherished for years to come.

    So, whether you’re a Cape Cod local or planning a family vacation to this idyllic destination, take a break from the usual tourist haunts and venture into the realm of tide pools. Equipped with a sense of wonder and a willingness to learn, you’ll embark on a remarkable journey where curiosity and joy merge, fostering a lifelong appreciation for the natural world. Let’s dive into the magical world of Cape Cod’s tide pools and discover the endless possibilities that await your family in nature’s captivating classroom.

    What’s unique about the tide pools on Cape Cod?

    The tide pools in Cape Cod possess a unique charm that sets them apart from other coastal regions. Cape Cod’s tide pools showcase an impressive biodiversity of marine life. From tiny hermit crabs and sea stars to elusive seahorses and fascinating sea slugs, the tide pools of Cape Cod offer a rich tapestry of species to discover. The variety of habitats, including rocky outcrops, sandy stretches, and tidal flats, contribute to this remarkable biodiversity. Each location offers its own set of geological features and ecological characteristics, providing a diverse range of exploration opportunities.

    Cape Cod is renowned for its annual migrations of marine creatures, including horseshoe crabs and shorebirds. During certain times of the year, tide pool explorers may witness these fascinating natural phenomena as thousands of horseshoe crabs gather to spawn, or flocks of shorebirds feed along the shoreline. Such spectacles add an extra layer of wonder and excitement to the tide pool experience.

    In addition to the abundant marine life, Cape Cod’s tide pools boast breathtaking natural beauty. The rugged coastline, picturesque beaches, and dramatic rocky formations create a stunning backdrop for exploring the tide pools. The serene atmosphere and stunning vistas make every visit to the tide pools of Cape Cod a truly memorable experience.

    These special and unique characteristics of Cape Cod’s tide pools make them an exceptional destination for families to connect with nature, learn about marine life, and create lasting memories while exploring the captivating intertidal world.

    Best tide pools on Cape Cod for kids

    Here on Cape Cod, specifically in Brewster, the exposed sand left after the tide recedes is called “the flats.” This expanse of the ocean floor is the largest in North America! You can walk over a mile into Cape Cod Bay at dead low tide. But, if you can’t make it to Brewster, plenty of other Cape Cod towns have tide pools worth exploring. 

    Great beaches for tide pools on Cape Cod

    • Crosby Landing, Brewster
    • Thumpertown Beach, Eastham
    • Skaket Beach, Orleans
    • Town Neck Beach, Sandwich
    • Gray’s Beach, Yarmouth
    • Corporation Beach, Dennis

    You may notice these beaches are all on the north side of Cape Cod. We have found that the tide is much more extreme on the north side, so there are more tide pools! *Bonus, these beaches also tend to have calmer waves for your younger children to swim safely. 

    Does it cost money to go to beaches and tide pools on Cape Cod?

    It depends on when and where you go. There are fifteen towns on Cape Cod, and every town has different rules and regulations for its beaches. Please check the town’s website to see if you can buy a beach pass for the day or if you need a pre-purchased beach sticker or pass. Sometimes, your luck might be that low tide is before or after the time of day that a beach pass is required. Another option is walking or cycling to a beach to avoid paying the fees. 

    Checking the tide

    Once you’re ready to go on a tide pool exploring adventure and have chosen your location, it’s time to check the tide! When you visit the beach, it’s essential to be there at low tide or an hour or so before and/or after. The tide changes from high to low every six hours and varies about 45 mins daily, so the easiest way to check what the tide will be is to look at a tide chart. Some local businesses carry paper ones, and we always head to the Brewster General Store to pick one up. It stays posted on our fridge all summer long. Furthermore, another way to check the tide is by looking online. So, here is the most accurate website I’ve found.

    What to wear to explore tide pools on Cape Cod with your children

    When you want to go on a tide pool exploration, it’s wise to be dressed appropriately. Bathing suits or water-repellant clothing is the best option; you’ll surely get wet when exploring a tide pool! One thing my children often wear, and I recommend, is water shoes with a rubber sole, or even shoes like Crocs. This way, you can climb over rocks, sometimes covered with sharp barnacles, without injuring your feet. When we explore tide pools in the colder weather (beach season is year-round when you live on Cape Cod!), my children wear their waders or insulated boots for extra protection and warmth.

    Another item to consider wearing is a wide-brimmed hat. There isn’t any shade on the flats, so sun protection is essential! Also, a fun extra item that isn’t necessary would be polarized sunglasses. The polarization makes it easier to view the sea life under the water. Also, they provide additional protection for your eyes! If you wear sunscreen, please consider using a mineral-based and reef-safe brand. The chemicals used in many regular sunscreens harm coral and possibly other sea life. 

    Supplies for exploring tide pools with children

    Honestly, you don’t need any toys or supplies on your tide pool adventure. There have been many impromptu visits to the beach with my children when they didn’t bring anything. They used sticks, shells, rocks, and pieces of driftwood to entertain themselves.

    However, if you are to bring anything, this is what I recommend: 

    • bucket for collecting treasures
    • shovel for digging in the sand or picking up a crab
    • net for catching minnows or sand shrimp
    • field guide for identifying what you discover

    You can also use items you already have in your home! Bring a Tupperware container as a bucket, a large serving spoon as a shovel, or a sieve as a net! Just remember, glass items on the beaches are not a good idea!

    And, as always, for any adventure, I’d recommend always packing some snacks and water bottles to keep your kids fed and hydrated. You may also consider bringing a waterproof camera or a smartphone in a protective case to capture memories without risking damage.

    What creatures will you find while exploring tide pools on Cape Cod?

    The wonder of nature is that it is wild and unpredictable. This rule applies to tide pools on Cape Cod as well. Even after a lifetime of living on Cape Cod and regularly visiting tide pools, I still find species I never noticed before. I am constantly surprised by what I discover. So, here are some of the most common things you may find while exploring tide pools on Cape Cod:

    • Hermit crabs – these small crabs inhabit the empty shells of other creatures, such as periwinkles, mud snails, or moon snails. They are found abundantly in tide pools and can range in size up to two inches. 
    • Asian shore crabs – this type of crab is an invasive species. They are commonly found burrowed underneath rocks in the shallow tide pools.
    • Lady crabs – this type of crab is a fantastic swimmer. Beware, they are quite defensive, and their pinch is a little bit painful.
    • Bloodworm – this type of sea worm has a translucent body, and you can see its reddish bodily fluids through its exterior. 
    • Decorator worm – this type of worm forms a protective casing over its exposed body. They construct it with bits of shell, sand, and seaweed.
    • Ice cream cone worm – this type of worm creates a thin layer of sand around its body in the shape of a cone, hence the name.
    • Scallops – the ones you will find on the beach are bay scallops, and they are smaller than the ones found in the deep ocean. These bay scallops have dozens of small blue eyes if you look closely!
    • Oyster – this white shelled mollusk can be found in the bay on Cape Cod. They are known to produce pearls!
    • Quahog – this hard shell clam can range in size from millimeters long up to 4 inches. 
    • Sand shrimp – this light colored small shrimp can walk on the ocean floor with their small front legs.

    Tide pool etiquette

    Don’t worry, there aren’t many rules associated with playing in the tide pools, but a few are for your child’s safety and the safety of the living creatures you may encounter. We want you to encourage your kids to interact with the tide pool environment in a safe manner (for both your kids and the wildlife). 

    Try not to touch and only pick up what you can identify

    Try to teach your kids to observe and appreciate marine life without touching or disturbing it. I know this can be really hard! Kids learn by touching, but sometimes touching or picking up creatures can harm them or their delicate habitats. Encourage them to use their hands only when necessary, and even then, they should handle the creatures gently and with wet hands to avoid injuring them. Be sure to only pick up or touch what you know cannot hurt them (or hurt the thing you’re touching). You want to be sure that the creature can’t harm your child. A few types of worms have pincers, and they pack a punch with their bite!

    Leave no trace

    Emphasize the importance of leaving the tide pool area as they found it, without leaving any litter behind. Be sure to keep the creatures in their homes and take nothing and leave nothing. Remind your kids that tide pool creatures belong in their natural habitats. It’s important not to remove any animals, shells, or rocks from the tide pools. Explain that these creatures play vital roles in the ecosystem, and disrupting their environment can have negative consequences. This rule also applies to any rocks you turn over or other items you move in the tide pools. Show kids how to carefully turn over rocks to discover hidden creatures, but put them back exactly where they were. 

    Be gentle and mindful

    These creatures you find are small, but it doesn’t mean they are insignificant. Encourage your kids to be aware of their surroundings and to step carefully to avoid crushing or damaging marine life. Remind them to stay on the rocks and sandy areas, and to avoid trampling on seaweed or fragile plants.  Please remind your children to be gentle!

    Places to visit to learn more about sea life on Cape Cod

    After exploring the tide pools and beaches of Cape Cod, you should learn more about what you’ve found and other marine animals! Here are some places on Cape Cod that are worth the visit:

    Recommended books for learning about tide pools 

    Are you ready to go explore tide pools on Cape Cod?

    About the author

    Lissy lives near the ocean on Cape Cod, Massachusetts, with her husband, 2 rambunctious boys (aged 4 & 7), and an ever-growing number of pets. She grew up walking nature trails and finding joy in the beauty of nature. She now shares that love for local adventures with her community through her blog, “Get Outside Cape Cod.” Lissy knows that everyone can benefit from spending more time outdoors and wants to inspire and support families to do just that!

    You can find more from Lissy in the following online locations:
    Instagram: @getoutsidecapecod
    Website: Get Outside Cape Cod
    Facebook: @getoutsidecapecod
    RWMC Posts: Lissy Perna

  • Best Outdoor Toys for Boys & Girls

    We all know how good outdoor playtime is for kids. Running, jumping, swinging, throwing, and especially using their creativity and imagination are imperative for their physical and mental development. Outdoor toys can spark their imagination and get them excited to play. Also, we all want to get them off cell phones and cut back the screen time! Today, Lissy Perna, Cape Cod mom of two, is here sharing some of her kids’ favorite outdoor toys. So, whether you’re looking to build your backyard oasis or just for a birthday or Christmas gift for an outdoorsy kid, check out our list of the best outdoor toys for boys and girls.

    Most popular outdoor toys for boys & girls

    We all want what’s best for our kids, so we made a list of the most popular outdoor toys for boys and girls. These toys have been tried and trusted by kids of all ages and received high praise from parents and kids alike. Any of them would make a great gift for that outdoorsy kid on your list. 

    Dome Climber: This jungle gym for kids is dome-shaped and has the option of adding a swing to the center. Another great creative way to utilize this toy is to add a tarp over the top to make a tent! Add some twinkle lights and you’ve got an igloo young kids can play in during cold winter months. While it is a wonderful outdoor toy for kids to climb, be advised that it takes a few adults and some patience to assemble. 

    SwurferThink surfboard meets skateboard meets swing. The Swurfer is a plank-like board suspended from ropes you attach to a tree limb. There are handles to help you maneuver this swing while standing on the plank. It is fun, and compound movements benefit a child’s physical development. Would make a great gift for any kid into surfing, skateboarding, or snowboarding. 

    Kiddie Pool: A kiddie pool, whether you have an inflatable one or a hard plastic one, can be used for more than just backyard splashing and soaking. It’s a fun way to cool off on a hot day. Or, fill it with sand, and use it as a sandbox; take it to the beach and set it up under a pop-up tent for your toddlers. This multi-function outdoor toy is a must-have for any household with kids. 

    Slackers NinjaLineThis ninja slackline obstacle course is fantastic if you’re short on outdoor space, but your kids are not short on energy! Kids can test their ninja skills with ten obstacles, providing them with a tremendous athletic challenge. The equipment is easily set up between two healthy trees or posts, and they will be ninja warriors in no time! 

    Stomp RocketsDo you remember these foam rockets from your childhood? They are still popular outdoor toys for boys and girls alike. Children can play with them on their own or create a competition to see who can blast their rocket the highest with a friend or sibling. One thing to mention is that it is best to play with this toy out in the open, not near trees or your house. Losing all your rockets to the treetops won’t be very fun!

    Sandboxes: Sandboxes are fantastic outdoor toys for boys and girls of all ages and would make a great outdoor gift. Toddlers are happy to sit in the sand and scoop with their hands or little shovels, and older kids can get creative in what they make with the sand. The key to this toy is to purchase one with a cover. Or I have even seen parents set up a sandbox inside a small tent. This cover will prevent other debris from getting into the sand and deter animals from using it as a litter box.

    Tonka Trucks: Your child might already be truck obsessed, but these near-indestructible vehicles are fun for all, even if they aren’t! Fill them with pinecones, dirt, or sticks, or have races with a sibling or friend. The metal construction and rugged design have made these toys last for years. We have a joke in our family that my boy’s Tonka trucks have 300,000 miles on them.

    Walkie-Talkies: Walkie-Talkies are the perfect gift for outdoorsy kids and can be used by the entire family. Walkie talkies can be used inside or outside, but my boys have so much fun with them outdoors. They play hide-and-seek with them or pretend they are on “secret missions.” We brought ours on a camping trip last summer, and this outdoor toy became a functional tool for keeping track of each other on the campground. One thing to note about these toys is that you want to store them inside to avoid damage. 

    Trampolines: Trampolines come in all sizes nowadays and make a great addition to your backyard. Sizes range from miniature ones with a handle for toddlers to massive ones that even adults can enjoy. One thing they all have in common, they are a great way to burn some energy! The large ones take time and patience to assemble, so keep that in mind if you pull the trigger and purchase one. 

    Little Tikes slide: This slide is great for toddlers, but my boys used it well beyond their toddler years. They used it not only for climbing and sliding but for sliding into an inflatable pool and racing matchbox cars down the slope!

    Power wheels: Motorized, rechargeable cars that kids can ride are so fun and make really fun outdoor gifts for outdoorsy kids! They are made for most ages, from toddlers to big kids, and have every design you could think of, from Barbie Jeeps to Land Rovers. Kids love being in control of a steering wheel and honking the horns! Be on the lookout for these on swap pages – you can usually get a second-hand car at a fraction of the price and just update the battery. 

    Splash pads: If you’ve ever been to a community splash pad, you know how fun they can be! You can buy smaller versions that connect to your garden hose, which are bound to impress your kids! 

    Balance bikes: Try a balance bike before your child is ready to take off on a two-wheel bicycle or even a big kid bike with training wheels! These bicycles are such fantastic outdoor toys and provide the child with the basic skills to build on to successfully ride a bike on their own. Also, They are often adjustable, so as your child grows, so does the bike! Remember to instill in your child that they should wear a snug-fitting helmet whenever they get on their bikes. 

    Bounce house: If you want to go all-out crazy with action, a bounce house is a HUGE hit for any outdoor play space. It’s a bit of an investment, but it’s guaranteed to be a big hit and keep your little ones jumping and happy for hours at a time. Many bounce houses can be used both indoors and outdoors, so if you have a large enough space inside, it can be used year-round. 

    Ride-on Dig Cranes: If you have kids like my two boys, they might be obsessed with big trucks, construction equipment, and having their own “job sites” at our house. These ride-on dig cranes turn your kids into operators and would make great holiday gifts. Your kids will have a blast digging in the dirt or sand for hours of outdoor fun. I’ve even seen parents bringing these mobile toys to the beach; what a fantastic idea! 

    Wagon: Don’t underestimate a solid wagon for outdoor play! You can give your kids rides around the yard, and as they grow older and more robust, they can give each other rides. They are also helpful for parades, trick-or-treating, or walks around the neighborhood!

    Water Tables: What is more fun than water play on a hot summer day? A water table is easy to contain and an attractive toy for kids to play outside. Just fill it with water from the hose and let your kids loose with their imagination. My boys have even used their water table in the winter once the water freezes!

    Yard games for boys and girls

    Card and board games are great options for playing in your living room, but what about the outdoors? Here are a few options to get your kids outdoors and excited about playing together! 

    Cornhole: Cornhole is a fun outdoor game that people of all ages can enjoy. It’s popular to play on the beach and at barbeques with friends. Children’s versions are collapsible and easy for kids to set up. This outdoor toy is an interactive competitive game that allows your child to participate in healthy competition, all while practicing and improving their coordination and throwing skills. 

    Oversized Jenga: Jenga is a relatively easy game to teach young children, and most people enjoy it even as they get older. These giant wooden blocks make the game even more fun, and you don’t have to worry about knocking your furniture around or denting your floors when you play outside!

    Lasso golf: This game is played in teams to score 21 points first! It promotes competition and accuracy and is easy to set up and break down to store. 

    Ring toss: When I think of ring toss, I imagine playing at a carnival. But there are at-home versions that are perfect for playing outside. The game is easy for any age to play and understand, and your kids can practice eye-hand coordination.

    Croquet: Yes! People still play croquet, and not just your grandma’s friends. This game is an excellent addition to your backyard game’s repertoire and is fun to set up for a barbeque with friends. 

    Best outdoor toys for boys and girls for the beach

    If you’re lucky enough to live near a body of water or even have a backyard or community pool, here are some toys you can use next time you go for a swim.

    Kids kayaks: These kids’ kayaks are lightweight, durable, and not easy to tip over! Designed to meet the needs of youth, including front storage and a convenient cup holder so your child can easily switch from paddling near the dock to that all-day adventure. Comes with a padded slip-resistant seat, swim-up deck, paddle rest and stable hull design with great maneuverability and steady tracking. 

    Foam squirt guns: We know water guns are a hit with kids, but they are so easy to refill that even toddlers can do it independently. They are also lightweight and pretty inexpensive! Bring them to the beach, or use them in the backyard with a bucket of water for refills.

    Diving toys: Kids love a challenge, and practicing with these dive toys are a great way to hone their skills in the water while still having fun!

    Boogie boards: These boards can be used to float around and kick through the water, but my boys have used them as floating tables, placing their dive toys or rocks and shells they find on the ocean floor on them.

    Collapsable buckets: These are great space-saving options for buckets. They are sturdy and ready to make sandcastles, collect frogs, or be water transporters!

    Fishing Poles: If you live in an area that allows for fishing, check out these kids’ fishing poles. Younger kids may need some assistance from an adult, but as they age, this is a great hobby to encourage that independence!

    Inexpensive outdoor toys for boys and girls

    While there are so many outdoor toys for boys and girls to choose from, some of them have hefty price tags. Check out this list of toys you can find at the dollar store. They are relatively inexpensive, and children of all ages will enjoy them. 

    Sidewalk Chalk: Combine your child’s love of creating art with the outdoors! If you have asphalt to draw on, great! But we have also used sidewalk chalk to color rocks or leaves.

    Jump ropes: Jump ropes are inexpensive, easy to store, and provide hours of fun! Once your child gets the hang of simple jumps, there are many tricks to learn!

    Wooden planes: You may remember wooden plane kits from your childhood. However, they still make these little sets and are just as fun for our kids. Folding your paper planes can make this activity even less expensive!

    Bubbles: Who doesn’t love bubbles? There are many ways to play with them, and they come in different forms. Our favorites are the bubble wands. Pro-tip – tape the bubble container to a tree or table leg outside so the kids don’t spill all the bubble solution at once!

    Water balloons: Water games are always a good idea in the summer. You can purchase a pack of water balloons for only a couple of dollars, and it’s an excellent activity for a birthday party or even a fun activity on a warm day.

    Balls: This may seem like a no-brainer, but those big rubber bouncy balls you can find at the dollar store provide hours of fun. Watch as your child comes up with their games involving the balls, or start a kickball game with the whole family.

    Yoga mat: Do you have a tiny yogi on your hands? Bring that yoga mat onto the porch, patio, or grass, and practice “child’s pose” with your kids!

    Magnifying glass: Plastic magnifying glasses are perfect for little hands to get a close-up look at the world around them. Look under logs, at bugs, or even a flower bloom. 

    Squirt bottles: This multi-purpose item can be filled with water and used outside for open-ended play. While it may not be exciting initially, kids will love spraying down their toys, the garden, or even each other!

    FREE outdoor toys for boys & girls

    Yes, you read that right! There are hundreds of toys for kids to play with outside, and you can find them all in nature. 

    Sticks: A stick can be a magic wand, a baseball bat, or a tool for writing in the sand. It can be something your child collects to make a fort or something to paint on to create a personalized hiking stick. 

    Water: Water is simple, but it can be used for many activities. Let the kids use the hose and make mud pies and stone soup with a bucket, dirt, stones, pinecones, and water. Or, with a younger child, fill a shallow pan with water and let them splash. 

    Leaves: Use leaves to make a leaf crown, attaching them to a paper strip and placing them on your head. You can also do leaf rubbings by putting a leaf under a piece of paper and rubbing the top of the paper with the long side of a crayon. Make a leaf man after reading the book Leaf Man!

    Clouds: Lay on your back on the grass or a sleeping bag and watch the clouds. You can talk about the job clouds have with your older children, or look for animals or objects in the shapes of the clouds with their younger siblings. 

    Make a nature shelf: This can be an outdoor activity for the whole family. When you play outside, or go on a nature walk, collect little rocks, shells, feathers, or whatever else catches your eye and sparks your interest. Add them to your nature shelf, which you can hang inside or keep outside. 

    I hope this post can help you find the perfect birthday or Christmas gift or broaden your knowledge of outdoor toys. New toys are constantly hitting the market, but many have stood the test of time, as you may remember playing with them as a child! Now, get outside and start playing! 

    Which toy do you think your child will love?

    Lissy Perna

    About the author

    Lissy lives near the ocean on Cape Cod, Massachusetts, with her husband, 2 rambunctious boys (aged 4 & 7), and an ever-growing number of pets. She grew up walking nature trails and finding joy in the beauty of nature. She now shares that love for local adventures with her community through her blog, “Get Outside Cape Cod”. Lissy knows that everyone can benefit from spending more time outdoors, and wants to inspire and support families to do just that!

    You can find more from Lissy in the following online locations:
    Instagram: @getoutsidecapecod
    Website: Get Outside Cape Cod
    Facebook: @getoutsidecapecod
    RWMC Posts: Lissy Perna

  • Ultimate Camping Gear List for Families

    Packing for a camping trip with the family sounds a bit overwhelming and intimidating. But it doesn’t have to be! Today, Lissy Perna, Cape Cod mom of 2, put together this ultimate family camping gear checklist to help make packing for your next trip quick and easy! She covers everything from the camping essentials to all those little items that are easy to overlook. This printable camping gear packing list for your family is organized by categories and filled with exactly what families need. It’s a great starting point for making your own checklist with absolutely everything you need to make your camping trip a success! We’ve also included some additional resources on finding affordable camping gear, what you specifically need with camping with babies and toddlers (or if you’re bringing your dog), plus tips on how to properly store your camping gear, and more! 

    *This post contains affiliate links.

    Ultimate camping gear list for families

    Is a camping trip with your family on your summer bucket list? Are you planning to visit one of the national parks or even just a small-town campground? Camping is an amazing outdoor experience for the whole family and totally worth all the work. (Yes, it’s work.) It’s easy to get overwhelmed when you start thinking about everything you need to bring when camping with kids. But don’t worry, we’re here to help!

    Let this post filled with family camping essentials and our downloadable ultimate family camping gear list be your guide! Whether you’re a camping expert or a camping newbie, having a list is a great way to stay organized and not forget any important items and start making some family memories! We’ll help you get started making your family camping packing list with everything you need to have a fun and well-stocked experience! 

    Photo credit: @roaminggonzalez

    Before you pack, do your research

    The first thing to do before you ever start packing is to research your campground/campsite and make yourself familiar with what’s there and what’s available. Campgrounds can vary widely in the amenities that they offer. Basic amenities at most established campgrounds include bathrooms, showers, picnic tables, water spigots, trash/recycling, and firepits. Beyond that, you may also find campgrounds with playgrounds, splash parks, stores, restaurants, bike/boat rentals, hammock hook-ups, ice makers, electricity, hot tubs, movie nights, zip lines, laundry, wifi, swimming pools, nature crafts, yoga classes, and so much more! 

    Check to see if your local campground has information online about the layout of your specific campsite so that you can see how much space you’ll have and what is already there. For example, some campgrounds have water access, a fire pit, a picnic table, and electricity! Some sites have none of the above, so you’d be “roughing it” and will need to bring more in order to be best prepared. Either way, you’ll still need to bring various items for a successful trip. 

    everything you need to pack when camping with kids Photo credit: @wildstokefam

    How to acquire your camping gear affordably

    Camping gear can be expensive, so it’s worth trying to find your items below retail price. Gently used equipment can be just as good as brand new at a fraction of the cost. Whatever works for your family’s budget and needs is the best option. Here are some ways to save money while still acquiring everything you need:

    • Check your local “buy nothing” or yardsale sites on Facebook. 
    • Look for camping gear rental services near you; by renting, you can test a product to see if you like it before taking the plunge on a purchase. 
    • Buy in the off-season or during big sales; prices are sometimes better.
    • Borrow from friends.
    • Ask for camping gear as gifts from family or friends for holidays or birthdays.
    • Check thrift stores; this is where we found our cooler & camp chairs.
    • You local “dollar store” should have inexpensive utensils, tablecloths, flashlights, and snacks.

    Camp packing tip: make your own list

    Every family’s packing list will be different based on when and where you’re camping, the ages of your kids, the weather, the amenities, your comfort level, your camping experience/skill, and tons of other factors. We’ve done our best to provide you with a family packing camping list that you can use as a starter to make your own. We’ve  included all the basics, but we’ve also added a ton of optional items you may (or may not) want to bring. You don’t need to bring everything! Camping is all about the simple life, so just bring what you need to feel comfortable.

    We highly recommend you start with our list as inspiration, but make your own master copy of your packing list and update it every time you go camping. It’ll change quite a bit over the years as you think of things that would make camping better, as your kids grow, as the seasons change, and as you get more comfortable camping. Making your own list will trigger your brain to remember things that may be important to your family. When packing, make sure to check each item off your list as you pack and then double-check (just in case you got distracted when packing).

    ultimate printable family camping checklist

    Camping gear for babies and toddlers

    Any age child is old enough to go camping. However, as parents, we know that babies and toddlers tend to be more high-needs than elementary-aged kids and above, and that goes for the camping gear we need to bring too! Whether this is your baby’s first camping trip, or 10th, there are some specific items that you may want to bring for your babies and/or toddlers while camping. Here are a few of our top recommendations:

    • Pack and play – This can be a safe spot for your child to play in outside at the campground and can also serve as a bed inside your tent.
    • Outdoor gate – An adjustable play gate can allow your child to play safely on the ground while still being enclosed within a safe area. 
    • High chair – If your baby or toddler is used to eating in the same high chair daily, you may consider bringing it. This will make mealtime easier for everyone!
    • Kid carrier – A hiking backpack or carrying sling can be helpful, especially when you go on adventures. 
    • Sound machine – If your campsite has electricity, a sound machine can be helpful to drown out the extra noise during nap time or at night. 
    • Stroller – Besides being a great way to transport your little one, a stroller can also help carry gear.
    • Comfort items – If your child is used to sleeping with a special baby, stuffy, toy, or blanket, be sure to bring it! 

    What to bring when camping with dogs

    Dogs love to camp! If you can take them, camping can be a great experience for your family and your pup! Here are some things to remember if you’re bringing your canine friend along for the adventure:

    • Dog bed – If your dog is used to sleeping on a bed every night, don’t leave it at home! You want them to feel comfortable while camping and have a place to rest during the day.
    • Leash and dog lead – Even if your dog is the “goodest-boy ever” you still want to have a leash and even a dog run for your campsite. This is for your dog’s safety as much as anyone else’s.
    • Dog food – You’d think this would be a given, but sometimes, I forget it if it isn’t on a list!
    • Dog bowl – Always keep a bowl of fresh water out for your pup, especially in hot weather.
    • Outdoor dog pen – Sort of like a playpen for dogs, this small but helpful pen will keep your dog contained. 

    Camping gear you actually need

    There’s a lot of gear you can take with you when you go camping. However, you don’t always need all that stuff. If this is your first time camping with kids, you’ll probably significantly overpack, and we’re here to tell you that’s ok! We know that sometimes having everything you just “might” need with you means that you’ll feel more confident going. And if that’s the case and gets you out the door, by all means, pack away! 

    However, with a little experience, you’ll quickly realize that you don’t need nearly as much stuff for an overnight camping trip as you might think. And actually, the less
    stuff you have, the easier it is to get out of the house, and the more creative and resourceful you (and your kids) will learn to be. But again, that takes time (something to look forward to, right?).

    For now, we’ll go over the basics of what you need and give you plenty of suggestions for optional items you can also bring to make camping more comfortable and help you feel more prepared.

    camping gear packing list for families with kidsPhoto credit: @kristcx

    Basic camping gear list

    Let’s start with the basics of traditional tent camping. Here’s what you will need most of these items for even a bare-bones camping trip. 

    Tent

    You’ll want to be sure you have a tent that is the appropriate size for your family. Tents run on the small side – the number of people that your tent says it’ll hold is only that, leaving you no extra room for gear, luggage, mattresses, spreading out, etc. We recommend upsizing when possible. For example, we have an 8-10 person-sized tent for our family of 4. Having room to move around inside the tent and our sleeping space is key. Also, make sure your tent has a rainfly for protection from the elements. You can leave it off for extra fresh air when it’s not raining.

    Here’s a great post on the best way to choose the right tent for your family and our top family tent recommendations.

    Tarp or footprint

    This item is to lay underneath your tent as a moisture barrier and protect against abrasions and punctures. Not all tents come with a footprint included, so this is something that you may need to find or purchase separately. Make sure the footprint is a bit smaller (up to 2 inches smaller) than the outline of your tent. This may sound counterintuitive, but if the tarp/footprint extends out from under the tent edge or is the same size, it can cause water to pool between the footprint and your tent floor in the rain. 

    Sleeping bags 

    Sleeping under the stars is always a great idea, unless you can’t get comfortable and stay warm. One key element to this issue is a well-fitting, cozy sleeping bag. For kids, a bag like the Kids Kelty Mistral that keeps kids toasty in temperatures below 40-degrees, is a great investment. For the smaller ones, a sleeping sack/bag made for babies, like this one from Morrison Outdoors, might be just the right fit. If you’re camping in the summer, it may be enough to just bring extra blankets and sheets and sleep on top of your sleeping bag. 

    Sleeping pad or cot

    Every good camping sleep system also includes a sleeping mat or a cot. Mats are a great option because you can buy them a little big to last a longer. A self-inflating sleeping pad like the REI Kindercamp is nice and worth the extra cost because the kids can help set up their own sleeping spot and you don’t need to bring an additional air pump. If you want something bigger (for multiple kids or kids plus an adult, we love the REI Co-op Camp Dreamer Double Self-Inflating Deluxe Bed. If you’re looking for something that gets your little one off the ground, or if you have multiple kids and are tight on space, check out the Kid-O-Bunk bunk bed cots.

    Photo credit: @coleyraeh

    Illumination – headlamps, flashlights, lanterns

    You’ll want to be able to see in the dark when camping. Headlamps offer a perfect hands-free illumination option. Once placed on the head your kid can freely move about without worrying about dropping something or shining it in the right place. We love these high-quality adjustable Petzl Tikka headlamps. Flashlights are a classic option and come in so many fun colors and sizes. Small flashlights like these EverBrite Flashlights come in multiple packs for the whole family. If you’re looking for something a bit more substantial, these LED tactical flashlights are bright, rechargeable, magnetic, and waterproof. Lanterns come in all shapes and are made from a variety of materials. One style to consider is an ultra-lightweight inflatable lantern like these LuminAid lanterns, that can also charge your phone! 

    Rain shelter

    A rain shelter is a great way to provide sun and rain protection over any area of your campsite. Sometimes these are called easy-up tents or pop-up shelters. We put one up over our kitchen space, so I have shade and rain protection to prepare meals. A rain shelter isn’t 100% necessary every time we go camping, but it’s a blessing if we’re expecting any rain or need some additional shade for little ones. It’s also an excellent purchase for picnics, ballgames, tailgating, and other events.

    Outdoor/indoor rug

    An easy-to-clean outdoor/indoor rug or small carpet is an excellent addition to your campsite. Set it right outside the entryway into your tent to minimize dirt, leaves, debris, mud, and sand tracked into your tent. It can quickly be swept or hosed off to clean. The last thing you want to feel when you slip into your sleeping bag is dirt or sand. 

    best tips and advice for camping with kidsPhoto credit: @kristcx

    Trash receptacle

    A trash can/barrel is a must-have for any campsite. Sometimes campgrounds will provide these for you, but not always. We have one where the lid clicks closed so no raccoons, squirrel, or skunks can get it. However, if you have bears in your area, you might want to avoid keeping any trash on your site if possible. Be sure to check your campground’s local rules and regulations regarding trash storage and disposal. 

    Camp table

    Some campsites have picnic tables available at every site to provide a space for eating, cooking, playing games, etc. If yours does, that’s great! However, if it doesn’t, you’ll want to consider bringing one. I suggest a collapsable lightweight table crafted for outdoor use. 

    Camp chairs

    Collapsible, comfortable, lightweight, waterproof chairs are the best for camping. Some models have cup holders, headrests, or overhead shades. Pick one that suits your needs! We also recommend small camping chairs for little kids. A chair that’s just the right size like this  Coleman Kids Chair is a great option. (Although that’s not to say they still won’t steal your chair!) It’ll give them a safe (and just the right size) place to sit around the fire and feel like part of the group. 

    camping supplies and gear for families

    Camp kitchen gear & essentials

    Your camp kitchen gear essentials will depend a lot on the type of food that you’ll bring with you and how you want to cook it. If you do all your meal prep ahead of time or like cooking directly on an open fire, you may need less gear than if you were planning to prep, assemble, and cook your meals onsite. Before you start making your kitchen gear list, consider the food, snacks and meals that you’ll be eating (and how many of them), and then come up with a list of kitchen items that you’ll need (step-by-step ) when making and cooking the food.

    When planning your meals, you’ll want to be sure to pick your  “hot” meals around the type of heat source you’ll have available at your campsite. You’ll probably have easy access to a campfire. Cooking over a  campfire isn’t hard, but you may need a few basic items to be most efficient, such as an over-fire grill grate. Another option is a portable camp stove. Some campsites may have charcoal grills for you to use, and in that case, you’ll need to bring your own charcoal. 

    Stove or grill

    If you’d like to eat a hot meal while camping, you’ll need something to help you cook your food. As mentioned above, some campsites have fire pits perfect for over-the-fire cooking. If you’re cooking directly on a flame, consider a grill grate or some roasting sticks or pie irons. However, you might also want to bring a small grill or cooktop. This will allow you to cook nearly anything without needing a steady fire going (and can be used in the rain). 

    Wash bins, dish soap & sponge

    Plastic or metal wash bins for holding and cleaning dirty dishes are a must-have. Finding nesting bins is a space saver; one can be used to wash, while the other can be used to rinse. Make sure your soap won’t harm the local wildlife – many campgrounds require use of biodegradable soap. Also, check with your local campsite regarding how to properly dispose of all food scraps, and any special areas to dispose of grey water (used dish washing water). 

    Tablecloth

    While not essential, a  plastic tablecloth with fabric backing is great for use on a picnic table. This allows for super easy cleanup and splinter prevention!

    camp cooking and camp kitchen family packing listPhoto credit: @coleyraeh

    Pots and pans

    If you’ll be camping at an established campsite near your vehicle (as opposed to hiking in to a backcountry campsite with only the stuff you can carry), you’re not limited on space for the kitchen cookware you bring. Full-sized pots, pans, knives, utensils, and the cast iron skill from your home kitchen will work great! No need to buy specialty camping cookware. Depending on what you’re cooking and how (size of cooking surface), bring the appropriate size. 

    Pot holders, dish towels, wash rags, and cloth napkins

    Choose something you don’t mind getting dirty. Second-hand shops are the place to look for these items that you can put into your camping kitchen storage and use exclusively for this purpose. 

    Plates, cups, utensils

    Sturdy plastic is a good choice for these items. You can use paper or plastic for convenience, but if you can choose something more sustainable and reusable, the better. Again, you can find inexpensive ones at the dollar store. 

    Cutting board & sharp knife

    If you’ll need to chop veggies, cut meat or slice anything for your meals, bring a sturdy cutting board and a sharp knife. Remember to keep the knife in a sealable container or with a sheath on it when not in use for safety. 

    Cooler(s)

    The number and type of coolers you bring camping will depend on how much (and what) you bring for food. A basic cooler with ice packs is essential for keeping perishable food and drinks cold. We usually use the reusable ice blocks from Yeti in a Yeti cooler for our food. That keeps the ice from melting and having your food swimming around in melted ice water. We do use regular ice for keeping drinks cold. And if we need ice for drinks, we’ll bring a separate special cooler for that. 

    Photo credit: @kristcx

    Water dispenser

    Instead of using single-use plastic water bottles, we opted for a 5-gallon water dispenser on our camp table. This is not only for easy water storage, but the kids can refill their water bottles independently as needed. We can also use this water for cooking, brushing teeth, washing hands, etc. as needed. Depending on the length of your tip and access to water, you can bring your own water from home or fill it at the campsite. 

    Paper towels/napkins

    A roll of disposable paper towels is always a good idea for quick and easy clean-up. However, if you want to cut down on your waste, consider bringing tea towels or clothing napkins. The soiled towels get thrown into the laundry bag after use and reused for each trip. 

    Tin foil

    Tin foil has a number of uses and is so helpful and handy to have when cooking at the campsite. Foil can be used for both cooking or food storage. We like to make tin foil meal packets to cook on the grill or directly in the camp fire for easy dish-free clean up. 

    Cooking utensils

    Think about the food you’ll be cooking and consider what utensils you’ll need for cooking. A mixing spoon, spatula, tongs, and measuring cups are all basic needs for a camping trip. You may also need some specialty utensils like a can opener, wine key, whisk, or strainer for cooking some items. 

    Refillable water bottles

    These can be used in conjunction with your water dispenser to cut down on the amount of waste and plastic you’re using on your camping trip. Be sure to stay hydrated when camping, and bring your water with you on every adventure. 

    Coffee pot/french press

    It’s a proven fact that coffee tastes better when camping! And after a possibly long night, you may need some extra java in the morning. If you’re camping at a site that has an electrical plug in there’s no rule that says you can’t bring your coffee pot from home! This way, you’re sure to have coffee made just the way you like it, and plenty of it. Be sure to bring an extension cord to stretch where you need it to in your campsite. Don’t forget your coffee grounds and filters (or k-cups, or whatever you use). If you don’t have electricity, consider a french press coffee maker or a pour-over method. 

    Camping food items to pack

    Of course, you can bring whatever food you’d like, but here are some typical camping foods that are easy to bring, store, make and eat to add to your camping gear list! There’s no need for fancy meals when you’re camping. Just be sure to bring enough food! And be prepared for it to taste great, because everything tastes better when you’re camping!  

    • Eggs 
    • Bacon or sausage
    • Bread
    • English muffins
    • Deli meat 
    • Peanut butter
    • Jelly
    • Hot dogs
    • Hamburgers
    • Chicken breasts
    • Fish fillets
    • Rice 
    • Potatoes
    • Veggies 
    • Fruit
    • Protein bars
    • Pretzels
    • Trail mix
    • S’mores fixings – chocolate, marshmallows, and graham crackers
    • Gatorade or a similar hydrating drink
    • Salt & pepper
    • Seasonings & spices
    • Condiments
    • Cooking spray
    • Coffee & filters

    Personal care items

    Just because you’re out in the wild doesn’t mean you must stop taking care of yourself. So here’s a list of personal care items to add to your camping gear list. Remember that a standard first aid kit might include some of these items. 

    • Toothbrush & toothpaste
    • Floss
    • Shampoo & conditioner
    • Soap
    • Medications
    • Vitamins
    • OTC pain relievers
    • Bug spray
    • Sunscreen
    • Lotion
    • Aloe vera gel
    • Burn relief cream
    • Thermometer
    • Moleskin for blisters
    • Band-aids/bandages
    • Antibiotic cream
    • Hairbrush
    • Deodorant
    • Contact lens solution
    • Feminine products
    • Bath towels & face cloths
    • Razor
    • Toilet paper (depending on your campsite set-up)
    • Diapers, wipes, pull-ups if needed

    Photo credit: @kristcx

    Clothing for your camping gear list

    Depending on the season and where you are camping, you will want to bring different clothing items for you and everyone in your family. What you transport your clothes in is up to you! We used a clear tote that we kept in the car. It was easy to transport and didn’t take up much room. Other options include a suitcase, duffel bags, backpacks, re-purposed laundry bags, or a laundry basket. For adults and teenagers, one change of clothes or a shirt and pants/shorts for each day should suffice. However, kids tend to get dirty quickly when camping (especially if there’s water around), so consider bringing two outfits for each day for the younger kids and babies. But, also know that a little dirt won’t hurt and wearing dirty clothes when camping isn’t the end of the world!

    Here are some clothing items for your camping trip that you may consider packing:

    Base layers

    Merino wool base layers are fantastic options for almost every season. The wool is lightweight, not scratchy, and warm. Woold pieces can be used alone on warmer days or can add a much-needed layer of comfort on those chilly winter escapades. One of our favorite brands that makes beautiful, soft layers is NUI Organics. We love their collection of soft merino wool, which comes in a variety of beautiful solid gender-neutral colors (so they can be passed down kid to kid). This company, in particular, is great because they carry layers for the entire family (adults included). 

    Check out our post on the Best Merino Wool Layers for Kids for a comprehensive list of the best wool brands, clothing options, and price points. 

    Socks & underwear

    I might be the wrong person to ask this question because my formula for the number of pairs of underwear to bring on a trip goes like this. # of days you are gone X 3 = # pairs of underwear to bring. Is this too much? ALWAYS! But I’d rather be overprepared in this department. The same goes for socks, and wool is always a good option. Our favorite brands are Smartwool and Bombas. 

    Rain gear

    No matter the weather forecast, I would recommend bringing rain gear with you. A rain jacket for every family member, or even better, rain suits! The REI Co-op Rainwall Jacket and Rainwall Pants are great options for a two-piece set. For the younger kids, full-body rain suits are a great choice because there is little to no worry about their underlayers getting wet when the weather turns. Our longtime favorite rain suit for everyday wet adventures has been the Oaki trail suit, but we also really love the Polarn O. Pyret Rain Shell with interior fleece-lining for colder rainy day adventures. 

    camping gear list for familyPhoto credit: @kristcx

    Swim suits

    If you’re camping during the spring and summer, don’t forget to bring a swimsuit. If you’re lucky, your campground will include a body of water suitable for swimming. We like rashguards for the kids because it adds an extra layer of protection from the sun and bugs. 

    Gloves & hats

    If it’ll be cold, bring a warm hat for each family member and warm waterproof gloves in the winter. If it’s sunny out, consider bringing a wide-brimmed hat for sun protection during the rest of the year. Check out our full gear review post for a breakdown of the best kids’ gloves and mittens for outdoor play

    Pajamas

    Remember that the temperature can vary significantly from day to night, and you are less protected from the elements while sleeping outside. Most of the time, your wool layers can double as pajamas or serve as your base layer (underneath clothes) to keep you and the kids extra toasty warm on cold nights or when camping in cooler temperatures. Light weight layers will help keep kids cool when camping in the hot summer months.  

    Shoes

    Bringing an extra pair of shoes for each family member is a good idea. In the winter, be sure to bring your warm boots. In the summer, a sturdy pair of sandals is a good idea. If you’re planning on doing some hiking, biking or creeking, remember to bring your best shoes for that activity. Also, a pair of shower shoes or flip-flops if you’ll be using a public shower while camping. 

    Sunglasses

    You’ll be spending a lot of time outdoors; let’s protect those eyes! A polarized pair will give you a clearer view too! For little kids, we love these Babiator sunglasses that come in 2 styles (the Navigator UV and the Aviator) and a variety of colors. Frames are made from rubber, making them strong and flexible, shock and impact resistant.

    Laundry bag

    Don’t forget something to hold all of your dirty clothes. A large laundry bag with a drawstring top works well for us. In a pinch, you can also use a trash bag or designate one empty duffle bag or suitcase to hold all the dirty laundry. 

    tips for camping with babieseverything you need to pack to go camping with kids

    Campsite fun

    Camping with your family should be a fun experience, and while being out in nature is a form of entertainment all on its own, sometimes you need a few other ideas of things to do or bring from home to help the play. There are a ton of fun activities you can play around the campfire and inside a camping tent to make your camping experience a memorable one. Here are some suggestions for games and enjoyment you can bring along with you. 

    Walkie-talkies

    Walkie-talkies are perhaps one of the best outdoor toys you can purchase for your kids! Not only are they fun to use and can be a catalyst for hours of imaginative play, but they are also a helpful device for keeping track of our busy independent kids when they’re out exploring or running around the campsite. These Topsung rechargeable walkie-talkies are great because they are long-range and come in packs of two or three.

    Binoculars

    My binoculars go with me on every outdoor adventure, so this is on my essentials list. But, if you aren’t a birder like I am, you might want to think about bringing a pair of binoculars to get an up-close look at some of the natural wonders you might find. A good pair of high-resolution, waterproof binoculars like these Occer compact binoculars will make sure your kids don’t miss a thing (but they also won’t break the bank). 

    Field guides

    Bringing a field guide relevant to the area you are visiting will be a great way to engage your kids in their environment. We all know about the fantastic apps for identifying plants, birds, and even bugs, but a good old-fashioned guidebook is an unplugged version perfect for your camping trip. 

    how to make a camping packing list for your family

    Books

    Hopefully, you will do some relaxing on your trip, and what’s better than sitting down with a good book? Scroll down below for some great kids camping books for kids. 

    Games

    Bubbles, chalk, jump ropes, frisbee, card games like UNO or Skip-Bo, activity books, board games, sketch pads, fishing gear, and bicycles with helmets are all options for your family to bring for some entertainment.

    Outdoor string lights

    Solar powered string lights can add extra light and ambiance to your tent or even your whole campsite. They make your whole campsite feel a bit more magical!

    Bluetooth speaker

    Bring a waterproof Bluetooth speaker with you if you want to listen to some music while camping. 

    Hammock

    These are not necessary unless this is your chosen method for sleeping, but they can be fun and relaxing. Many kinds are easy to pack away and lightweight while still sturdy. A hammock can easily provide my kids with hours of fun and entertainment. If your kids are anything like mine, a hammock can become a swing, a fort, or the perfect spot to ask mom for a gazillionth snack. Whatever way your kids prefer to make use of this classic camp item, you can’t go wrong with something like the ENO SingleNest Hammock.

    camping gear list for familyPhoto credit: @coleyraeh

    Helpful extras to add to your camping gear list

    • Trash bags
    • Ziplock/stasher bags
    • Duct tape
    • Zipties
    • Batteries
    • Toolkit
    • Portable potty
    • Waterproofing spray
    • Backpacks for day hikes or adventures
    • Cash for the camp store
    • Clothespins and a clothesline (we used this one, but a rope works well too!)
    • Phone chargers
    • Broom
    • Camera
    • Utility gloves
    • Hatchet/saw
    • Beach blanket
    • Extension cord
    • Koozies
    • Tent repair kit
    • Extra tent stakes
    • Rubber mallet
    • Fly swatterhow to properly store your camping gear

    How to store your camping gear

    Now that you’ve got a good grasp on everything you may ever need to bring with you when camping, what do you do with all that gear after your epic camping trip with your family? Make your life easier by staying organized for your next camping trip, with a few of these solutions. 

    Clear bins

    Clear bins work really well for storing camping items. You can see all or most of the contents from the outside, if you are ever unsure of what is on the inside. Each bin can be labeled on the outside with the gear it contains, or you could even keep a master list inside the container of all the contents. This will help you make sure that things are returned to the appropriate bin and restocked when necessary.

    For example, a bin with kitchen items, another for lanterns, flashlights, and string lights, a container with bedding, sleeping bags, sheets, etc. Store these bins in an out-of-the-way place like your basement, attic, or garage. If you plan correctly, you will have perfectly packed bins ready for your next adventure, making it that much easier to go camping! 

    Pegboards 

    Pegboards are great to hang in garages, storage closets, and basements. These are highly-functional and really helpful when hanging all kinds of items such as backpacks, headlamps, axes, hydration bladders, and even sleeping bags. Pegboards are great use of space when you are already short on space.

    How to store your tent

    Make sure that your tent is completely dry before storing, and don’t store it in a cramped or tight space. If it’s too tight, it can put unnecessary tension and stress on your tent fabric and poles. Your tent should be stored loosely in a cool dry place. Consider rolling the tent up and placing it inside of a large pillowcase. Avoid folding it, packing it up too tightly, or packing it in hot or humid places that can trap moisture inside. 

    How to store sleeping bags

    If you’re low on storage space, sleeping bags can be rolled up and stored in their original bags or inside of pillowcases. However, if you have room, you could also hang them in a closet or on a pegboard. We store ours hanging from hooks in our dry attic. 

    free printable camping gear list for family

    Camping books for kids

    One of my favorite camping activities is relaxing with a good book. Here are some camping-themed children’s books you can add to your camping gear list and bring along for your kids to enjoy!

    best camping themed books for kids and toddlerscamping gear list for familyPhoto credit: @kristcx

    Additional camping resources

    If you’re looking for even more info on how to camp with kids, we’ve got you covered. Check out these great camping resources below for your next camping adventure:


    family camping gear packing checklist

    Printable camping gear lists for families

    To make it easier for you to get started on your next family camping trip, we put our ultimate camping packing list for your family in a free printable 2-page PDF for you! Use this as the perfect start to create your own master packing list. You’ll also be signed up to receive our  AMAZING weekly newsletter, filled with fun outdoor activities and inspiration for getting your kids and family outside! You can opt-out anytime (although we’d hate to see you go). 

    [maxbutton id=”1″ url=”https://mailchi.mp/6ad1ea8208c2/fw0osm9qnr” text=”PRINTABLE CAMPING GEAR LIST” ]

    Happy camping!
    What would you add to this camping list for families?

    Lissy Perna

    About the author

    Lissy Perna lives near the ocean on Cape Cod, Massachusetts with her husband, 2 rambunctious boys (aged 4 & 7), and an ever-growing number of pets. She grew up walking nature trails and finding joy in the beauty of nature. She now shares that love for local adventures with her community through her blog, “Get Outside Cape Cod”. Lissy knows that everyone can benefit from spending more time outdoors, and wants to inspire and support families to do just that!

    You can find more from Lissy in the following online locations:
    Instagram: @getoutsidecapecod
    Website: Get Outside Cape Cod
    Facebook: @getoutsidecapecod
    RWMC Posts: Lissy Perna

  • Raising Monarch Butterflies with Children

    Monarch butterflies, with their beautiful vivid orange wings with wide black borders are considered by some to be the “king of butterflies” (hence the name). Monarch butterflies can be found across North America, but are facing issues due to their roosting sites being threatened by development and loss of the trees that create the unique conditions required by these butterflies. The good news is that you can help! Today, Cape Cod mom of two, Lissy Perna is here to show you just how easy (and important) it is to help the monarch butterflies. She’ll show you how to raise them from caterpillars, as well as give you facts about the butterflies and other suggestions for how to help them thrive. With the help of this detailed guide, you’ll be saving the monarchs in no time!

    Raising monarch butterflies with children

    Have you ever seen photos of children holding bright orange monarch butterflies or families enjoying the process of raising and releasing these delicate animals? Well, I’m here to tell you that you can raise monarch butterflies with your children too! And it’s a great way for the whole family to get involved in nature, conservation, and science. It’s a simple, inexpensive, and beneficial process that’s important to the sustainability of the monarch species. Here are your step-by-step instructions and family-friendly guide for raising monarch butterflies with kids. 

    Monarch butterfly facts for kids

    • The monarch butterfly’s proper name is Danaus plexippus (Linnaeus, 1758)
    • The upper side of a male monarch is bright orange with wide black borders and black veins. The upper side of a female monarch is orange-brown with wide black borders and blurred black veins. Both sexes have white spots on the borders and apex.
    • Monarchs can be found from southern Canada south through the United States, Central America, and most of South America. Monarchs are also present in Hawaii, Australia, and the Pacific Islands. 
    • Monarchs live mainly in open habitats including fields, meadows, marshes, and along roadsides.
    • Monarchs feed on nectar from milkweeds. Milkweed contains poisons that are distasteful or toxic to birds and other predators. After tasting a monarch, a predator learns to associate the bright warning colors of the adult or caterpillar with an unpleasant meal, and avoid eating monarchs in the future. 
    • Monarchs make a 3,000-mile journey each year, migrating between Canada and Mexico. These monarchs return each winter to roosts in the hills of Michoacan, Mexico, where they gather by the millions.

    *Source

    how to raise monarch butterflies with kids

    Lifecycle of a monarch butterfly

    Before you raise monarch butterflies, encourage your child to learn about the monarch butterfly life cycle.

    The life cycle of the monarch butterfly has four stages and four generations. The stages are (1) egg, (2) larvae, (3) pupa, and (4) adult butterfly. “Four generations” means four butterflies passing through these four stages within a year. 

    The previous generation’s adult butterfly lays eggs on the milkweed, when stage one of the first generation starts. Within 4 days, the eggs hatch to form a caterpillar or larva, the second stage. At this stage, the larvae eat the milkweed on which it lives. 

    Within two weeks, it attains full growth and attaches to someplace like a leaf or stem by discharging silk, and undergoes the process of metamorphosis to transform into a pupa or chrysalis.  Over the next 10 days, the continuous process of metamorphosis transforms the old body parts of the pupa into the beautiful parts of the future adult butterfly. The adult butterfly will emerge and fly away in search of food and a mate. 

    First-generation monarch butterflies live a short life that ranges from two to six weeks. Within this period, it will lay eggs for the second generation. The second generation flies roughly one month after the migrating monarchs arrive and reproduce which would be anytime from May through July.  It lays eggs for the third generation in July or August.

    The fourth-generation process is almost the same except for one point. The fourth-generation eggs are laid in the month of September or October, but they live more than eight to nine months. This fourth-generation butterfly also has a specialty; it migrates to the warmer regions of California or Mexico.

    *Source – http://www.saveourmonarchs.org

    does it help monarch butterflies to raise them in captivity

    The importance of the monarch butterfly

    Monarch butterflies are pollinators. Pollinators like monarchs play a vital role in the natural ecosystem and our food system. As pollinators, the monarch butterfly migration across the continent provides an invaluable service, essential for many ecosystems to thrive. It is thanks to pollinators, such as butterflies, bees, and other insects, that we have many of the flowers and dietary staples that we enjoy. 

    But monarch butterflies and their migration are now threatened by temperature changes, drought, deforestation, development, and other impacts. The loss of milkweed plants (due to eradication, urbanization and increased use of herbicides), loss of winter habitat, and climate change are all pushing monarchs to the brink. The monarch butterfly is now a candidate to be listed as endangered under the Endangered Species Act. 

    Does it help the species to raise monarch butterflies in captivity?

    In nature, monarchs are prey to various predators, and only ten percent of monarch eggs in the wild make it to the butterfly stage. Ants, wasps, birds, spiders, and other insects have easy access to the little eggs and consume them regularly. Even without the threat of predators, bacterial and viral diseases are also ever-present and cause widespread damage. In addition, tachinid flies prey on the soft chrysalis’ that house the transforming monarchs. Raising monarch butterflies with your children in captivity can help protect these eggs and ensure they are safely brought into adulthood and help the recovery of the monarch butterfly population. It’s one little thing we can do with our children to help make a difference. 

    Reasons to raise monarchs with children

    Many children learn best from hands-on experiences, and the process of raising a beautiful butterfly (from egg to caterpillar to butterfly) is a perfect example of that type of education. It’s a great backyard project for kids that’s not expensive, but has huge benefits for both the animal and the child.

    One of my favorite quotes by an unknown author exemplifies this, “Because little nature lovers grow into big nature lovers.” Children are the future, and their attention to wildlife protection is crucial. Introducing them to this type of experience makes them more likely to care for wildlife once they are adults. Your children can play a big part during the monarch-raising process, and the lessons learned will be invaluable. Raising butterflies from eggs and the entire process will be a delight (and valuable learning experience) for your young nature enthusiast. 

    tips for raising monarch butterflies from caterpillars

    What you need to get started raising monarchs with children

    You don’t need too much when it comes to raising monarchs, and it’s not a huge investment (but there is a huge payout and benefit). Here are the supplies you should gather: 

    • Butterfly enclosure
    • Cotton swabs
    • Paper towels
    • Spray bottle with clean water
    • Small clean, shallow plastic container with the top (sandwich-sized)
    • Magnifying glass (optional)
    • An abundance of milkweed plants, not treated by any chemicals

    what you need to raise monarch butterflies

    Finding milkweed for monarchs

    The first step in raising monarch butterflies with children is to find live monarch butterfly eggs and a food source for your caterpillars. Luckily, monarch butterflies will always lay these eggs on the leaves of milkweed plants (usually on the underside of the leaves), which is also their main food source. With a keen eye, you can easily spot these tiny eggs. The globular whitish-yellow eggs are only .9 to 1.2 millimeters long. 

    How to identify milkweed plants to search for monarch eggs

    The presence of milkweed is extremely important to the monarch. Milkweed leaves are the only food that monarch caterpillars eat. Adult butterflies also lay their eggs on the back of milkweed leaves. 

    There are multiple milkweed species, and this plant grows in many climates and habitats. You can often find milkweed growing alongside fences, on the sides of roads, or in ravines. Key characteristics of common milkweed (Asclepias syriaca) are:

    • flower color ranges from pink to white, highly fragrant
    • milky sap when leaves/stem broken
    • fine hairs on the underside of leaves—soft and velvety!
    • mature leaves are typically quite broad

    Milkweed fruits or pods are easy to identify although their size and shape can vary. Once they are mature, the pods split longitudinal and release the seeds within. The seeds are dispersed by wind so they are light and fluffy.

    where to find monarch caterpillars

    Types of milkweed plants

    • Common milkweed
    • Butterflyweed
    • Swamp milkweed
    • Antelope-horns milkweed
    • Purple milkweed
    • Showy milkweed
    • California milkweed
    • White milkweed
    • Whorled milkweed
    • Mexican whorled milkweed
    • Desert milkweed
    • Green milkweed

    These are just some of the milkweed plants native to North America. If you want to plant milkweed at your home, please be sure you choose a native species, as they are the healthiest for your monarchs and the local environment.

    how to find monarch caterpillar eggs on milkweed plants - detailed photos of milkweed leaf

    Collecting monarch eggs from milkweed

    Once you locate an egg on the underside of milkweed leaves, gently remove the leaf and place it in a clean container, egg side up, and secure the lid. Please do not touch the egg; even a gentle touch may harm it. We like to line these containers with damp paper towels to keep the environment moist.

    Depending on your comfort level, you may want to start with only a few eggs. Your first time raising monarch butterflies will teach you so much about the entire experience and what works (and doesn’t). Once you are familiar with the process, you will know if you can take on more tiny caterpillars in the future. 

    When harvesting anything in nature, always make sure you have permission to remove the leaves from these plants. A friend’s garden (or your own garden) would be the best place, followed by wild areas where responsible foraging is permitted. If you don’t know where to find milkweed, but want to help the caterpillars, you can plant and grow it yourself. Make sure that the plants you harvest are from areas with no chemical spraying, including pesticides or other harmful applications. 

    Also, before taking an egg or young caterpillar home, it’s important to have a source nearby that you can use to feed your growing caterpillar. Once your small caterpillar hatches from its egg, it will need fresh milkweed for its main food source. For your convenience and their health, make sure you have a nearby milkweed patch to serve as your source of fresh food. 

    Caring for your monarch eggs

    Monarch caterpillar eggs hatch three to eight days after being laid. So, you’ll want to keep a close eye on the eggs in your care. First, you will want to keep your closed container in a safe place. We keep ours on the window sill in our bathroom- away from curious dogs and cats. Natural light is best, but not in direct sunlight. Next, check on your eggs daily to give them fresh air and clean off any mold forming. Then, lightly mist the leaves with clean water from your spray bottle to moisten the environment. 

    A monarch egg hatched; what do I do now?

    Success! The first egg has hatched! Now, what do you do?

    Well, not much for the first few days. You will see an extremely tiny (less than one-tenth of an inch!) yellow caterpillar chewing on its eggshell. Once the caterpillar has eaten its shell, it will start to chew on the surrounding milkweed for food. Monarchs stay in this caterpillar stage for ten to fourteen days, growing every day. They move through stages called instars; there will be five in total!

    This stage is a great time to break out that magnifying glass for your children to better view these miniature, hungry caterpillars. But don’t worry, they won’t stay tiny for very long! They grow at an incredibly rapid pace. Very hungry caterpillar, indeed!

    how to take care of monarch caterpillars from eggs

    Move small caterpillars to a butterfly enclosure

    When your monarch caterpillars are small, this stage is ideal for moving your container into the mesh butterfly enclosure. An enclosure will keep your caterpillars safe from predators and allow you and your young children to observe them easily. You can take off the lid once you have the container inside the mesh enclosure. Remember to keep these enclosures somewhere safe; you don’t want them to knock over. 

    The size of your enclosure should determine the number of caterpillars you can safely house. Because we wanted something large and very sturdy to last us years, my father built us a wooden butterfly house out of scrap wood and an old screen, loosely based on styles we found online. If you would like a wooden house, here are a few options. Although, the inexpensive mesh ones work perfectly fine as well. You might want to purchase or construct a more permanent butterfly house, because raising monarch butterflies with your children is so fun!

    Here is a wooden enclosure on Etsy that is very similar to mine. This is an aluminum mesh butterfly enclosure I found on Amazon. A pop-up mesh cage also works just fine.

    raising monarch butterfly caterpillars - wood caterpillar house

    How to clean your monarch caterpillar container

    As your caterpillar grows, it will be consuming more and more milkweed. And what goes in, as we all know…must come out. You’ll want to keep your enclosure clean, so here’s how to take care of the waste. 

    First, you will need to remove the poop or frass that accumulates on the leaves and the bottom of your container. The best way to do this is with a cotton swab. You can gently wipe it away from the milkweed leaves to give your caterpillar a clean living environment. Then, as they grow even larger, you will need to throw out the damp paper towel lining your container and replace them at least once a day. The frass can range in color from dark green to dark brown and will vary in size depending on the size of your caterpillars. 

    How to clean your monarch caterpillar container

    Instar stages of your monarch caterpillars

    As mentioned previously, monarch caterpillars move through five stages before fully growing. These stages are called instars. First, the caterpillar grows (from eating the healthy milkweed you are providing) and becomes too big for its skin. After that, they shed their black skin through a molting process, and sometimes, they even consume their shed skin after the molting is complete. This molting process is fascinating; the caterpillar will almost vibrate and shake to remove its skin. If you happen to witness this stage, feel honored! It’s a quick process but is so crucial in their growth. 

    During the instar stages, the caterpillars will be eating quite a bit of milkweed. Make sure to provide enough milkweed leaves to keep them satiated. They will eat all of the leaves, leaving only the stems behind. As the caterpillars grow bigger, see if you can hear them munching. It’s louder than you’d expect! Isn’t that fascinating! 

    monarchs for kids - Instar stages of your monarch caterpillars

    Sizes of monarch caterpillars at each stage

    • First instar: 2-6mm
    • Second instar: 6-9mm
    • Third instar: 10-14mm
    • Fourth instar: 13-25mm
    • Fifth (and final!) instar: 25-45mm

    It takes ten to fourteen days to complete these five instar stages. 

    Instar stages of your monarch caterpillars

    Preparing for pupa

    The next stage in our monarch caterpillars’ life is their pupa stage. This stage is when the caterpillar transforms from larvae to the monarch butterfly. The length of this stage is anywhere from ten to fourteen days. 

    Once your tiny caterpillars reach full size, their eating will slow down a bit and they’ll get ready for metamorphosis. When your monarch caterpillars are ready to form their chrysalis, they will climb to the top of the butterfly enclosure.

    First, they will create a silk patch from their tail end to the top of the enclosure’s roof. Then, they will hang upside down in a “J” shape. Keep an eye on them once they do this, as it means they will form the chrysalis within twenty-four hours! I have noticed that right before they move into the pupa stage and are in “J” formation, their antennas will go limp, and their bodies will straighten out a bit. At this point, it will be only minutes until the transformation starts. 

    raising monarch butterfly caterpillars with kidsmonarch butterfly Larvae to pupa transformation

    Larvae to pupa, the amazing transformation

    Watching a larva pupate is fascinating and bizarre – it’s a true miracle in the natural world and to witness one is absolutely incredible! It goes rather quickly (or at least faster than you might expect), so timing is critical. You have to be paying very close attention to know it’s coming and be ready!

    First, the top layer of skin splits, and the green chrysalis becomes visible. The monarch caterpillar then expands and contracts until the outer layer of skin falls off, and the chrysalis is fully formed. Notice the tiny gold dots along the edge of the chrysalis. Once this happens, try not to touch the chrysalis and just let it be.

    You do not have to do anything during this period except keep the chrysalis out of reach of predators. After eight to ten days, the butterfly will be ready to emerge. You will be able to tell that it is nearly time to come out because you can see the monarch’s wings through the exterior shell of the chrysalis. 

    hatching monarch butterflies with kids - depiction of the development of the caterpillar

    Monarch emerging from the chrysalis

    When the butterfly is ready, it will emerge from the chrysalis. It will hang upside down for a few hours after coming out, its tiny sticky feet clinging to the broken shell of its chrysalis. If you happen to see a butterfly fall to the floor of the enclosure, gently scoop it up and allow it to re-attach to the chrysalis or the roof of the pen. 

    While hanging upside down, the butterfly will pump its wings, allowing the fluid from its body to flow to the wings so they may fully expand. You may also notice the proboscis, or tongue-like appendage, rolling and unrolling from their mouth.

    The wings need this time to dry to fly safely and effectively; this process usually takes three to four hours. Once the monarch starts fluttering around your enclosure, and it has been at least three to four hours, you can set it free. 

    monarch butterfly cocoons Resources to help you on your monarch raising journey

    Resources to help you on your monarch-raising journey

    When we first started raising monarchs, we used a local Facebook group as a resource. I would ask the group any questions I had about locating milkweed, the setup of my butterfly enclosure, or the behavior of the monarch caterpillars. You may have a group local to your area, but if not, there is a national one called The Beautiful Monarch

    Of course, there are always books to reference; here are some of my favorite resources that you can purchase online or check out from your local public library:

    things you can do to help monarch butterflies

    How else can you help monarch butterflies?

    Raising monarch butterflies with your children is a great way to help the monarch population recover, but there are other ways you can help, too!

    • Plant a pollinator garden in your own backyard. Include native plants in your area that are either host plants such as milkweed, or nectar plants for the butterflies to feed on, such as nasturtiums, zinnias, or cosmos. Here’s a great tutorial on how to plant a butterfly garden with your kids
    • Share the word! Now that you are an expert on these beautiful creatures, share that information with your friends and family. Then, maybe they will start raising monarchs with their children!
    • Please donate to the non-profit Save Our Monarchs, which is committed to saving monarch butterflies and serves as a great resource for any monarch enthusiast. Find out how at http://www.saveourmonarchs.org.
    • Fight climate change. The monarch’s innate urge to migrate is based on temperature changes that come with the seasons. Unfortunately, climate change has affected these temperatures, and the continued shift threatens their population. 

    hatching monarch butterflies with kids

    Have you ever raised monarch butterflies with kids?

    Lissy Perna

    About the author 

    Lissy lives near the ocean on Cape Cod, Massachusetts with her husband, 2 rambunctious boys (aged 4 & 7), and an ever-growing number of pets. She grew up walking nature trails and finding joy in the beauty of nature. She now shares that love for local adventures with her community through her blog, “Get Outside Cape Cod”. Lissy knows that everyone can benefit from spending more time outdoors, and wants to inspire and support families to do just that!

    You can find more from Lissy in the following online locations:
    Instagram: @getoutsidecapecod
    Website: Get Outside Cape Cod
    Facebook: @getoutsidecapecod
    RWMC Posts: Lissy Perna

  • Making Hiking Sticks with Kids

    Are you looking for a fun and easy project that will make hiking more exciting for you and your kids? We’ve got the answer! Today, Lissy Perna, Cape Cod mom of 2 and hiking guru is here sharing her step-by-step tutorial on making hiking sticks with kids. This project is fun for kids of all ages and (for the most part) can be done completely for free with items you already have at home in your craft supplies. These fun and colorfully decorated hiking sticks will let your kids get creative and help get them excited to hit the trail. 

    making hiking sticks with kids

    An art project that promotes outdoor activity

    Have you ever wanted to complete a practical, yet creative art project with your children that you can use outdoors? Wouldn’t it be great if your crafts actually inspired your kids to be active and get outside? Ever wish there was a way to kids your kids more excited about hiking?

    Well, making and decorating a hiking stick with your kids might be the perfect project for you! Making a hiking stick with kids is a fun and easy activity that will not only get their creative juices flowing, but it will also get them excited about their next hike. You can make this art project as simple or intricate as you’d like. Also, completing this project that is beautiful and serves a purpose is creating functional art! 

    Why walk with a hiking stick?

    When walking on an uneven surface, a hiking stick can provide support and help you keep your balance. For example, while walking uphill, a hiking stick can dig into the ground to use as an aid to pull yourself up. Conversely, hiking stics can be used as anchors to give yourself something to steady yourself when walking downhill. They are even proven to improve posture when walking on a flat surface.

    Need more reasons to use a hiking stick? Hiking sticks can also be used to brush spiderwebs out of your path, check the depth of a puddle in your way, or push thorn bushes aside. They’re really practical and handy to have when you’re out on the trail. These tools aren’t just for adults either, hiking sticks are for kids, too!

    child with a hiking stick on a trail

    Making hiking sticks appealing to kids

    While the logical reasons behind using a hiking stick make it worth your while when hiking, a child might still not be interested in carrying one. My kids love finding hiking sticks, but they don’t necessarily need or use them much.

    However, kids are involved in creating their own decorated hiking stick, they might be more interested in using it, as well as being proud of their accomplishment. Once they start carrying a hiking stick around, they may find other fun uses for one. My boys like to use their hiking sticks for walking but also to draw in the dirt, poke at rotting wood or mushrooms, or have the occasional sword fight. They have even been known to use discarded buoys found on the beaches as hiking sticks! 

    using a buoy as a hiking stick on the beach

    List of items need to make a decorated hiking stick with your kids

    The good news is that you really don’t need anything above and beyond to decorate your hiking stick. Other than the stick itself, there’s no need to buy or order anything special. Art and craft supplies you already have at home will do just fine. Here’s a list of art and craft supplies you could use: 

    • Carving knife, curved draw, or an ax
    • Electric sander or sandpaper, both will work
    • Varnish (optional)
    • Acrylic paint (this paint worked wonderfully on the wood, I highly recommend it!)
    • Paintbrushes
    • Drop cloth
    • Masking tape or washi tape (optional)
    • Power drill
    • Paracord, leather strips, or twine for handle loop
    • Yarn for journey stick (directions included in this article)
    • Scissors

    paint, paintbrushes, marking tape, for decorating hiking sticks with kids

    Locating a hiking stick with your kids

    Finding the perfect hiking stick to use can be as easy as looking along a trail or in your yard (if you’re lucky enough to live near the woods). We found branches in the woods near our house to use for our hiking sticks. It took a while to find ones that were not wholly decaying, but we didn’t want to cut down any live trees for this project. 

    Fresher wood is better for making a hiking stick because it’s less likely to be dried out and brittle. Keep that in mind during your hiking stick search. Just be sure to inspect the sticks you’re finding on the ground for any insect activity (as you probably wouldn’t want to bring these into your home) or decay (mold/fungi growth). 

    looking for a hiking stick in the woods

    How to find the perfect hiking stick

    When searching for a sturdy hiking stick, the essential qualities you are looking for are: (1) hard sturdy wood, and (2) a generally straight stick. The types of hardwood trees are maple, ash, cedar, beech, cherry, aspen, and others. But, use what you can find. We used some oak branches because the woods around our home are mainly pine and oak.

    Also, you want the hiking stick to be about one to two inches in diameter and at a comfortable height for walking. Of course, everyone’s preference is different, but generally, an adult’s hiking stick can be about 55-65″ in length, and children’s can be shorter. Typically, you want a hiking stick to come up about three inches or so below your underarm. If you find a straight hard wood stick that’s longer, you can always cut it down. A hiking stick that’s too short, won’t be as helpful or useful. 

    using a curved draw to remove the bark from the hiking stick

    How to prepare a hiking stick

    Once you find the chosen stick that you’d like to work with, there are a series of steps to follow to make it suitable to decorate and hike with. Here are the steps we took to prepare our hiking sticks. 

    1. Remove the bark

    First, you will want to whittle or carve off the bark of the stick. This will help keep you from getting splinters and make the stick easier to grip and decorate. You can remove the bark with a knife, a curved draw, or even an ax. However, if you want a rustic-looking hiking stick with more of a natural feel, you can keep the bark on. It’s really up to your preferences!

    Some types of hardwood have two layers of bark and need to be scraped down twice. This can be a lot of work, don’t get discouraged! Older kids can help with this process with adult supervision and guidance. Remind them to always carve away from your body and not to try to go too fast. 

    2. Let your hiking stick air dry

    Before applying any paint or varnish to your hiking stick, you want to make sure it is completely dry. We made the mistake of leaving our hiking sticks in the trunk of my SUV to dry, and then our dog, Jetty, found them and decided to use them as chew toys! Needless to say, they were a bit wet and slobbery (and in pieces) when we were ready for them.

    So, I’d recommend putting them in a safe place, out of reach from any pets who enjoy a nice stick as a snack. Depending on the climate and time of year, the drying process may take up to a couple of weeks. 

    our dog Jetty "helping" find hiking sticks

    How to prepare your hiking stick for painting

    Once your hiking stick is nice and dry, you’ll want to get it ready for painting and decorating. Use sandpaper to smooth out any inconsistencies, knots, or raw parts of the hiking stick. We started with an electric sander, but the hand-held sandpaper seemed to work better (although it took longer). Once you’ve entirely sanded your hiking stick, wipe it off with a damp rag to remove any sawdust. 

    If you’d like to add a handle loop to the top of your hiking stick, now would be a great time to add a hole at the top of your stick. We made a hole with a power drill and a small bit. You can make a wrist loop with a variety of materials, including leather, paracord, ribbon, rope, string, or twine. (I will add more information on making these handle wrist loops later in the article.)

    painting hiking sticks

    How to paint your hiking stick

    Set up your supplies for painting your hiking stick in a well-ventilated area. If possible, paint it outdoors! Get all your materials set out and ready. Gloves and a mask are a good idea, as well as a drop cloth or old sheet to prevent paint splatter on furniture or floors.

    If you are choosing to varnish your hiking stick, follow the instructions on the product of your choosing. This technique will create a simple look that will let the natural wood grain shine through. 

    If you choose to go for a more colorful look, as we did, you may want to start by giving your hiking stick a base coat of white paint. The white basecoat allows the bright colors to show up more vividly. For extra vivid colors, you may want to do a few coats of paint so that they really pop!

    painting hiking stickspainting hiking sticks with kids

    How to decorate a hiking stick with paint

    There are no rules when using paint to decorate your hiking sticks with kids! Let them be the creative director and see what they dream up. My youngest wanted to make a rainbow with every color possible, and my oldest wanted to make a ringed pattern. Both of their projects came out so great and matched their personalities too!

    I asked if they wanted to use masking tape to create “negative space” on their sticks as I did with mine, but they both declined. Masking tape and washi tape are helpful with this technique to make clean lines. 

    Other creative ways to decorate a hiking stick with paint are: polka dots, rainbow patterns, alternating colors, repeating patterns of large and small stripes, swirls or other textures, etc. 

    wrist loop on hiking stick

    How to make a wrist loop for your hiking stick

    So, why do you need a wrist loop for your hiking stick in the first place? Well, it’s really for safety reasons. If you happen to drop your stick while walking, it will be wrapped around your wrist and won’t go tumbling down the mountain. But, it is also helpful for storage! You can hang your stick by its loop when you’re not using it. It also just looks nice to have some extra color and decoration. 

    Choosing what material to use for your wrist trap is up to you. My favorite thing to use is whatever you have on hand! Again, no need to buy anything new. If you happen to have some rope – that works! If you have some paracord, that’s great! Being conscious about commercial consumption and using materials on hand is always the best option, in my opinion.

    Braided hiking stick wrist loop

    Plait a simple braid together with three pieces of whatever material you choose and then string it through the hole you made at the top of your hiking stick. But, first, make sure the loop fits comfortably around your wrist. 

    We used paracord, which is easy to manipulate, strong, and comes in various colors. If you choose paracord, make sure to melt the ends that you cut, so it doesn’t fray. Melting the material is easy to do with a lighter or match. Using a flame is a job for an adult or a supervised older child.

    paracord used for making hiking sticks with kids

    How to create journey sticks

    While researching making hiking sticks with kids, I found an enjoyable activity to do with your completed hiking stick. The concept of a Journey Stick originated in Australia with the Aboriginal people. When they went on an expedition, they would attach objects from their trip to a wooden shaft in chronological order as reminders of their travels. They would then use these items to tell stories about their voyages when they returned home. 

    The journey sticks were visual representations of the story of the journey. Storytelling is an important skill for kids to learn. We as humans are more likely to attach importance to a story when we see ourselves as a part of it. When children are asked to recount the story of their adventures and explorations, they become active learners, leaders, and caretakers of their environment.  journey sticktying items to journey stick

    Creating journey sticks with kids

    You can use your decorated hiking stick (or any hiking sticks) to create a journey stick with your kids. We took a simple wooden hiking stick out on a local trail through the woods to use as our journey stick. We brought scissors and yarn with us and I explained that we could pick up anything we wanted to tie to our stick in order to tell the story of our hike.

    My youngest required help with the tying, but he chose each of his treasures by himself. Picking out items to attach to his stick made him slow down and pay attention to his surroundings; it was beautiful! He ended up choosing pine needles, a leaf that “looked like an owl,” a piece of a fir tree, a pine cone, holly leaves, lichen, phragmites, and sea myrtle. When we returned home and looked at his journey stick, I was so surprised that he could remember exactly where he found each unique token and recount the story of our hike. 

    Try this on a hike with your kids and see what they find! For more info, we have a great post on making journey sticks with kids

    proud of his journey stick

    Fun facts about hiking sticks:

    After investigating all about hiking sticks and how to make them with your kids, I found some pretty fascinating factoids I thought I should share:

    1. Someone who collects walking sticks is called a rabologist. (I can see adding this name to my resume!)
    2. Hiking sticks are not only used for support but also for self-defense or as a fashion accessory.
    3. Henry VIII was once arrested for beating a constable with his walking stick!
    4. The Smithsonian has a cane with a golden handle given to President George Washington by Benjamin Franklin.
    5. Tutankhamun was discovered with 130 walking sticks buried in his tomb, as he had a clubbed foot. 
    6. The Appalachian Trail Conservancy estimates that 90% of through-hikers use hiking sticks or poles on the Appalachian Trail. 

    If you don’t have time to DIY a hiking stick

    If you’d still like to get the benefits of using a hiking stick but don’t have the time or the resources to find or make your own, there are premade ones that are acceptable alternatives. Also, many people choose to use two hiking poles rather than one hiking stick. The aluminum construction allows them to be very lightweight. I’ve included options below for both poles and sticks, and there are some great options online. 

    The best hiking sticks for kids:

    • These aluminum hiking poles are collapsable and lightweight.
    • These REI brand kids hiking poles are aluminum with plastic grips.
    • These customizable kid-sized hiking sticks are made from birch and are sold on Etsy.

    The best hiking sticks for adults:

    • These REI brand adult-sized hiking poles are made from aluminum with cork handle grips.
    • These foldable adult-sized hiking poles are lightweight and have tungsten carbide tips.
    • This wooden custom-made hiking stick from Etsy comes with an interchangeable tip, an alpine tip for trail walking, and a rubber bottom for paved surfaces.

    Best Hiking Books for Kids 2

    Children’s hiking book recommendations

    After decorating your hiking sticks with your kids, read these wonderful children’s books all about hiking and exploring nature!

    hiking sticks with kids

    More resources about hiking with kids 

    If you’re interested in more great content about hiking with kids, be sure to check out the following posts:

    Are you ready to make a hiking stick with your kids?

    Lissy Perna

    About the author

    Lissy lives near the ocean on Cape Cod, Massachusetts with her husband, 2 rambunctious boys (aged 4 & 7), and an ever-growing number of pets. She grew up walking nature trails and finding joy in the beauty of nature. She now shares that love for local adventures with her community through her blog, “Get Outside Cape Cod”. Lissy knows that everyone can benefit from spending more time outdoors, and wants to inspire and support families to do just that!

    You can find more from Lissy in the following online locations:
    Instagram: @getoutsidecapecod
    Website: Get Outside Cape Cod
    Facebook: @getoutsidecapecod
    RWMC Posts: Lissy Perna

  • How to Build a Bat House with Kids

    October is the perfect time of year to think about bats! If your kids are curious about bats and would love to learn more about these fascinating (and really beneficial) creatures, this post is for you! Today, Lissy Perna, Massachusetts mom of two and founder of Get Outside Cape Cod, is here to discuss all things BAT! Lissy walks us through the benefits and importance of bats and provides step-by-step instructions on how to build a bat house with kids. This hands-on DIY is easier to do than you might think! She also includes additional bat resources, bat book recommendations for kids, and some really interesting bat facts. 

    How to build a bat house with kids

    Have you ever thought about building a bat house with your kids, but you weren’t sure if it would be too much work? Well, I want you to know that you can totally do it! Building a bat house is an easy project that can be done in an afternoon. The shallow design of a bat box is perfect for bats because they like cramped, dark spaces for nesting. Get your kids involved in the planning and the work. Kids can help with picking the location, measuring the wood, cutting the pieces, driving nails, and decorating the bat house. Follow these steps while including your kids, and you’ll not only have built a bat house but will have formed a lasting memory together too!

    Benefits of bats

    Bats get a bad rap, as they are often associated with Halloween, vampires, and even the most recent pandemic. But, bats are crucial to their ecosystems and are generally not harmful or dangerous to humans. Here are some of the many valuable aspects of bats that you might not have been aware of.

    Bats that consume insects provide a critical amount of pest control – $3.7 billion worth in the United States alone each year. And, in a bittersweet way, these bats become sustenance for larger predators such as hawks, raccoons, and snakes. (Did anyone else start to sing “The Circle of Life” from the Lion King?)

    When you think of pollinators, bats probably aren’t the first creature that comes to mind. Bees, butterflies, or birds might top your list. But, some bats, like the Mexican long-tongued bat, are perfectly adapted to pollinate the agave plant in the Southwestern US. Sweet!

    Bat guano is rich in nutrients. Did you know that bat excrement (or bat droppings), also known as guano, is high in nitrogen and can be used as organic fertilizer? It’s more effective than cow manure, so moo-ve over heifers, we have a new way to fertilize our gardens.

    Flying bat in the evening skyPhoto credit: Stephen Ghio            

    What do bats eat?

    Bats eat various things, like fruit, nectar, pollen, and insects. Some even drink blood! However, out of 1400 species of bats, only 3 are vampire bats species that survive by consuming blood.

    Did you know that bats are the prime pollinator for the agave plant, an ingredient in tequila? So the next time you’re drinking a margarita, make a toast to a bat!

    The bat populations in our area in Massachusetts are all insectivores, meaning they only feed on insects. In just one hour, a single little brown bat can eat up to 1,000 insects. A nursing mother bat can eat up to 4,000 insects in one night; isn’t that wild?

    More amazing bat facts for kids

    Let’s face it, bats are pretty interesting creatures. Here are ten more facts about our winged friends that I thought were unusual that might interest your kids:

    • Bats are the only mammal that can truly fly.
    • The oldest living bat on record was found in Siberia; it lived to be 41 years old!
    • Bats have lived on earth for over 50 million years, and the oldest fossil was found in Wyoming near Yellowstone National Park.
    • The saying “blind as a bat” doesn’t hold much weight, as bats can actually see. Some bats that eat fruit rely almost entirely on their vision to find their food.
    • The largest known colony of bats is in Texas at the Bracken Bat Cave. There are more than 20 million bats living together!
    • Bats are a symbol of happiness in Japan.
    • Bat excrement or guano was used to make gun powder during the Civil War.
    • There is species of bat in West Africa that live in spider webs!
    • Bats’ echolocation is so precise that it can detect an object as thin as human hair.
    • The smallest known bat is Kitti’s Hog-nose bat also known as the Bumblebee Bat because it only weighs 2 grams.

    Now that you’ve learned so much about these truly magnificent mammals and the critical role they play in our ecosystem, are you ready to build your bat house? Great! Just hang in there because I have all the information you need up next.

    Flying batPhoto credit: Adam Olliver

    Bat house design

    Typically, bat house design is pretty straightforward. Bat houses are usually in the shape of a narrow flat box, with an opening at the bottom for the bats to fly in and out of. The goal for bat house design is to make a bat house that mimics the space between tree bark and a tree trunk. The space inside a bat house should be very narrow, unlike a birdhouse, which would house a round nest. Bats like tight spaces. They also like warm spaces when raising their young. The open bottom designs allow the bats easy entrance/exit. 

    Gathering materials to build your bat house

    First, you will need to gather all materials to build the bat house with your kids.

    Tools needed:

    • Hammer
    • (24) 2-inch nails, aka “6-penny nails”, or galvanized screws
    • Circular saw
    • Compound miter saw
    • Power drill
    • Tape measure
    • Pencil for marking measurements and straight edge
    • Safety goggles
    • (2) 3″ exterior screws for mounting
    • Paint and paintbrush (optional)
    • Plastic mesh netting and staple gun (optional)
    • Wood boards (preferably cedar boards)

    Pieces of wood cut into the following sizes:

    You’ll need to cut 6 separate pieces of wood to assemble the house. Measuring the boards is a great project for kids. I’ve included the dimensions for a basic bat house below, but you can certainly make a bigger bat house if you’d like; adjust the sizes accordingly. 

    • Front panel – 18.25″x12″x1″
    • Sides (2) – 22″x4″x.1″, make 30-degree cuts on one end of each
    • Back panel – 25″x 12″x1″
    • Roof – 16.5″x7″x1″, you can make a 30-degree angle on the roof if you choose to, not necessary
    • Predator Buffer – 12″x 1.5″x 1″

    Also, cedar is generally recommended but tends to be expensive. We chose to build with rough-sawn native white pine from a local mill, as it was less costly and has worked fine in bat boxes that we have made in the past. Whichever wood you decide to use, remember that it must not be treated with any chemicals, as they can be harmful to the bats. Purchasing an 8-foot by 1-foot plank of wood from a lumberyard should give you enough material to build your entire bat house.

    Drill, saw, hammer, nails, staple gunWood pieces needed to build bat house

    How to assemble a bat house

    Create kerfs in the wood

    The first step in assembling your bat house is to make sure that the interior sections of the house are not planed or smooth. As you can see on our back piece, we created multiple horizontal lines with the saw. These “kerfs” were a quarter-inch deep and made with the compound miter saw. (This step would most likely be a job for an older child, but using power tools can be an empowering skill to learn!)

    These kerfs make it easier for the bats to hang when sleeping upside down in the house. Another option is to use plastic netting and staple it onto the interior of the bat house. Carefully trim any excess edges to avoid injuring the bats while inside the house. Bat houses should not contain fabric or plastic mesh. 

    Keep the predators out

    Next, nail the predator buffer to the bottom of the inside of the front piece. This piece of wood is vital to prevent predators from climbing inside the bat house and create a safe home for the bats. However, the small opening is still big enough for the bats to squeeze through. The gap at the bottom should be three-quarters to one inch.

    Nailing this piece of wood is a great way for the kids to get involved in building the bat house. You can help stabilize the pieces using wood glue, but that’s not necessary. Kids can use a hammer to pound in a few nails, and it’s great for hand-eye coordination! Pro-tip: Holding the hammer farther down on the grip, away from the head, will give you more force and more “BANG” for your buck.

    Hammering on predator buffer

    Add the sides to the bat house

    Next, use the power drill to start the holes in the sides of the house. We made three evenly spaced pilot holes along the edge. Pre-drilled holes made it easier for the kids to bang in the nails. These side pieces then get nailed to the back of the bat house.Drilling holes in side piece of bat houseNailing in side piece of bat house

    Add the front and landing areas

    The next steps are to slide the front piece into place and add the landing area. A little gap along the upper edge is a good thing – it’s necessary for ventilation. Use three more nails on each side. The overhang on the bottom is called the “landing area” this is where the bats land and climb up inside the house. A four-inch landing zone is sufficient for the bats to perch and climb comfortably.

    Attach roof and mount

    The last piece to attach is the roof. We used four nails after pre-drilling holes.

    Finally, drill a hole in the bottom center of the back piece & the top center of the roof for the exterior screws to mount to the side of a building or the side of a house. 

    Done building the bat house!

    And with that last step, you just built your very own bat house with your kids! Pat yourself on the bat- I mean, back. Great work!

    Decorating your bat house

    While it’s not necessary to paint your bat house, paint color can affect the inside temperature, which in turn can either attract or repel bats. You should either paint your bat house a light color or dark color depending on the temperature where you live. Here is a trusty map I found from Bat Conservation and Management that will guide you to what color you should paint your bat house based on your location if you decide to paint. Colder climates need darker colors to absorb warmth. 

    When painting your bat house, the most important rule is to choose non-toxic water or oil-based paint that will withstand natural elements such as snow and rain. You can use a drop cloth or old sheet to protect any surfaces from paint splatter. Remember to let the paint dry fully before hanging your house! 

    We decided not to paint our bat house and hung it up as-is. However, we did make another one and added a bat stencil to the front. The little brown bat stencil was initially drawn by my younger brother about twenty-five years ago when he first made a bat house with my dad. Can you believe my dad still had the stencil in his barn? This project ended up being incredibly special because my kids got to make this house with my dad and me, and he passed some of his carpentry skills on to them!

    Finished bat house with bat stencil

    bat stencil

    Where to hang a bat house

    Choosing a place to attach your bat house is very important and depends on whether bats will decide to move into your newly constructed dwelling. There are a few factors to keep in mind when choosing the best location and mounting your bat house.

    • The bat house should face south or south-east and get 6-8 hours of sun per day.
    • Mounting the house at least 12 to 20 feet from the ground is ideal.
    • The bat house should be away from bright lights.
    • Trees are not the best option for mounting a bat house because they are usually too shaded and predators can more easily access the house.
    • A fresh water source should be within a quarter-mile from where you place your bat house.
    • Multiple bat houses can be grouped side-by-side on a home or building or back-to-back on a pole mount.

    These seem like many requirements, but they are just general guidelines for the most successful bat houses. The goal is to do your best. If you only have a tree to mount it on, then try that. Or, if you don’t have a water source nearby, it’s still worth it to build a bat house!

    Attracting bats to your bat house

    Another thing to mention is building and hanging a homemade bat house does not guarantee that bats will decide to move in. Many factors are beyond your control that will determine whether or not you have a successful bat house. Some factors include predators nearby, other established roosts in the area, temperature and location of your bat house, etc. Ninety percent of bat houses become occupied by local bats within two years of installation, so practice patience. Hopefully, you will see some bat action sooner rather than later.

    Hanging the bat house

    “When day fades away, bats come out to play”

    Best times to look for bats

    If you want to look for bats in your backyard or a local park, choose a clear dry evening. Bats mainly come out at about dusk to feed, so find out when the sun sets and head out around that time. Where we live in New England, Spring, Summer, and early Fall are the best seasons to look for these flying mammals, as they hibernate during the colder months.

    When we set out to look for bats in our yard, we lay blankets on the lawn and ensured all outdoor lights were off. Then, staring up into the sky as the sunlight slowly fades away, we keep our eyes peeled for any movement above the trees. There’s certainly no shortage of mosquitos, so we hope the bats will soon follow. 

    SWOOP! We saw our first bat! It was a flash of jagged flight, looking almost uncoordinated, but we knew better. These winged mammals are precise hunters and we had front-row seats.

    My kids are always so excited to count bats. They love pointing at the sky and yelling out – “There’s one!” “I see another!” “Did you see those big brown bats, Mommy?!” It’s awesome. I try to capture photos of these insectivores, but they are too fast. As a result, only blurs of black in the early night sky showed up on my screen. The memory of this experience, however, is clear as a bell.

    Looking for bats at dusk in the back yard

    Become a bat-tivist (bat-activist)

    Now that you’ve built a sturdy bat house to help support the bats in your neighborhood, there are other ways that you can help protect and support bat populations.

    • Keep those dead trees up on your property! If they aren’t going to be a safety hazard, let them stay. Their natural cavities create the perfect habitat for bats, as well as many other creatures.
    • Refrain from using dangerous pesticides, as these can unintentionally harm bats and other animals. There are all kinds of natural alternatives that are safer for the animals and our planet, too.
    • Keep domesticated cats indoors, as they are dangerous to bats. House cats kill over 250,000 bats each year. Also, bat rehabilitators report that about one-third of injured bats are due to house cat attacks.
    • Share your knowledge! Tell your friends that you know how to build a bat house and how beneficial these winged animals are.

    Learning about bats

    Effortless options for a bat house build

    Here are some alternatives for certified bat house kits for kids. They come with pre-measured and cut wood pieces that are easy to assemble, creating safe and attractive homes for bats without needing to use power tools. 

    Reading about bats

    Bat book recommendations for kids

    If you’d like to read more about these marvelous flying mammals that will hopefully soon be living in your bat house, here are some beautiful books that you can find at your local library or book store. Who knows, maybe you’ll have a bat-tivist on your hands in the future!

    Learn more about bats

    If you (or your kids) are super interested in learning more about bats, check out Bat Conservation International. Their website is filled with amazing bat-tastic information including the latest bat news, bat facts, bat conservation efforts, and how you can help the cause. They also have free plans for building a bat house. 

    Are you ready to build a bat house with your kids?

    Lissy Perna

    About the author

    Lissy lives near the ocean on Cape Cod, Massachusetts with her husband, 2 rambunctious boys (aged 4 & 7), and an ever-growing number of pets. She grew up walking nature trails and finding joy in the beauty of nature. She now shares that love for local adventures with her community through her blog, “Get Outside Cape Cod”. Lissy knows that everyone can benefit from spending more time outdoors, and wants to inspire and support families to do just that!

    You can find more from Lissy in the following online locations:
    Instagram: @getoutsidecapecod
    Website: Get Outside Cape Cod
    Facebook: @getoutsidecapecod
    RWMC Posts: Lissy Perna

  • Tips for Whale Watching with Kids

    Observing whales in the ocean is a phenomenal experience. Whales are fascinating and breathtaking. They’re one of the most important creatures in the ocean and vital to our planet and ecosystem. Because of their size and importance, the only place you can see a whale is in the wild. Today, Cape Cod mom of 2, Lissy Perna is here sharing her experience whale watching with kids. She’s sharing tips for parents on what to bring, when/how to purchase whale watching tickets, how to spot whales in the ocean, interesting whale facts for kids, the best places to spot whales, favorite whale books for young children and so much more! Ahoy! Let’s get started!

    Tips for whale watching with kids

    The wonder of whale watching with kids

    There’s something truly magical about seeing the world’s largest mammals up-close and personal, right before your eyes, in their natural habitat. Sharing that miracle with your child and watching their eyes widen when a 40-ton cetacean vaults itself clear out of the ocean is something you both won’t soon forget.

    That’s the kind of wonder that a whale watch with your kids provides! It’s truly spectacular in a way that’s hard to describe in words. You just have to experience it to understand how massive and magnificent these creatures are. Whale watching is magical for the whole family, no matter what age, interest or ability. It’s nearly impossible not to be impressed by these amazing animals. 

    whale watch kids humpback whale provincetown cape cod vacation

    Whale facts for kids

    1. Whales are mammals – Whales breathe air (just like we do), so they need to reach the surface of the ocean to breathe. To breathe, whales have a blowhole in the top of their heads. Whales also give birth to live young. Baby whales are nursed and taken care of by their mothers until they reach a certain age.
    2. There are two types of whales: baleen whales and toothed whales – Baleen whales feed on krill and plankton. Toothed whales eat several kinds of fish (tuna, cod, and salmon) and some small mammals like seals.
    3. The blue whale is the largest animal in the world – It’s also the largest animal that has ever existed! It’s larger than the largest dinosaur ever found. 
    4. Whale tails are unique – Whale tails have flukes or lobes. Each fluke is unique to that whale. Similar to a person’s fingerprints, whale lobes have distinctive traits and markers that are helpful in identifying specific whales and species. 
    5. Whales can swim as fast as 30 miles per hour.
    6. Some whales hold their breath and can stay underwater for as long as 90 minutes.
    7. Whales only half-sleep – In order to keep from drowning, whales do not fully sleep as other mammals do.  Whales sleep by shutting down half of their brain.  This lets the other half of their brain remain alert to make sure they take breaths when needed. 
    8. Whales move in groups called pods – Pods can be as small as two whales and be as big as a hundred or more whales. Larger pods are usually formed when embarking on a long migration.

    Conservation value of whale watching

    Observing whales in the ocean can be an exhilarating experience for kids and adults. While whale watching is an economic activity that can provide an incentive to preserve them in their natural habitat, it also has the potential to negatively affect whale populations that are targeted for tourism. It is important for whale-watching tour companies to be responsible and understand both the benefits and the potential impacts of this activity.

    Responsible whale watching benefits everyone: the observers, the tour operators, the local communities, and the whales! Responsible whale watching offers people the opportunity to learn about whales, the threats they face, and what we can do to help. It also provides a research platform to collect data on the behavior and ecology of whales. Whale watching tours can also provide income for coastal communities and gives locals an economic incentive for caring for the animals. 

    Whale species and where to spot them

    Depending on the location where you’re doing your whale watching, you might see one or more species of whales during whale season. Here are the most common types of whales that you’ll see on a whale watch cruise.

    • Minke whales (all over)
    • Humpback whales (all over)
    • Blue whales (Azores, Quebec, Mexico)
    • Killer whales / Orca (Norway, Iceland, Canada)
    • Sperm whales (Norway, New Zealand, Azores)
    • Gray whales (Mexico, Alaska)
    • Right whales (Argentina, Australia, South Africa)
    • Fin whales (all over)
    • Beluga whales (Arctic, Quebec)

    cape cod whale watch kids provincetown

    Whale watching tips for parents

    Have you been on a family whale-watching adventure with your family yet? Preparing for a four-hour tour out on the ocean with your children may seem daunting. It’s easier to do than you think and even more incredible than you can imagine. We’ve gone whale watching as a family multiple times and I’m here to support you with some tried and true tricks to help you have a successful trip. We want to make sure this is a great experience for your kids. Because kids that love animals and wildlife, grow up to be adults that love, appreciate and protect wildlife and their habitats. 

    Set realistic expectations

    In a world where we are accustomed to everything instantaneously and in on-demand form, this type of excursion may need an explanation for your children. For example, heading out on a whale watch is not comparable to going to a zoo. The animals on this adventure are not kept in enclosures, where they’re easily visible and reliably there, day in and day out. 

    These whales live in their natural habitat, a vast and wide-open ocean with no barriers. And while they are the biggest animals in the ocean, seeking them out takes time, patience, persistence, and a little luck. Since the first whale watches that I’ve brought my sons on, I’ve always said, “We’re going on a boat ride; we might even see a whale!” Under promising (and then hopefully over-delivering) can never hurt in this situation. 

    cape cod provincetown whale watch kids

    Planning ahead – check the weather

    When planning a whale watch for your family, try not to book too far in advance if possible. The weather on the coast can be unpredictable and it’s best to pick a day that you know will have good weather. If you can secure tickets the day of or the day before the tour, that would be best.

    Sunny days with no fog and calm winds are ideal weather conditions. Where we live on Cape Cod, there tends to be fog in the early mornings, so we usually avoid the day’s first trip and opt for the afternoon or early evening excursion. Get familiar with the weather in the area where you’ll be doing the whale watching tour and ask when the best time of day would be to go. Also, know your kids and their limitations. If you have little ones that nap in the afternoon, a morning trip is probably best so as to not have an overtired and cranky kiddo. 

    We went out on one particular whale watch where the wind was so breezy and the water was so choppy that it was hard to stand up on the boat without falling. Despite the rough seas, we enjoyed ourselves and still managed to see whales. However, the Captain decided against traveling all the way out to Stellwagen Bank, which is the ultimate destination for whale sightings in our area. Thankfully, my son was just delighted to be on the ocean and in a boat, so he was not disappointed in the least! (Again, set those expectations low.)

    kids whale watch cape cod boats

    Purchasing your tickets

    Most whale watching tour companies have websites that allow you purchase your tickets in advance online. They usually post the daily schedule of the outings and set the expectations on what you’ll see, need to bring, and when/where to arrive for the tour. Sometimes whale watching areas and tours can get booked pretty far out in advance, due to the popularity. As I mentioned above, it’s best to book as close as possible to your tour date (so you have a better idea of weather), but that might not always be possible. 

    Whale watch tickets can be pricey. Whale-watching tours in our area can cost between $40-$80 per person. To keep costs down (especially for large families), it’s wise to spend a few minutes doing some research to possibly save a few dollars. When you’re ready to purchase your tickets, take the time to see if you qualify for any discounts.

    For example, the Dolphin Fleet Whale Watch Company out of Provincetown, Massachusetts, grants a discount for veterans, military, first responders, teachers, and front-line workers. Also, children four years old and younger ride the boat for free! While young kids are allowed on the ships and will enjoy themselves, keep in mind that strollers are also allowed on the vessel, but the boat’s top deck may not be accessible. 

    whale watch provincetown cape cod massachusetts boat adventure

    What to pack for a whale watching tour

    So now it’s a picture-perfect weather day, and you’ve purchased your tickets. What should you pack for your whale-watching excursion?

    • Sunglasses – Polarized sunglasses are a huge help in letting you see into the water, as they cut down on the glare from the sun on the water. 
    • Binoculars – Get an even more intimate glimpse of these majestic marine mammals up closer, or help the naturalists on the boat look for whales on the horizon.
    • Field guide – There are several educational field guides and books with in-depth information about the whales and other marine life that you might see while aboard the boat. Whale tours usually include “downtime” while waiting for whales to surface or traveling to a particular location, so this is a great time to read up on what you might encounter.
    • Snacks – Most whale watch boats have a concession stand or snack bar of some variety, but we always pack our food and plenty of water. Also, keep in mind that many trips are 3-4 hours long, so make sure to bring a meal if necessary. 
    • Appropriate clothing – Be sure to bring a sweatshirt or waterproof jacket with you, depending on the weather forecast. It can be an additional 10-15 degrees cooler offshore! Flat, rubber-soled shoes are a good idea on a boat in motion, too; not everyone is born with sea legs! Life jackets will be provided by the tour company.
    • Reef-safe sunscreen – Whale watching tours are hours long and there’s not always a way to get out of the sun. Bring a hat and use reef-safe sunscreen for protection.
    • Sea-sickness remedies – If you’ve ever experienced sea-sickness, you’re already aware that it’s a quick way to ruin your day on the water. One way to avoid this is to take a product like Dramamine before boarding the boat. If you don’t feel comfortable with that, you can bring sea-bands, which push the pressure points on your wrists to reduce sea-sickness symptoms. I’ve also recently discovered ginger lollipops that are super yummy and thought to help with an upset tummy. 
    • Cash– This can vary by boat, but many ships do not accept credit cards. Also, it’s nice to tip the crew at the end of your trip!
    • Something to do – If your kids tend to get bored easily, consider bringing something along to have a few fun ways to keep them entertained. Just hanging out on a boat in the ocean is pretty fun, but when the novelty wears off, it’s a good idea to have a game, book, crayons and coloring book, a puzzle, or a few favorite toys on hand. The naturalists on board do a great job keeping things exciting, but it’s always best to be prepared.

    whale watch field guide nature books kids

    Be prepared to ask questions! 

    Come on; you didn’t think this would be a leisurely boat ride, did you? No such luck! We’re here to learn, too!

    Once settled on the ship, a naturalist will introduce themselves and explain all about the whale’s physical characteristics, what they consume, their behaviors, why and where they migrate, and more. For instance, on the Dolphin Fleet whale watch, they pass around baleen pieces, the bristled plates used to intercept food within the whale’s mouths. Seeing and touching the baleen instigated a question with my 7-year-old son, which prompted questions.

    “Do these whales have teeth too, or just baleen?” Our naturalist for the day, Dennis Minsky, was a gracious host and teacher. His career with the Dolphin Fleet began over 25 years ago, and he has been a biologist and educator for 45 years. Dennis’ enthusiasm was apparent while answering the myriad of children’s questions, and he even remembered all of their names for a shout-out at the end of the trip. 

    Kids are naturally curious and they’re bound to have questions. Help them gain the confidence to speak up and ask their questions. The answers may even prompt foll0w-up questions and lead to a love of learning more about these majestic animals. 

    cape cod adventure whale watch naturalist whale watch baleen humpback cape cod kidscape cod adventure whale watch kids humpback

    Navigating the boat

    When the naturalists spot whales, they may use terms like port-side, starboard-side, bow, or stern to describe the whale’s location relative to the boat. So let’s familiarize ourselves with these terms now, and you’ll be expert mariners by the time you board the ship.

    The back of the boat is called the stern. The front is called the bow. So if you’re standing at the stern (back), facing the bow (front), the port side is on your left, and the starboard side, your right. A good trick to remember is that port and left both contain 4 letters. The boat crew may also use the hands of the clock to point out a whale. Twelve o’clock would be the bow, and six o’clock would be the stern, and so forth.

    Also, if you want to be super mature like me, you can show your kids where the bathrooms are by walking them to the poop deck. Yes, that’s an actual thing. 

    whale watch boat cape cod outside oceanwhale watch boat humpback cape cod

    How to spot a whale

    I always assumed the whale watch boats had some sort of super-sonar magnetic-laser-vision on board that could detect the whales and that’s how they found them.

    Nope. It turns out that it’s much more straightforward than that. On the Dolphin Fleet boats, the goal is ultimately to get to Stellwagen Bank, which is the premier feeding territory for humpback whales in the North Atlantic. So, while traveling to our destination, the Captain and naturalists simply use their ears and eyes instead of elaborate gadgets to find the whales. 

    The good news is that you can do the same thing! Keep your eyes peeled and listen. You might just spot a whale first! Want to know what to look for and listen to? Here’s the scoop…

    boat cape cod ocean sea kid children adventure

    What to look for when whale watching

    Breaches, lobtailing, or fin-slapping. Breaching is when a whale’s body fully exits the water and then slams back down, creating a large splash. Lobtailing is when the whale slaps the water with its tail fin repeatedly, and fin-slapping is when the whale uses its pectoral fins to hit the water while laying on its side. 

    Another lesser-known indicator of a whale’s presence would be the spouts of mist created by the exhalations from the whale’s blowholes when they surface for a breath of air. These spouts are visible for miles on a clear day! 

    humpback whale fin cape cod provincetown adventure

    What to listen for when whale watching

    When you’re trying to spot a whale in a huge ocean, keep your listening ears on. “PSHHHH!” is the noise that the whale’s exhalation makes when the whale surfaces for a breath. This sound travels for quite a distance, so keep an open ear. Another sound that some whales make is their songs, even with no vocal cords. Did you know that only the male humpback whales sing, and the sound can travel up to 10,000 miles? 

    humpback whale spout blowhole cape cod

    What kind of whales do you see?

    Since we live on Cape Cod in Massachusetts, we use the Dolphin Fleet whale watch service that operates out of Provincetown, located at the most northern point of the Cape and closest to Stellwagen Bank. This location in the North Atlantic Ocean is a feeding ground during the summer months for many whales species and one of the best whale-watching destinations in the world.

    Some of the most common species on animals you may encounter while on a whale watch in the Cape Cod area would be:

    • Humpback whale
    • Minke whale
    • Fin whale
    • Common dolphin
    • Atlantic white-sided dolphin

    On this particular trip, the whales we saw were all humpbacks. Our naturalist, Dennis, knew all of them by name. Freckles, Scylla, and Nile, were all seen spouting and diving, feeding and gliding through the cold 60-degree water of the Atlantic. We were most thrilled to spot Nile, seen on whale watches in the past, and highlighted in a book written by a local author. Nile is a female humpback who was born in 1987. “Almost as old as you, mom!” my son shouts. Yes, almost as ancient as me. She’s been swimming the ocean around the same land that I’ve been living on my whole life. 

    What else can you see on a whale watching tour?

    Oftentimes, there’s a lot of other wildlife and aquatic animals that you can see on whale watching tours. Depending on where you are taking your whale watching tour, be on the lookout for some of the following animals: bald eagles, dolphins, sea turtles, seals, sea lions, sardines, albatross, pelicans, sharks, otters, blue herons, and more! Just remember to keep your eyes peeled!

    humpback whale watch cape cod kids adventure vacationwhale watch boat adventure ocean excursion cape cod

    Why go on a whale watch?

    Some of my favorite things in life are combined seamlessly when we’re on a whale watch: (1) spending time in nature, (2) connecting with my children, and (3) getting a chance to see marine animals in their natural habitat. A desire to bring others to see and love these creatures grew out of my childhood – I was raised learning about whales, realizing they need our protection, and advocating directly and passionately for them. 

    Thanks to the Marine Mammals Protection Act and the Endangered Species Act, enacted in the 1970s, whale species such as the humpback have made a comeback from near extinction. In addition, whale watches provide a personal experience for the passengers, and are a great way to foster an emotional connection between humans and animals. 

    We cannot protect something we do not love, we cannot love what we do not know, and we cannot know what we do not see. And touch. And hear.” 

    -Richard Louv, Last Child in the Woods

    whale tail provincetown whale watch adventure ocean kids

    Best US destinations for a whale watch with your kids

    You don’t have to be on Cape Cod to spot whales. In addition to our phenomenal whale watching location, here are a few other places and reputable whale watching tour companies in the US where you can spot whales with your family:

    whale watch provincetown massacdusetts lighthouse kids cape cod

    Whale book recommendations

    If you want to learn more about whales (either before or after your whale watching adventure), here are some really beautiful and educational books about whales to add to your shelves or check out from your local library. Who knows, maybe these books will help turn your little ones into future marine biologists. 

    Have you ever gone whale watching with your kids?

    Lissy Perna

    About the author

    Lissy lives near the ocean on Cape Cod, Massachusetts with her husband, 2 rambunctious boys (aged 4 & 7), and an ever-growing number of pets. She grew up walking nature trails and finding joy in the beauty of nature. She now shares that love for local adventures with her community through her blog, “Get Outside Cape Cod”. Lissy knows that everyone can benefit from spending more time outdoors, and wants to inspire and support families to do just that!

    You can find more from Lissy in the following online locations:
    Instagram: @getoutsidecapecod
    Website: Get Outside Cape Cod
    Facebook: @getoutsidecapecod