Your cart is currently empty!
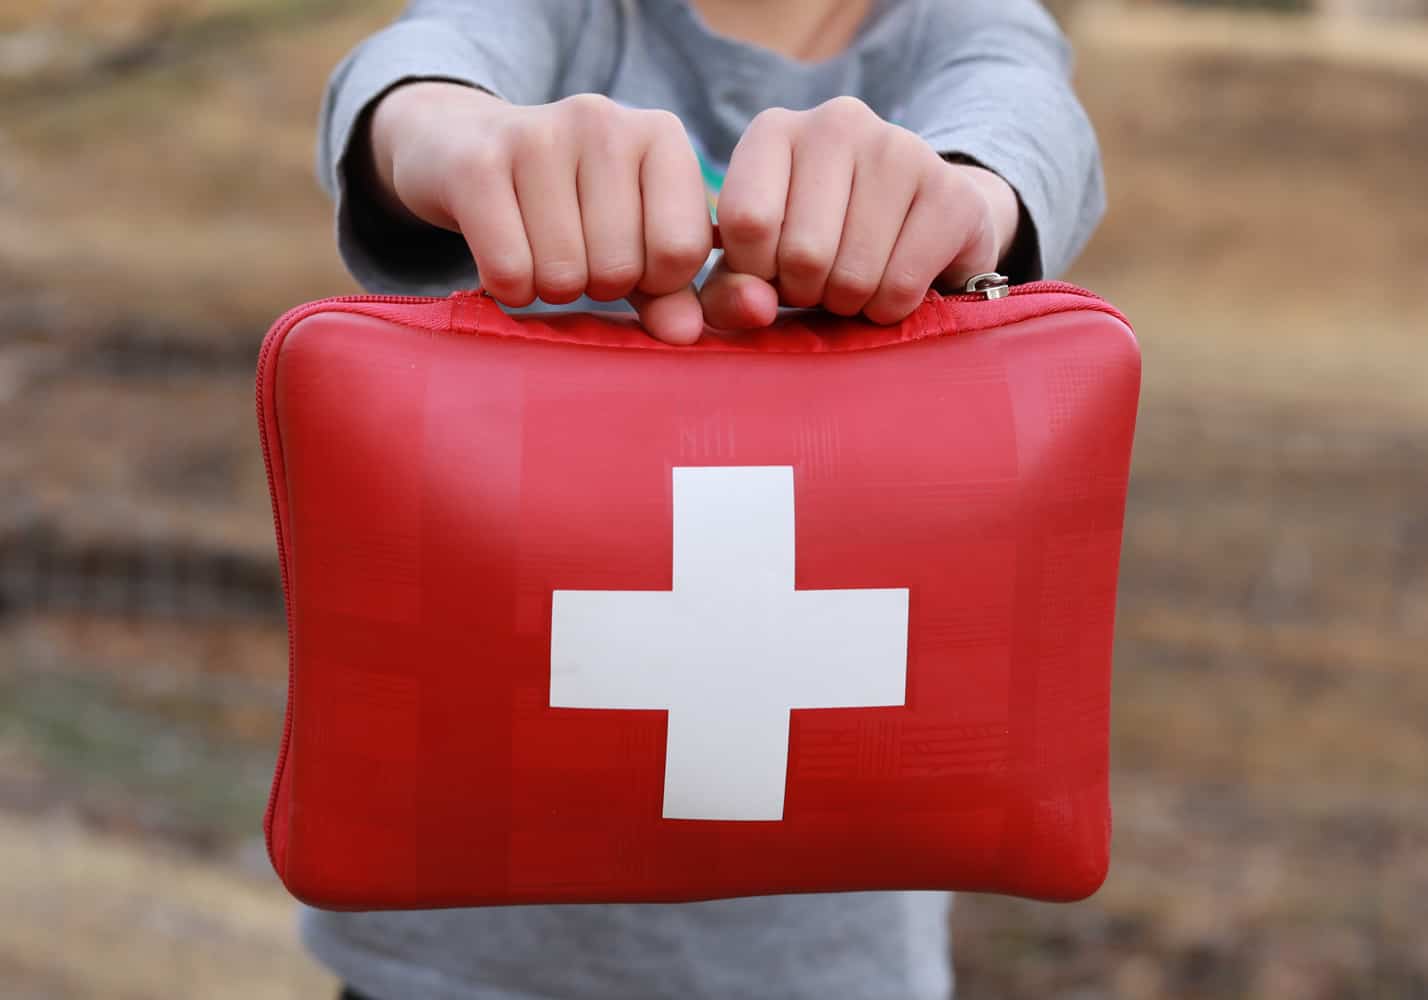
Teaching Basic First Aid to Kids
The more time you spend outside with your kids, the more likely we all are to encounter some sticky situations. Cuts, scrapes, burns, and bruises can happen. Even when we’re being careful. And as kids get older and more independent, they’re more likely to need some basic first aid knowledge and skills. Today, we have Creative Team member, mom of two and nurse, Ashley Greenhalgh here to give you a primer on teaching basic first aid to kids. Take a little time to familiarize yourself with the basics and then go over these practical first aid tips with your child. That way you can both be more confident and capable on your next outdoor adventure!
{This post contains affiliate links}
Teaching basic first aid to kids
Whether we spend a little or a lot of time outside with our children, there comes a point when they will be venturing off on their own. We are trying to raise our kids to be kind, curious, thoughtful, and smart. We want them to make good decisions for themselves. But even when they do, injuries can happen. In that case, we want them to be as prepared as they can be to take care of themselves (and others). Injuries and medical care can be intimidating for many people, but it doesn’t have to be. With a little knowledge, preparation, and forethought, you can prepare your kids to handle the basics of first aid.
This article is designed to help your children help themselves. Whether that’s in an emergency scenario or an everyday situation where basic first aid is necessary. Teaching first aid to children is something that will make you and your children more safe and confident in the outdoors.
Outdoor injuries happen…
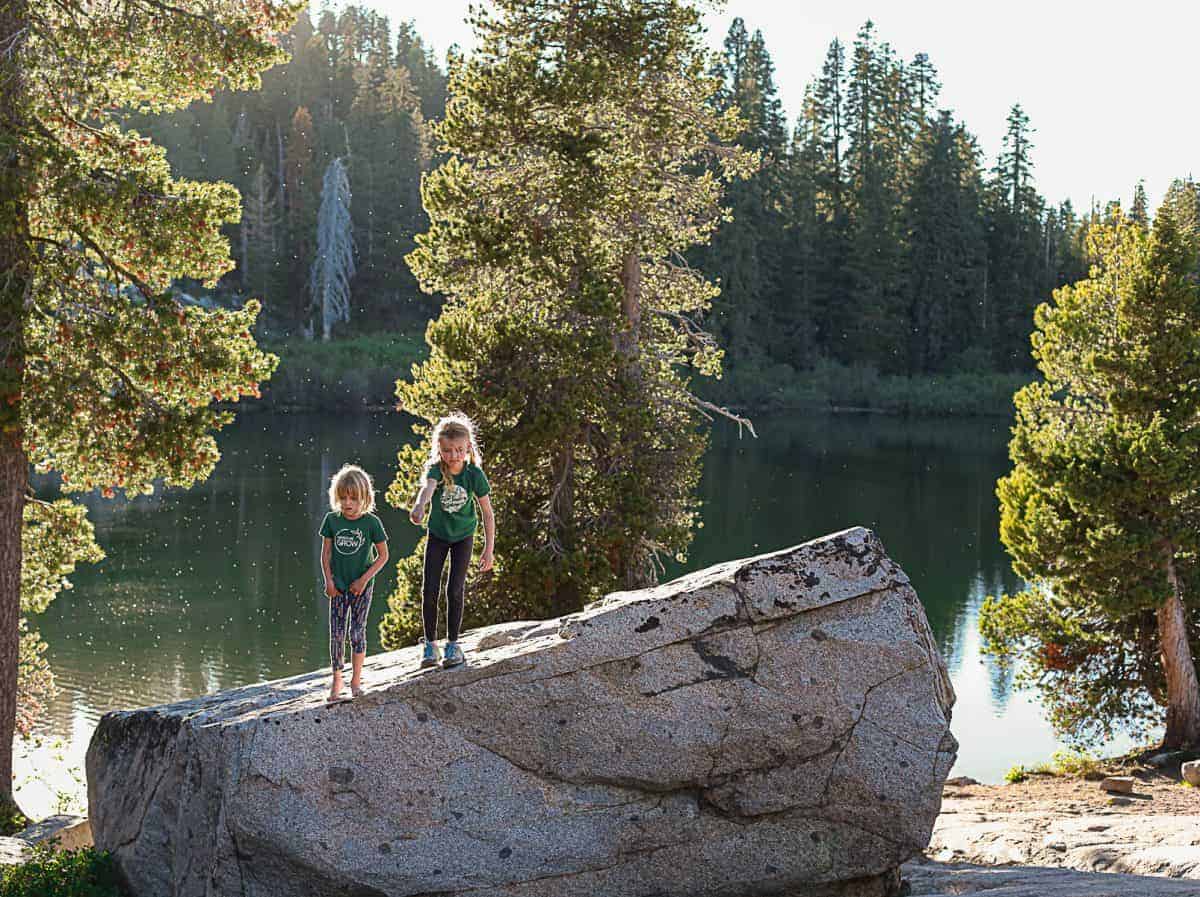
While enjoying an outdoor adventure, there are inherent risks. Kids playing outside are running, jumping, climbing, roasting marshmallows over a fire, crossing a river, riding bikes, and countless other amazing activities. These things foster creativity, independence, self-esteem as well as mental and physical health. Nothing comes more naturally to children than play. And we want nothing more than for them to enjoy these activities with full abandon! Yet, injuries do happen.
When a child gets an injury while outside, usually, someone runs for an adult. But, wouldn’t it be amazing if your kids could properly care for their own minor injuries when there isn’t a knowledgeable adult nearby? Wouldn’t that give you more peace of mind and give your child more independence?
This article will assist you in teaching your child some basic first aid. We’ll cover (1) how to treat minor injuries, (2) what skills to use, (3) kid-friendly first aid supplies, and (4) other helpful first aid tips.
…so, don’t panic
First things first. If you can only teach your child ONE thing, it should be to stay calm in an emergency. When panic sets in, many times multiple people will be injured instead of just one. Things can go from bad to much worse if you panic. Injuries can be scary, so staying calm is easier said than done. But, with a little advanced preparation and knowledge, it’s much easier to keep your cool.
In any situation, the first and most important thing to do is to assess the situation. When something scary happens, one way to slow down panic is to count backward in your head before acting. “Three, two, one… ACT.” This allows just enough time for your brain to assess what needs to be done and cut down on mistakes. Also, practicing deep breathing (big breath in through your nose, out through your mouth) can have a calming effect on our bodies.
Roleplay with your kids to prepare
One of the best ways to teach children first aid is through scenarios and role play. Be aware that scenarios involving mom or dad getting hurt can cause anxiety in children; so try to keep it light-hearted and not super scary. Explain the situation and ask your child what to do first. Always remind them to take some time to fully assess the situation and think about it before acting or blurting out an action plan. This will remind your child to stop the panic and think.
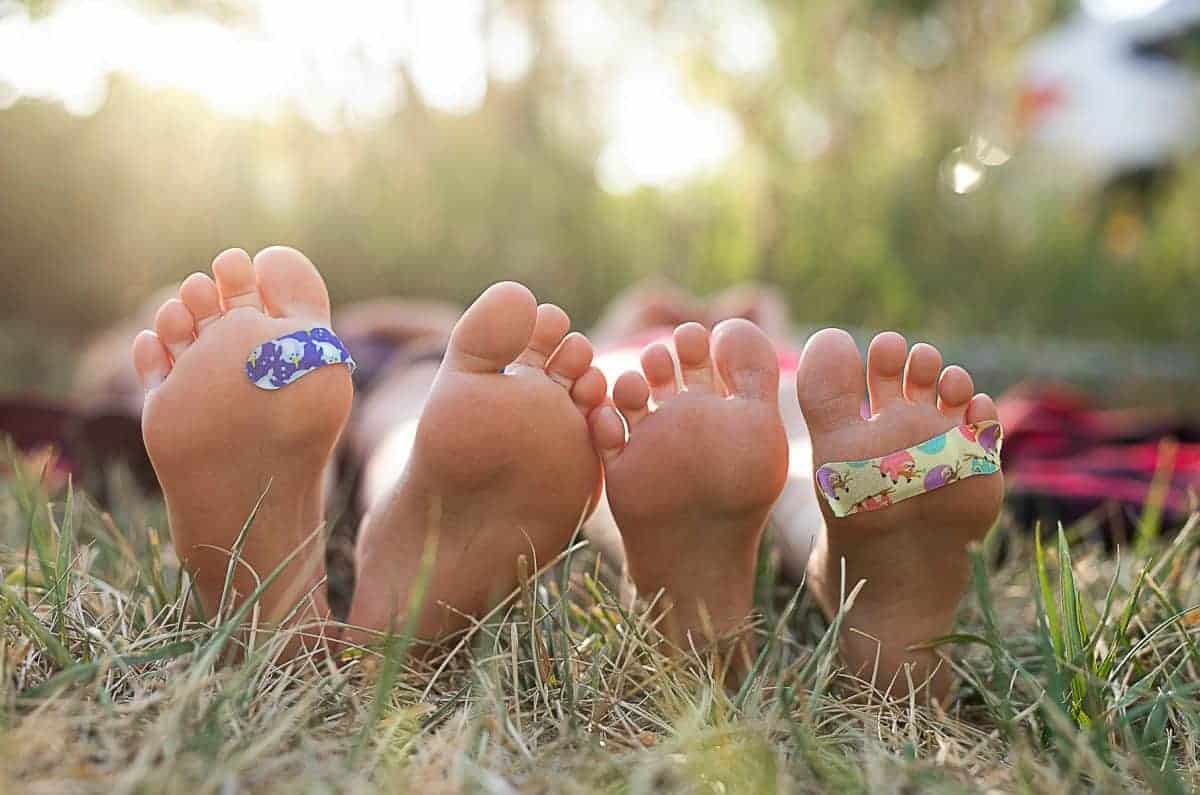
Teaching kids to care for scrapes and cuts
While jumping on rocks, climbing trees, or making marshmallow sticks; scrapes and cuts are some of the most common injuries of children. Most of these will be minor and washing with soap and water and keeping it clean will aid in healing.
Simple steps for taking care of a cut:
- Stay calm and assess the situation.
- If there is major bleeding, immediately call for help and apply pressure to the area to stop the bleeding.
- If the injury is not major, apply pressure (usually just a few minutes) to stop bleeding and allow the body to form a clot.
- Clean the area with soap and water if available, if not wipe with an alcohol wipe or iodine swab and let dry.
- Apply an antibiotic ointment.
- Apply a clean bandage or piece of gauze (secure with tape or Tegaderm), as needed.
If there is a laceration that is deep and won’t stop bleeding after applying pressure, a SteriStrip may be necessary. A SteriStrip can be used in place of stitches in a pinch. Say your child fell and hit her head on a rock and now has a two-inch long gash that is 2cm deep and looks like it will need stitches. Now imagine you’re three hours from an urgent care or ER. A SteriStrip will do wonders until you can seek proper medical attention.
Steps to apply a SteriStrip:
- As previously stated, apply pressure to get the bleeding to stop or slow enough to apply the bandage.
- Clean the area as much as possible with soap and water and/or sterile gauze.
- Open the SteriStrip and measure the length of the cut and cut the appropriate number of strips that match the wound length.
- Remove the backing from one side of the SteriStrip and apply the adhesive to one side of the cut.
- When the adhesive has attached to the skin, pull the other side of the Steristrips across the laceration (this will close the wound)
- Remove the backing and press to adhere the other side to the skin.
We recommend keeping SteriStrips in your first aid kit and practice using them (and let the kids practice) before you ever need to use them in real life.
How to treat minor burns
What is camping without a fire? We all love sitting around a campfire, telling stories and roasting marshmallows! These nostalgic moments can be cut short if someone touches a burning stick or spills a hot meal or drink on themselves. A burn is essentially your flesh cooking, and it is very painful. To stop the pain, you must stop the cooking.
Your first instinct may be to run to the nearest ice-cold stream and place the affected body part in the water. However, you can actually do more harm that way. Very cold water can constrict the bloodflow and cause damage to the surrounding tissues.
If you or your child gets a small burn, apply a clean, cool (but not ice cold) wet towel or sheet to the affected area to cool it down and keep it clean. Do not apply a tight dressing over a burn, as it can attach to the flesh and peel away tissue upon removal.
Clear away any hanging or dead tissue with clean scissors or nail clippers. Then, apply an antibiotic ointment, and a clean dry bandage or gauze. This only applies to small burns. For larger and more serious burns, you need to seek medical attention right away.
Burn prevention
Prevention of burns is something worthwhile to teach children. Some burn prevention basics are:
- “Stop, drop, and roll” if their clothes catch on fire.
- When pouring hot liquids, set the cup or bowl on a hard, stable surface to reduce the risk of tipping the liquid over.
- Emphasis walking around fires and stoves, no running or jumping close to a fire.
- Never touch items used for cooking without a potholder (they could be hot).
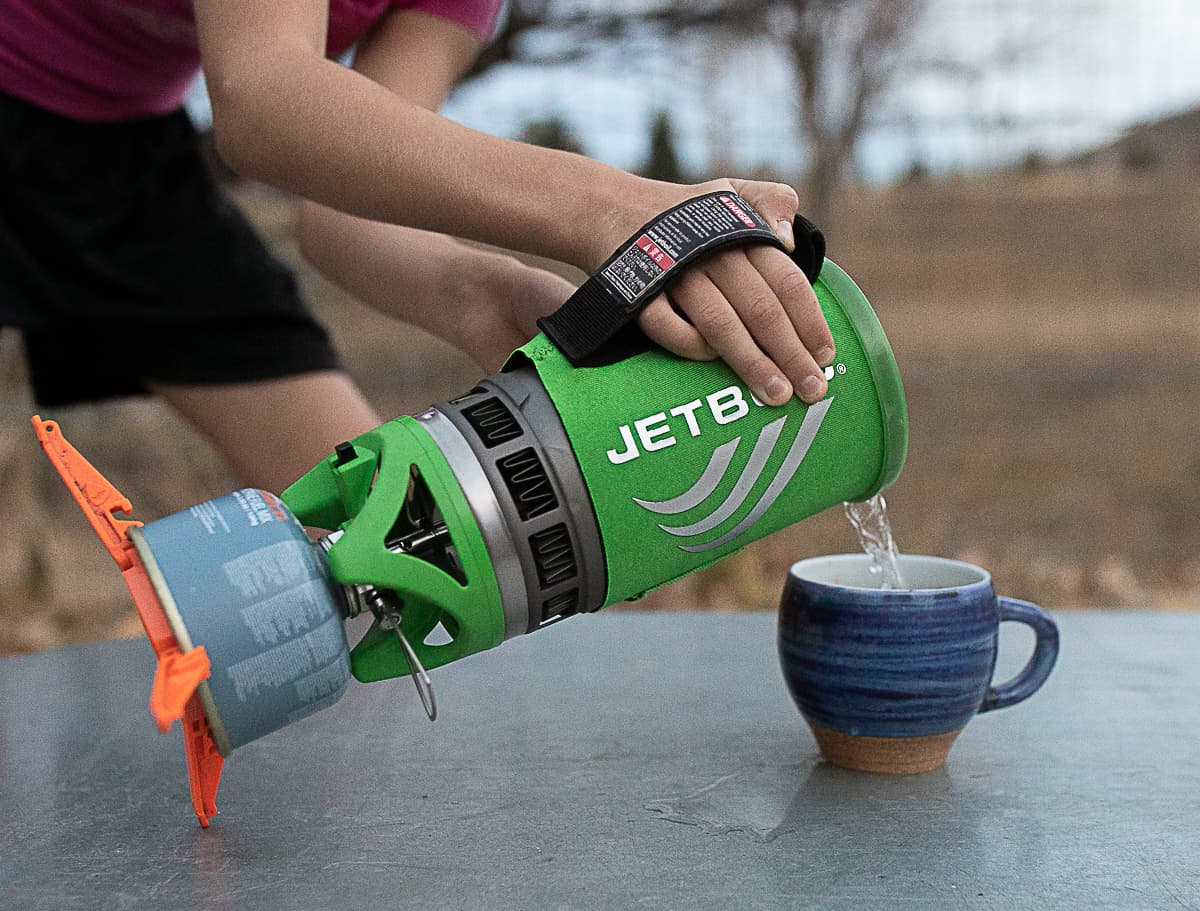
Also, be aware of basic (and sometimes innocuous looking items) that can cause burns. If you’ve used a JetBoil (amazing and so convenient when camping!), you know how benign this piece of equipment can look. It’s small, quiet, and the flame is tiny. However, there are metal elements that heat quickly and can cause burns. We love our JetBoil, but it can be very dangerous for little ones.
Be aware and cautious about any item that gets hot or is used in cooking. If you get new camping cooking equipment, be sure to test it out and know how it works before letting your kids try it. It is so fun to learn about a new piece of equipment together – review the dangers and read the instructions.
How to handle a twisted ankle
Unfortunately, twisted ankles (ligaments stretching or tearing) are a common injury for children and adults. Running, jumping, climbing, hiking, skiing, snowshoeing, you name it…all put you at an elevated risk for a sprained ankle. Getting your children into the habit of wearing stable footwear while enjoying outdoor activities is the best way to prevent such injuries.
However, if you or your child gets injured, these steps can help them get to medical care safely.
First, have them sit in a safe place and take off their shoes and socks. This allows you to look at both feet and ankles together – for comparison. The injured ankle may be bruised or swollen, and painful.
Check for a broken bone. If there is an obvious deformity that would likely indicate a broken bone, you’ll need to call for help to have the injured person evacuated or taken to a medical facility for care. Keep the injury resting with no pressure put on it.
If there is not an obvious broken bone, apply ice or a cold pack for 20 minutes. This can help with swelling and pain. Another option would be to place the foot and ankle in a cold stream or lake – the cold water will do the same thing.
Next, elevate the affected area. If you’re sitting on the ground, rest the sprained foot up on a backpack, for example. This will also help reduce swelling.
After a period of rest, the next step is to assess the range of motion. Move the foot up and down, and side to side. If there is minimal pain and swelling, and if the person can move the ankle through the full range of motion, likely the injury can be treated in the field with athletic tape and you can head back to your home or vehicle to continue resting. Or if you have a SamSplint (more on this near the end of the article), you can use that.
How to tape up a twisted ankle
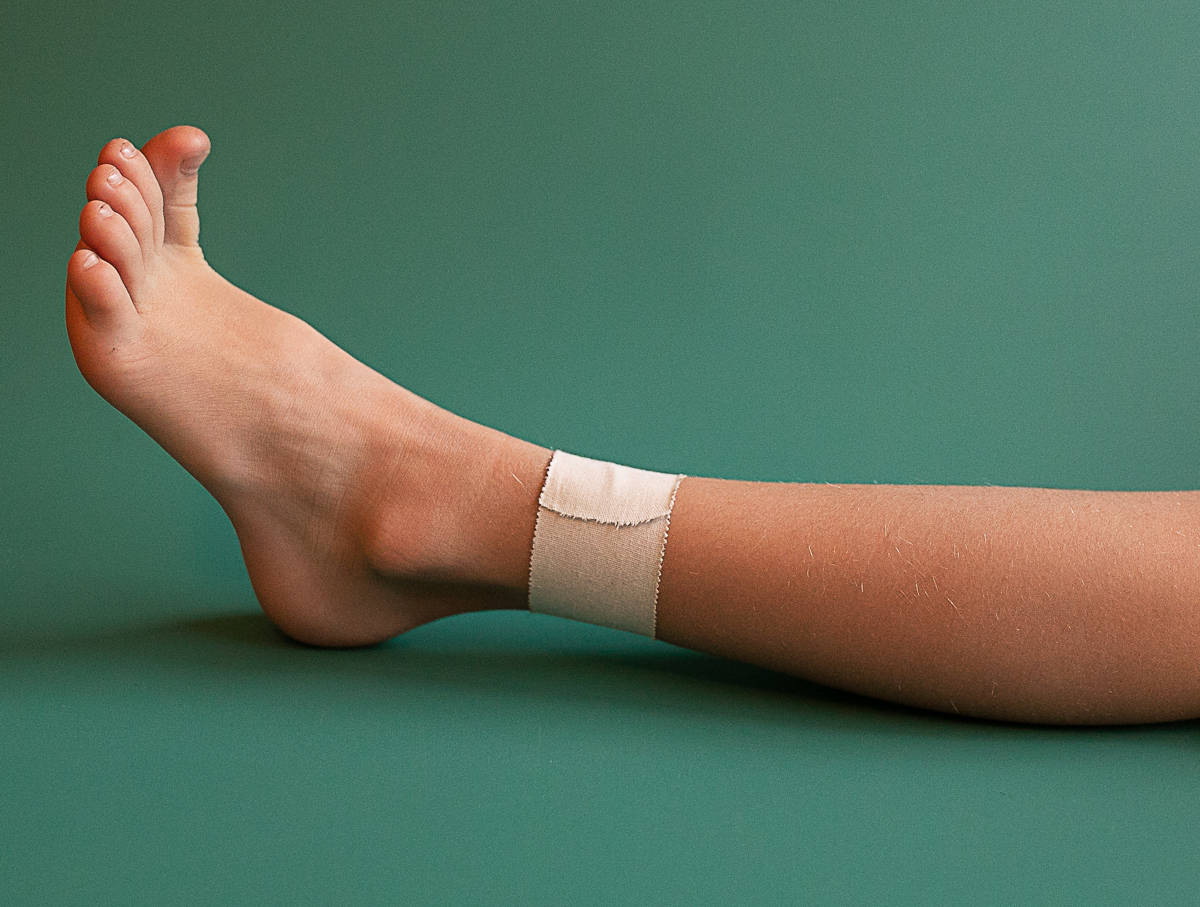
Step 1: To tape an unstable ankle, first, wrap a piece of tape completely around the leg about two inches above the ankle bone. This is called the landmark tape.
Step 2: Apply three additional pieces of tape in a U-shape (like a stirrup) to support the foot. Start at the landmark tape, then pull the tape below the foot and up the other side. Cut the tape and repeat twice, overlapping the tape.
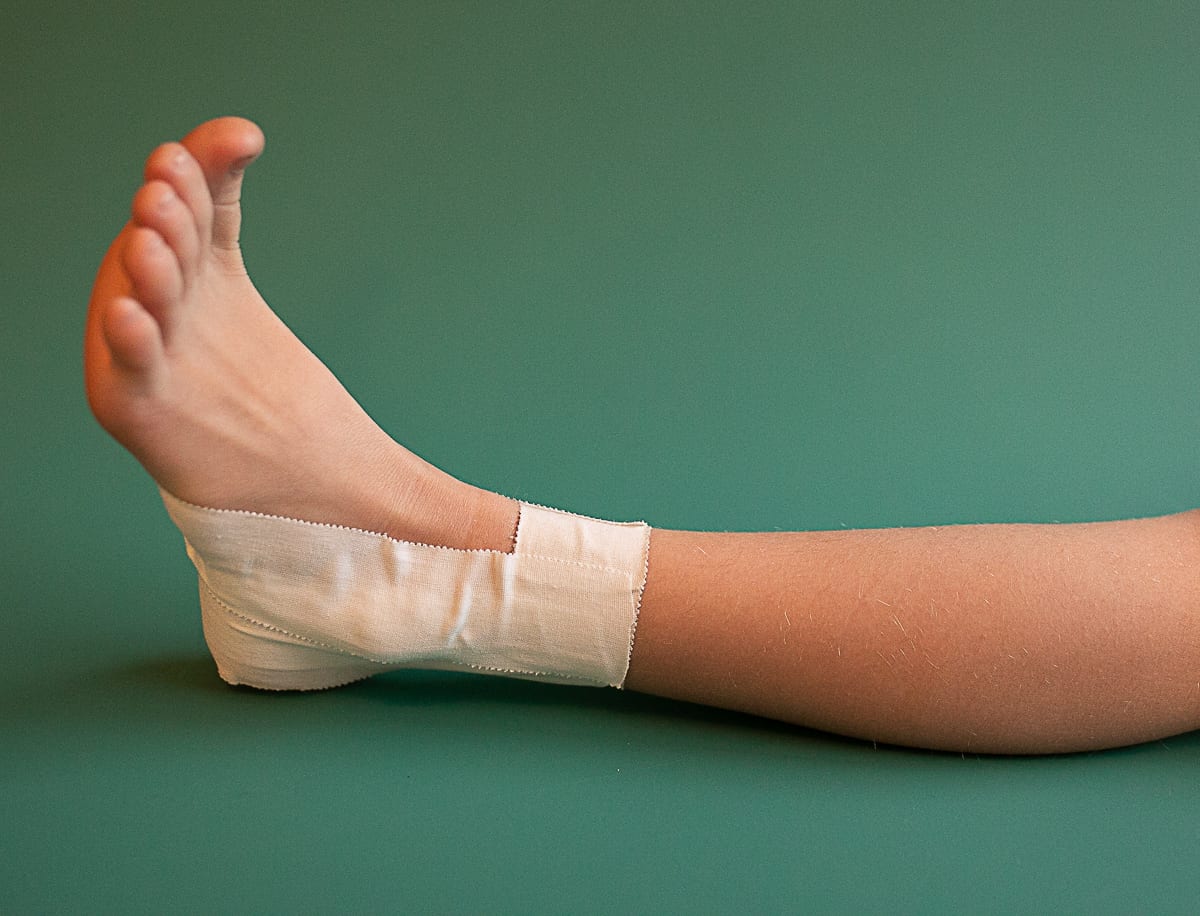
Step 3: Apply three additional strips of tape in a J-shape for additional stability. Again, start at the landmark tape on the uninjured side of the leg, pull the tape down below the foot, over the top of the foot and secure back where you started the J-shape. Repeat this two more times, overlapping the tape.
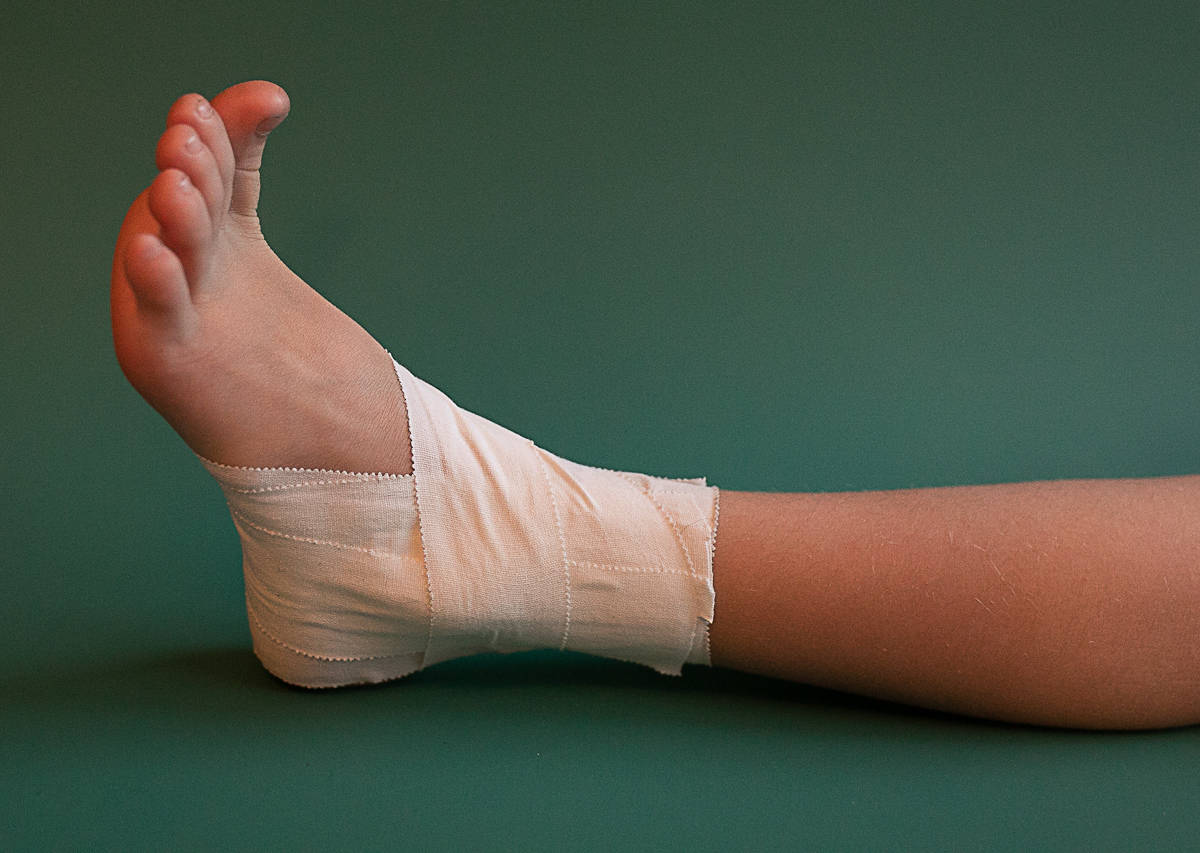
Step 4: Apply athletic tape in a figure-eight. Start where the J-shape begins. Pull the tape below the foot, up the opposite side of the foot, over the top and around the back of the ankle, then over the top again and attach. Repeat this two additional times, overlapping the tape. Ensure that the injured person’s toes are pink, can wiggle, and they can feel them. This is known as “CMS” – circulation, motor, sensory.
When comfortable, walk out slowly, and seek additional medical treatment if needed. If the foot is not too swollen, the shoe can be worn for the walk out.
Again, this is an activity you can practice at home (while safe and calm) before ever having to use these skills out in a real-life situation. Practicing taping an ankle will give your kids confidence to know exactly what to do in case the situation ever arises.

How to treat a bloody nose
More than likely, either you or your child has experienced a bloody nose at some point. You’ve probably heard many different tactics on how to stop a bloody nose. The problem is, many of the previous recommendations (tilting your head back, for example) can result in swallowing blood. This can result in your child throwing up. Our bodies do not like blood in our stomachs, and as a result, it will force itself to expel the blood.
The better and easiest way to stop a bloody nose is to sit down, lean your head slightly forward, and pinch your nose just below the bridge (where you can feel the bony area stop and the cartilage (the soft tissue that forms your nostrils). Continue to apply pressure for about 5 minutes until the bleeding stops. Many times, this is enough time for a clot to form. Try not to be alarmed when you attempt to remove the tissue and a large clot pulls away from the nostril. This is normal. If the bloody nose cannot be stopped after trying this technique, please seek medical attention.
First aid kit for kids
Teaching kids first aid tips and techniques is one thing. If you want your children to feel not only cool but also confident in their first aid abilities, let them take some basic first aid supplies along with them on their adventures. We have put together first aid kits for our girls and they love being able to help others or themselves when someone has an injury. This list of items can easily fit into a daypack and can treat most minor injuries.
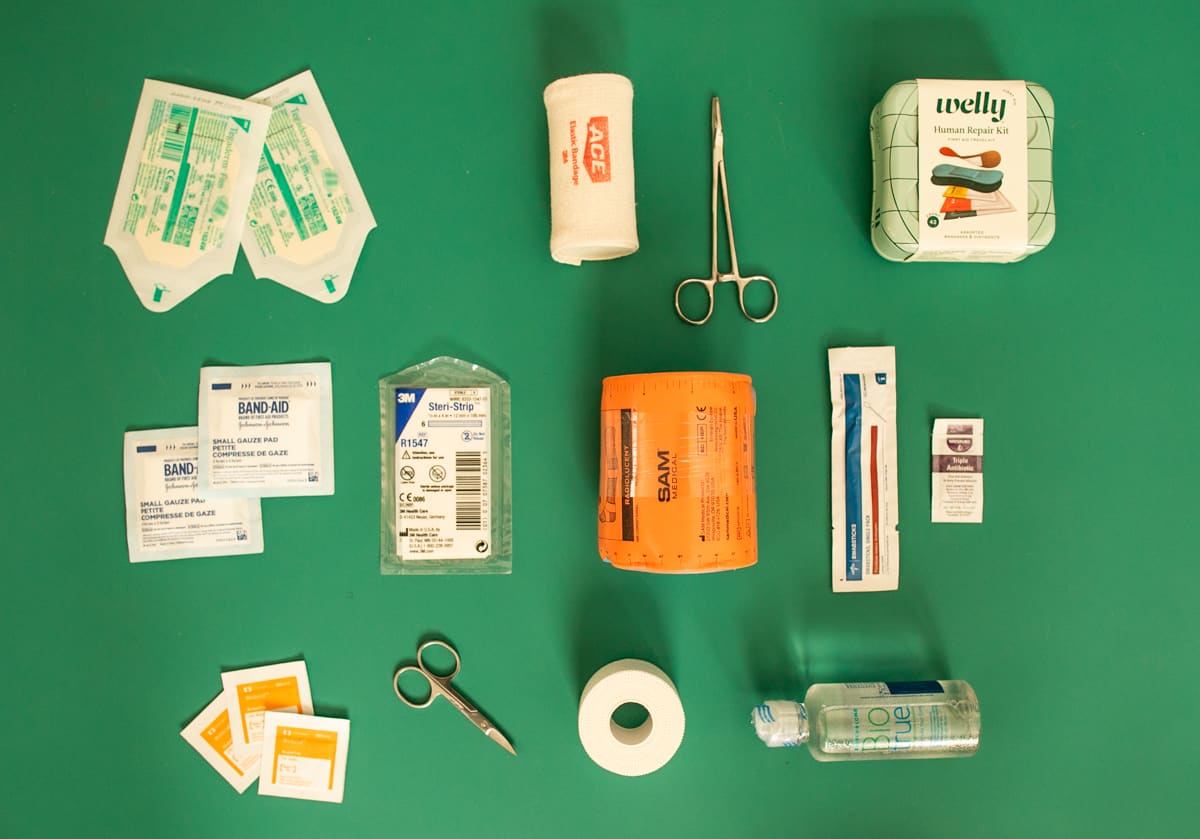
Make your own first aid kit for kids
Tegaderm – Tegaderm bandages are incredibly useful if you have an injury in an area that may get wet. They are clear and gentle on the skin, and also water-resistant! Say you have a cut and have cleaned it well, but will be out camping for a couple more days. If you put a Tegaderm bandage over clean gauze for a cut, it will stay on, keep moisture out of the area, and you can see any redness (a sign of infection) through the bandage. After a few days, you can gently peel the Tegaderm off in the shower. I’ve used these extensively throughout my career as a nurse, and I cannot recommend these enough.
Ace bandage – As mentioned above, Ace bandages would be applied over a splint or large bandage to reduce mobility and can provide some compression.
Multipurpose tool – A good multipurpose tool provides tweezers, a knife, and small scissors all in one compact tool. These are great for removing splinters and hang nails, and cutting gauze or athletic tape.
Welly Kits – We love the Welly Kits. The adorable metal container includes first aid basics such as bandages for small cuts, antibiotic cream, hand sanitizer, and hydrocortisone cream. I start with these kits and leave a few of those items in the container, then add a few more items to it to make it even more functional. The container keeps everything secure and dry when in a larger kit or backpack.
Burn bandages – These handy bandages are great for protecting a scalding burn.
Gauze – It’s definitely worth carrying some gauze with you when adventuring outside. Usually, gauze is individually wrapped (to keep sterile), great for cleaning wounds and applying to cuts/ abrasions on top of antibiotic ointment. You can then apply a Tegaderm directly on top of the gauze to keep it in place or apply another type of bandage.
SteriStrips – As previously stated, SteriStrips are great alternative to stitches when you’re away from medical help. Apply pressure to the cut to get the bleeding to stop. Clean the area as much as possible with soap and water and/or sterile gauze. Open the SteriStrips, measure the length of the cut and cut the appropriate number of strips that match the wound length. Remove the backing from one side of the SteriStrips and apply the adhesive to one side of the cut. When the adhesive has attached to the skin, pull the other side of the SteriStrips across the laceration to close the wound. Remove the backing and press to adhere the other side to the skin.
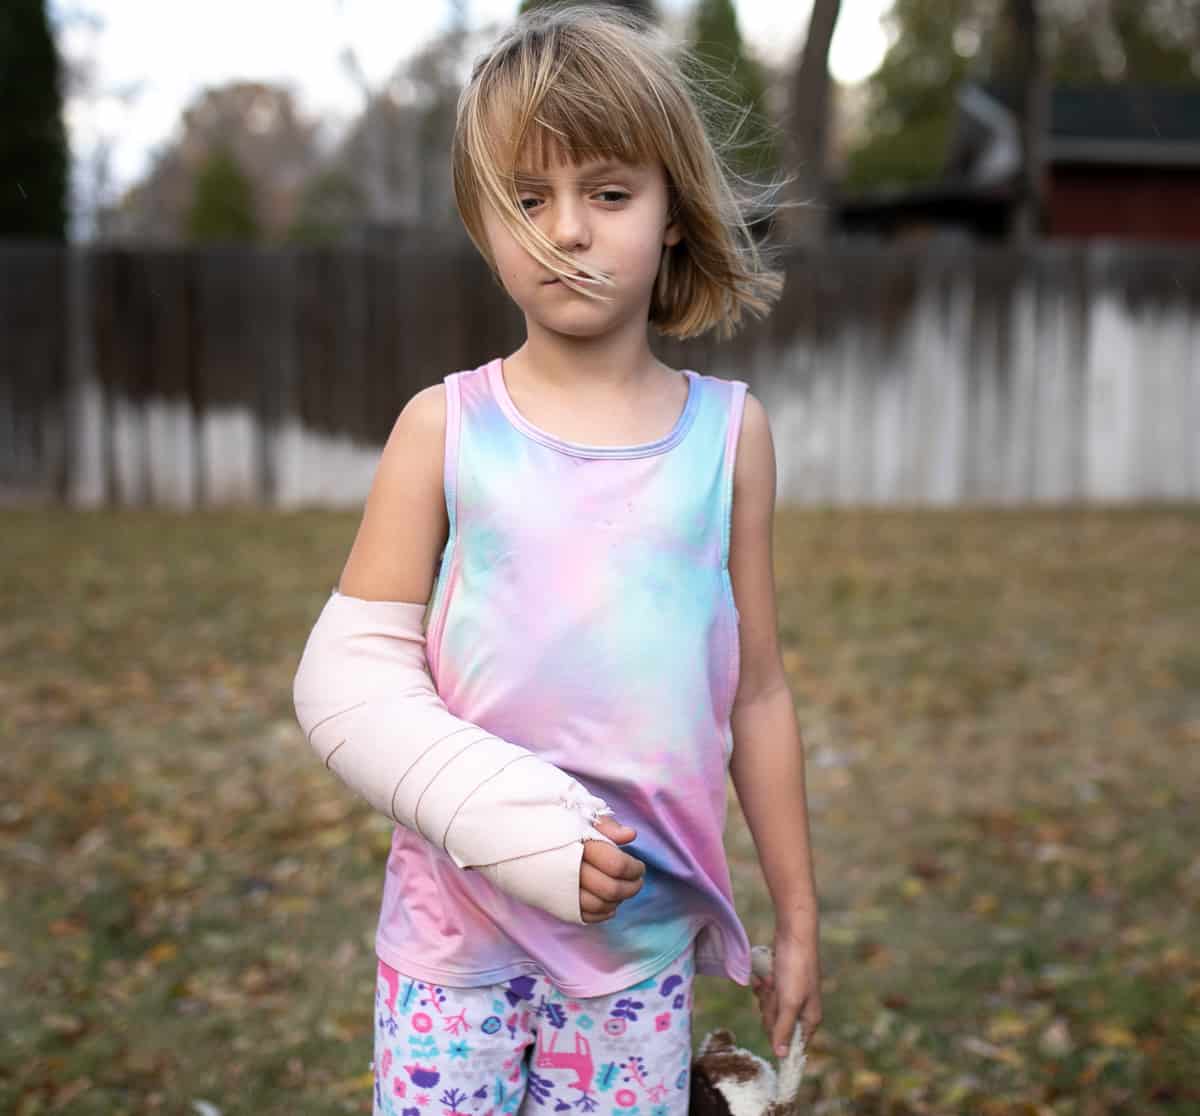
SamSplint – I learned about the SamSplint a few years ago when I earned my Advanced Wilderness Life Support certification. These things are amazing! You can splint an arm, ankle, wrist, etc. so quickly! They even have instructions printed right on the front! Use the SamSplint, then apply an Ace Bandage to keep the splint in place while you evacuate the area and get to professional medical care. When splinting a bone, remember the anatomical position. For example, our youngest broke her radius and ulna a few weeks ago after a fall. The correct way to splint the area was to have her bend her elbow, then support the broken bones from beneath. This not only provides a degree of pain relief, but aids in appropriate healing.
Alcohol wipes or Iodine swabs – Both are a great option for cleaning injuries. You will want to choose alcohol wipes if you have an iodine allergy, or vice versa. In a pinch, smelling an alcohol wipe can also decrease nausea. Make sure to remove any debris from the injury with clean hands or a tweezer. Then wipe the area with either an alcohol wipe or Iodine swab. Let the area dry, then apply the appropriate bandage or dressing.
Antibiotic ointment – After cleaning a cut, abrasion, small burn, or other minor injury, apply antibiotic ointment directly to the CLEAN DRESSING (bandage, gauze, etc.). DO NOT apply directly to the skin, as you can contaminate the entire tube of ointment if you touch the container to the skin. Antibiotic ointment will help kill any germs that are present on the skin.
Athletic tape – This can be used to secure a bandage or dressing, to splint a sprained ankle, or fix that hole in your tent! Talk about multipurpose!
Contact solution – A few weeks ago, we were playing down by a river with some friends and one of the kiddos, unfortunately, got sand in her eye. If you’ve ever had a corneal abrasion, you know how painful it can be! Luckily we had some contact solution on hand and we squeezed it into the girl’s eye and were able to remove the sand before it did any major damage. A travel-sized container of contact solution works well. I’ll always carry one in my first aid kit now.
First Aid Guide – Last but definitely not least, is a First Aid Guide. It’s a great addition to any outdoor adventure to assist with any first aid you or your children may need. Adrenaline can sometimes get in the way of logic, so a book for reference is a great item to have on hand. This one is not only lightweight but waterproof!
First aid lessons for kids
Teaching first aid basics to kids is a great step in raising strong, capable, confident, and helpful children. I hope this article was informative and will help you (and your child) feel more prepared for your next outing! Educating your child about outdoor safety, injury prevention and treatment is so important. Plus, having a first aid kit equipped with the right supplies can make or break a trip. I wish you all happy and safe trails. And if you or your child are injured, I hope you now feel more confident to handle it!
Take care, Ashley (RN)

About the author
Ashley is an RN certified in Advanced Wilderness Life Support, Advanced Cardiac Life Support, and Pediatric Advanced Life Support. She’s a nature-loving mother of two who is passionate about outdoor education for parents and their children. Ashley grew up in Alaska, where her family spent most of their time outdoors fishing, camping, skiing, and hiking. She currently lives with her husband and children near the Sierra Nevada Mountains and Lake Tahoe, where they can be found outdoors year-round; hiking, backpacking, biking, skiing, and camping. She is also very passionate about photography and owns a small photography business.
You can find more from Ashley in the following online locations:
Instagram: @sage.and.summit
Website: Sage & Summit Photography
RWMC posts: Ashley Greenhalgh
ashley greenhalgh education First Aid first aid for kids first aid kit getting kids outdoors hiking tips safety Teaching teaching first aid
Comments
19 responses to “Teaching Basic First Aid to Kids”
We need to acknowledged with the first aid and what our next step for a help provided to a friend, colleague. This is fantastic you’ve been exploring some tips for the first aid. Even If I’m writing my assignment for my teacher but I decided to pay attention on the information provided above. Thank you!
Came here for this after hearing you on the podcast, thank you so much for this post and the product recommendations! I’ll definitely be having this talk with my kiddos now.
[…] Basic First Aid […]
[…] kids for this unpredictability. Kids are curious little beings and, they can get injured anytime. Teaching first aid will equip them for complex […]
[…] Teaching Basic First Aid to KidsBy Run Wild My Child‘Take a little time to familiarize yourself with the basics and then go over these practical first aid tips with your child. That way you can both be more confident and capable on your next outdoor adventure!’ LINK […]
[…] How to Teach Basic First Aid to Kids: RunWildMyChild.com/teaching-first-aid […]
[…] How to Teach Basic First Aid to Kids: RunWildMyChild.com/teaching-first-aid […]
[…] Hướng dẫn trẻ cách sơ cứu cơ bản: RunWildMyChild.com/teaching-first-aid […]
[…] Source 2 […]
Great information. I am a paramedic and have to teach a 30-minute lecture to a group of 5th and 6th grade girls at our church Pioneer Girls club. Was looking for some basics to get me started. This is perfect. Thanks!
[…] Accidents happen, so pack a small First-Aid kit with bandages, Neosporin, and alcohol swabs. Baby wipes are also good to have handy, especially when sand or sunscreen gets in someone’s eyes or face. They make it much easier to help wipe it away. Here’s exactly what should be in your first aid kit for kids. […]
[…] has snacks, a first aid kit, and seasonally appropriate […]
[…] over basic first aid with your kids. Show them where supplies are kept, what is included in a first aid kit, and how to […]
[…] For more information on first aid, check out our full posts on Hiking Safety & First Aid (which includes a list of exactly what should be in your first aid kit) and this post on Teaching First Aid to Kids. […]
[…] Image credit […]
[…] But the kit only helps if people know how to use it. Parents should teach kids about first aid and s… […]
[…] Teaching your child basic first aid and learning first aid for children can be a literal lifesaver should anything happen that requires these skills, from how to deal with allergic reactions to helping a child who is choking or suffering a major bleed. These are things many people wish never to have to deal with. Still, sadly, a lot of people do encounter terrifying situations that require these skills. If you want to be able to help your child in s time of need, basic first aid is essential. […]
[…] always comes first. Teach your kids basic first aid techniques, such as bandaging wounds, handling minor injuries, and knowing emergency numbers. These skills are […]
[…] kids for this unpredictability. Kids are curious little beings and, they can get injured anytime. Teaching first aid will equip them for complex […]
Leave a Reply